Working with measurement tools
General
To measure a temperature, you can use one or more measurement tools, e.g., a spotmeter or a box.
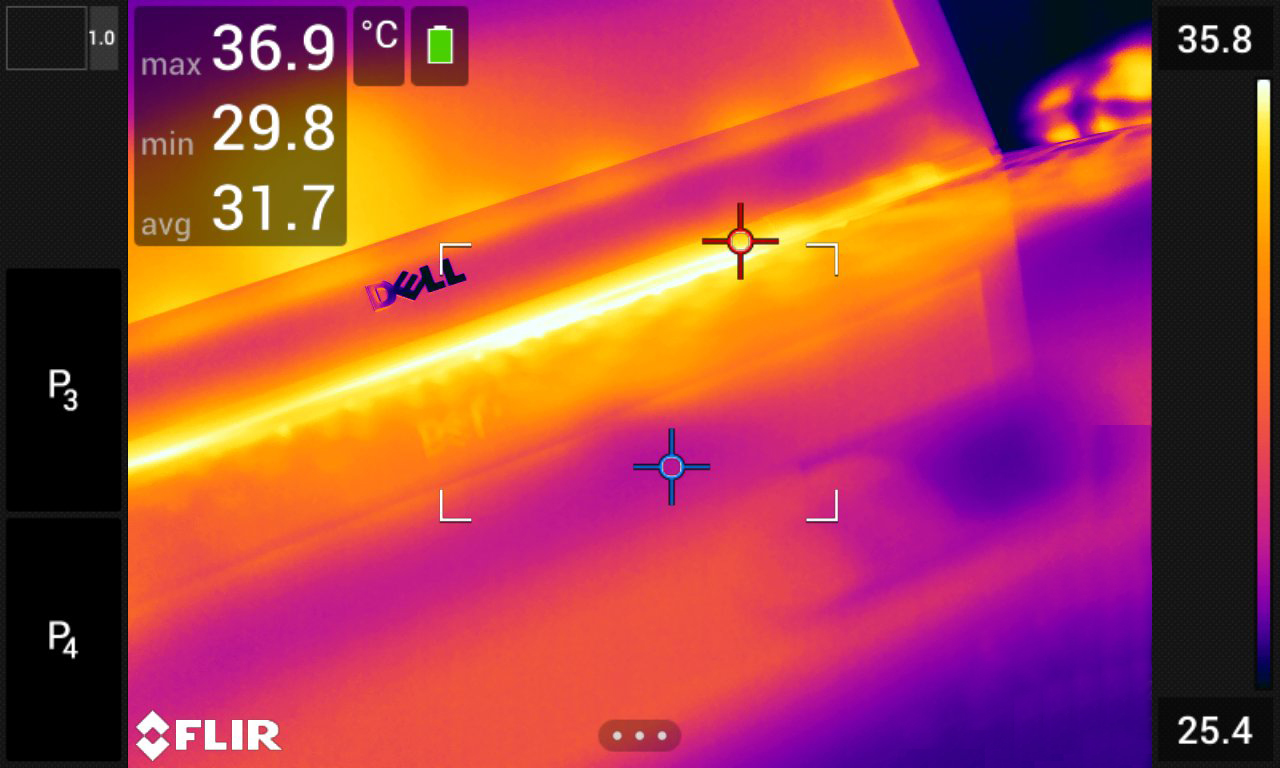
Adding/removing measurement tools
Follow this procedure:
Push the joystick to display the menu system.
Select
 (Measurement) and push the joystick. This displays a submenu.
Use the joystick to select one of the following:
Select
 (No measurements) to remove all tools.
Select
 (Center spot) to add a center spot.
Select
 (Hot spot) to add a hot spot detection within a box area.
Select
 (Cold spot) to add a cold spot detection within a box area.
Select
 (User preset
1) to add user preset 1. (Not available in all camera models.)
(User preset
1) to add user preset 1. (Not available in all camera models.)Select
 (User preset
2) to add user preset 2. (Not available in all camera models.)
(User preset
2) to add user preset 2. (Not available in all camera models.)
Push the joystick to confirm and exit the menu mode.
Editing user presets
A user preset is a measurement tool, or a group of measurement tools, with predefined characteristics.
Follow this procedure:
Push the joystick to display the menu system.
Select
(Measurement) and push the joystick. This displays a submenu.Use the joystick to select
(User preset
1) or (User preset
2).Push and hold the joystick. This displays the Edit user preset menu.
Select
 (Add measurement) and push the joystick. This displays a submenu.
Use the joystick to select one of the following:
Select
(Add spot) to add a spot.Select
 (Add box) to add a box.
Select
 (Add circle) to add a circle.
Select
 (Add line) to add a line.
Select
 (Add delta) to set up a differential calculation.
Push the joystick. This displays the measurement tool on the screen.
Push the joystick. This displays a context menu, where you can select one or more of the following actions (depending on the type of tool):
Remove the tool.
Resize, move, center, and rotate the tool.
Set alarms.
Display maximum, minimum, and average values.
Set local parameters.
When completed, select
 (Done) and push the joystick.
When all measurement tools have been added, select
 (Save as user
preset).
(Save as user
preset).Push the joystick to confirm and exit the menu mode.
Moving and resizing a measurement tool
You can move and resize a measurement tool.
When you select another measurement tool, any changes of position and size of the current tool will be lost. If you wish to keep the position and size settings, use the user preset feature, see section Editing user presets.
Moving a spot
You can also move the spot by touching the screen.
Follow this procedure:
To select the measurement tool, touch the tool on the screen. The tool is now displayed with one or more handles.

Push the joystick—or touch and hold the tool. This displays a context menu.
To move the spot, do the following:
Select
 (Move spot) and push the joystick.
Move the joystick up/down and left/right to move the spot.
To center the spot, select
 Center spot and push the joystick.
When completed, push the joystick and select
(Done).Push the joystick to confirm and exit the menu mode.
Moving and resizing a box, circle, or line tool
You can also move and resize the measurement tool by touching the screen.
Follow this procedure:
To select the measurement tool, touch the tool on the screen. The tool is now displayed with one or more handles.
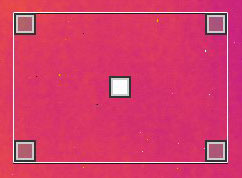
Push the joystick—or touch and hold the tool. This displays a context menu.
Select
 (Move/resize) and push the joystick. This displays a submenu.
Use the joystick to select one of the following:
Select
 (Resize) to change the size of the tool.
Select
(Move) to move the tool.Select (depending on the tool)
 (Center box/circle) to center the box or circle tool or
  Rotate &
center line to rotate and center the line tool.
Rotate &
center line to rotate and center the line tool.
Move the joystick up/down and left/right to resize or move the tool.
When completed, push the joystick and select
(Done).Push the joystick to confirm and exit the menu mode.
Changing the measurement parameters
General
For accurate measurements, it is important to set the measurement parameters.
During normal operation there is typically no need to change the default measurement parameters, see section Recommended values.
Types of parameters
The camera can use these measurement parameters:
External IR window compensation, i.e., the temperature of any protective windows, external lenses (e.g., the close-up lens), etc., that are set up between the camera and the object of interest. If no protective window, protective shield, or external lens is used, this value is irrelevant and should be left inactive.
Object distance, i.e., the distance between the camera and the object of interest.
Atmospheric temperature, i.e., the temperature of the air between the camera and the object of interest.
Relative humidity, i.e., the relative humidity of the air between the camera and the object of interest.
Reflected temperature, which is used when compensating for the radiation from the surroundings reflected by the object into the camera. This property of the object is called “reflectivity.”
Emissivity, i.e., how much radiation an object emits, compared with the radiation of a theoretical reference object at the same temperature (called a “blackbody”). The opposite of emissivity is reflectivity. The emissivity determines how much of the radiation originates from the object as opposed to being reflected by it.
NoteThere is an Emissivity mode setting, which you can use to enter the emissivity by material instead of by value. Select
 (Settings) > Device settings > User interface options > Emissivity mode > Select from materials
table.
(Settings) > Device settings > User interface options > Emissivity mode > Select from materials
table.
Emissivity is the most important measurement parameter to set correctly. If the Emissivity is set to a low value, the Reflected temperature also becomes important. The parameters Object distance, Atmospheric temperature, and Relative humidity are relevant for longer distances. The External IR window compensation must be activated if a protective window or external lens is used.
Recommended values
If you are unsure about the values, the following are recommended:
|
Object distance |
1.0 m (3.3 ft.) |
|
Atmospheric temperature |
20°C (69°F) |
|
Relative humidity |
50% |
|
Reflected temperature |
20°C (69°F) |
|
Emissivity |
0.95 |
Procedure
You can set the measurement parameters globally. You can also change the Emissivity, Reflected temperature, and Object distance parameters locally for a measurement tool.
Local parameters are normally only effective for a fixed setup, where each measurement tool is set for a specific object of interest. For a general handheld application, the global parameters are usually sufficient.
Emissivity and Reflected temperature are the two most important measurement parameters to set correctly in the camera.
Setting global parameters
Follow this procedure:
Push the joystick to display the menu system.
Select
 (Measurement
parameters) and push the joystick. This displays a submenu.
(Measurement
parameters) and push the joystick. This displays a submenu.Use the joystick to select one or more of the global measurement parameters:
 (External IR
window compensation).
(External IR
window compensation). (Object distance).
 (Atmospheric
temperature).
(Atmospheric
temperature). (Relative humidity).
 (Reflected
temperature).
(Reflected
temperature). (Emissivity).
Push the joystick to display a dialog box.
Use the joystick to change the parameter.
Push the joystick to confirm and exit the menu mode.
Changing local parameters
You can change the local parameters for a measurement tool.
A P next to the measurement tool on the screen indicates that local parameters have been activated for the tool.
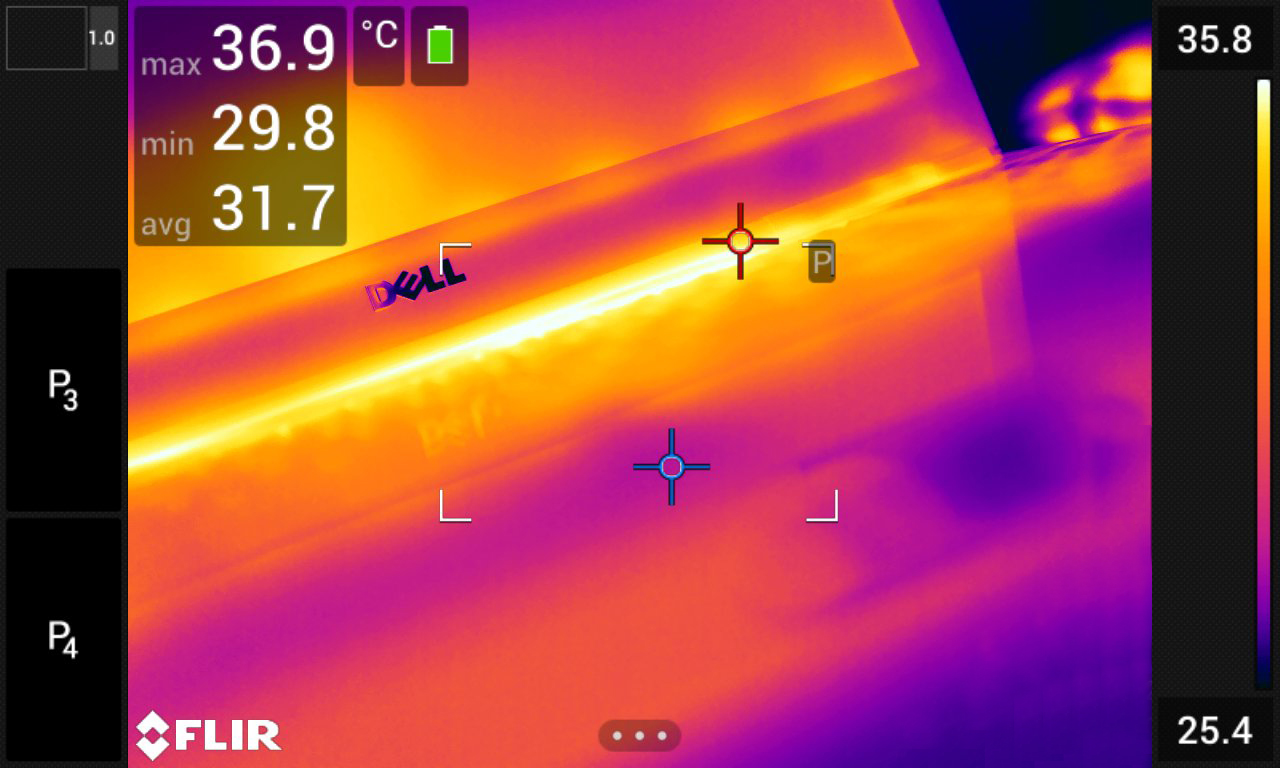
Follow this procedure:
To select the measurement tool, touch the tool on the screen. The tool is now displayed with one or more handles.
Push the joystick—or touch and hold the tool. This displays a context menu.
Select
 (Use local
parameters).
(Use local
parameters).Push the joystick.
 (icon with unfilled indicator) is displayed.
Push the joystick to activate the use of local parameters.
 (icon with filled indicator) is displayed together with a submenu.
Use the joystick to select one or more of the local measurement parameters.
Push the joystick to display a dialog box.
Use the joystick to change the parameter.
Push the joystick. This closes the dialog box.
When completed, push the joystick and select
(Done).Push the joystick to confirm and exit the menu mode.
When you select another measurement tool, the local parameters are reset. If you wish to keep the local parameter settings, use the user preset feature, see section Editing user presets.
Displaying values in the result table
For the box, circle, and line tools, you can set the camera to display the maximum, minimum, and average values in the result table.
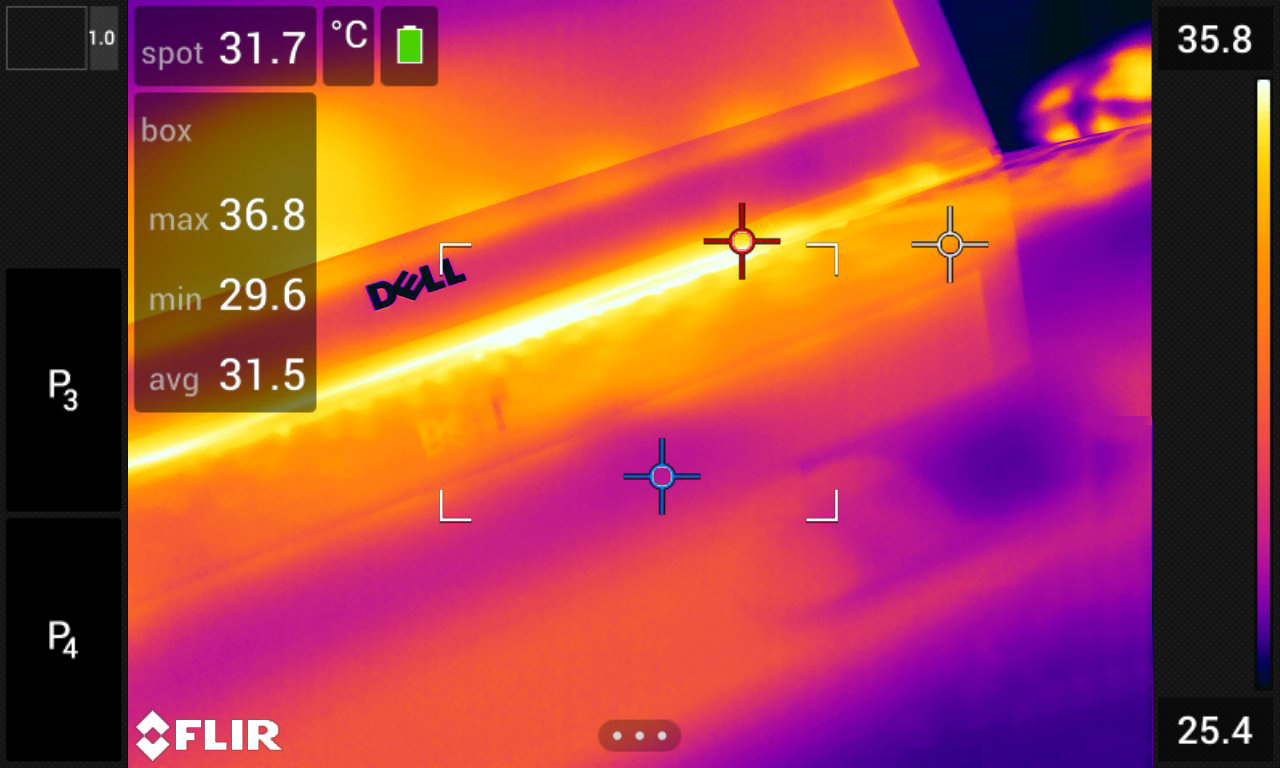
Follow this procedure:
To select the measurement tool, touch the tool on the screen. The tool is now displayed with one or more handles.
Push the joystick—or touch and hold the tool. This displays a context menu.
Use the joystick to select
 (Max/Min/Avg).
Push the joystick. This displays a submenu.
Use the joystick to select one or more of the following:
Select
 (Max) to display the maximum value.
Select
 (Min) to display the minimum value.
Select
 (Avg) to display the average value.
Select
 (Max &
min markers) to display the maximum and minimum markers (the
hot/cold spots).
(Max &
min markers) to display the maximum and minimum markers (the
hot/cold spots).
Push the joystick to toggle the function between inactive and active:
When the icon with the unfilled indicator
 is displayed, the function is inactive.
When the icon with the filled indicator
 is displayed, the function is active.
When completed, move the joystick down to close the submenu.
Select
(Done) and push the joystick.
Displaying a graph
For the line tool, you can set the camera to display a graph.
You can display a graph when previewing an image, when defining user presets, or when editing an image in the archive.
Follow this procedure:
To select the measurement tool, touch the tool on the screen. The tool is now displayed with one or more handles.
Push the joystick—or touch and hold the tool. This displays a context menu.
Use the joystick to select
(Graph/Max/Min/Avg).Push the joystick. This displays a submenu.
Select
 (Graph).
Push the joystick to toggle the function between inactive and active:
When the icon with the unfilled indicator
 is displayed, the function is inactive.
When the icon with the filled indicator
 is displayed, the function is active.
When completed, move the joystick down to close the submenu.
Select
(Done) and push the joystick.
Creating and setting up a difference calculation
A difference calculation gives the difference between the values of two known measurement results.
You can set up a difference calculation when previewing an image, when defining user presets, or when editing an image in the archive.
This procedure assumes that you have previously laid out at least one measurement tool on the screen.
Follow this procedure:
To set up a difference calculation, do the following:
If you are defining user presets, select
(Add measurement) and then select (Add delta).If you are editing an image in the archive, select
(Measurement) and then select (Add delta).
Push the joystick. This displays a dialog box where you can select the measurement tools that you want to use in the difference calculation. You can also select a fixed-temperature reference.
Push the joystick. The result of the difference calculation is now displayed on the screen.
Setting a measurement alarm
General
You can make the camera trigger an alarm when certain measurement conditions are met.
Types of alarm
You can choose between the following alarm types:
Above: Triggers an alarm when the temperature is above the preset alarm temperature.
Below: Triggers an alarm when the temperature is below the preset alarm temperature.
Alarm signals
When an alarm is set, the symbol  is displayed in the result table.
When an alarm is triggered, the value in the result table is displayed
in red (above alarm) or blue (below alarm) and the symbol  (above alarm) or
  (below alarm) is blinking.
You can also set an audible alarm (there will be a “beep” when the alarm is triggered).
Procedure
There are different procedures for setting up an alarm for a spot, for a box, circle, or line, and for a difference calculation.
Setting up an alarm for a spot
Follow this procedure:
To select the spot, touch the tool on the screen. The tool is now displayed with a frame.
Push the joystick—or touch and hold the tool. This displays a context menu.
Select
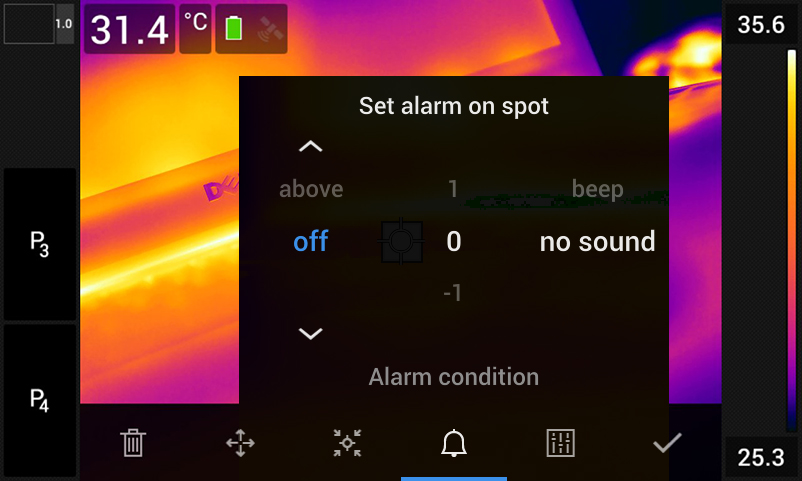
 (Set alarm
on spot) and push the joystick. This displays a dialog box.
(Set alarm
on spot) and push the joystick. This displays a dialog box.In the dialog box, you can define the settings for the alarm.
Alarm condition: The condition that triggers the alarm. Applicable values are Above, Below, or Off.
Alarm limit: The temperature value that will be the critical condition when an alarm is triggered or not.
Alarm sound: Applicable values are Beep or No sound.
Push the joystick. This closes the dialog box.
Setting up an alarm for a box, circle, or line
This procedure assumes that you have previously set the camera to display at least one value (maximum, minimum, or average) in the result table. For more information, see section Displaying values in the result table.
Follow this procedure:
To select the measurement tool, touch the tool on the screen. The tool is now displayed with one or more handles.
Push the joystick—or touch and hold the tool. This displays a context menu.
Select
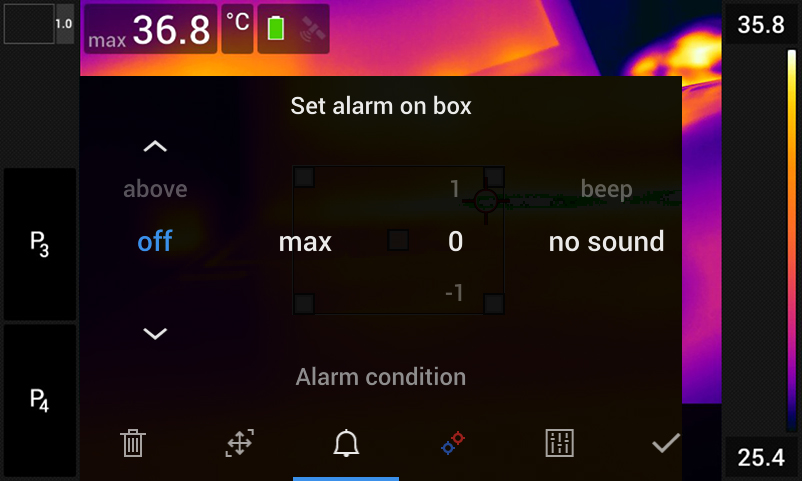
(Set alarm) and push the joystick. This displays a dialog box.In the dialog box, you can define the settings for the alarm.
Alarm condition: The condition that triggers the alarm. Applicable values are Above, Below, or Off.
Select measurement: Applicable settings are the values you have previously defined (Max, Min, and/or Avg).
Alarm limit: The temperature value that will be the critical condition when an alarm is triggered or not.
Alarm sound: Applicable values are Beep or No sound.
Push the joystick. This closes the dialog box.
Setting up an alarm for a difference calculation
You can set up an alarm for a difference calculation when defining user presets, or when editing an image in the archive.
This procedure assumes that you have previously set up a difference calculation.
Follow this procedure:
To set up an alarm for a difference calculation, do the following:
If you are defining user presets, select
(Add measurement).If you are editing an image in the archive, select
(Measurement).
Select
 (Select) and push the joystick. This displays a dialog box.
Select Delta and push the joystick. This displays a context menu.
Select
(Set alarm
on delta) and push the joystick. This displays a dialog box.In the dialog box, you can define the settings for the alarm.
Alarm condition: The condition that triggers the alarm. Applicable values are Above, Below, or Off.
Alarm limit: The temperature value that will be the critical condition when an alarm is triggered or not.
Alarm sound: Applicable values are Beep or No sound.
Push the joystick. This closes the dialog box.