Image editor
This chapter describes the screen elements of the image editor included in the FLIR Thermal Studio application.
General
The FLIR Thermal Studio application includes an embedded image editor where the user can edit thermal images and sequences (videos). To edit an image in a report, either double-click the image or right-click the image and then click Edit.
Navigation
This image shows what the image editor looks like when you have selected an image to edit.
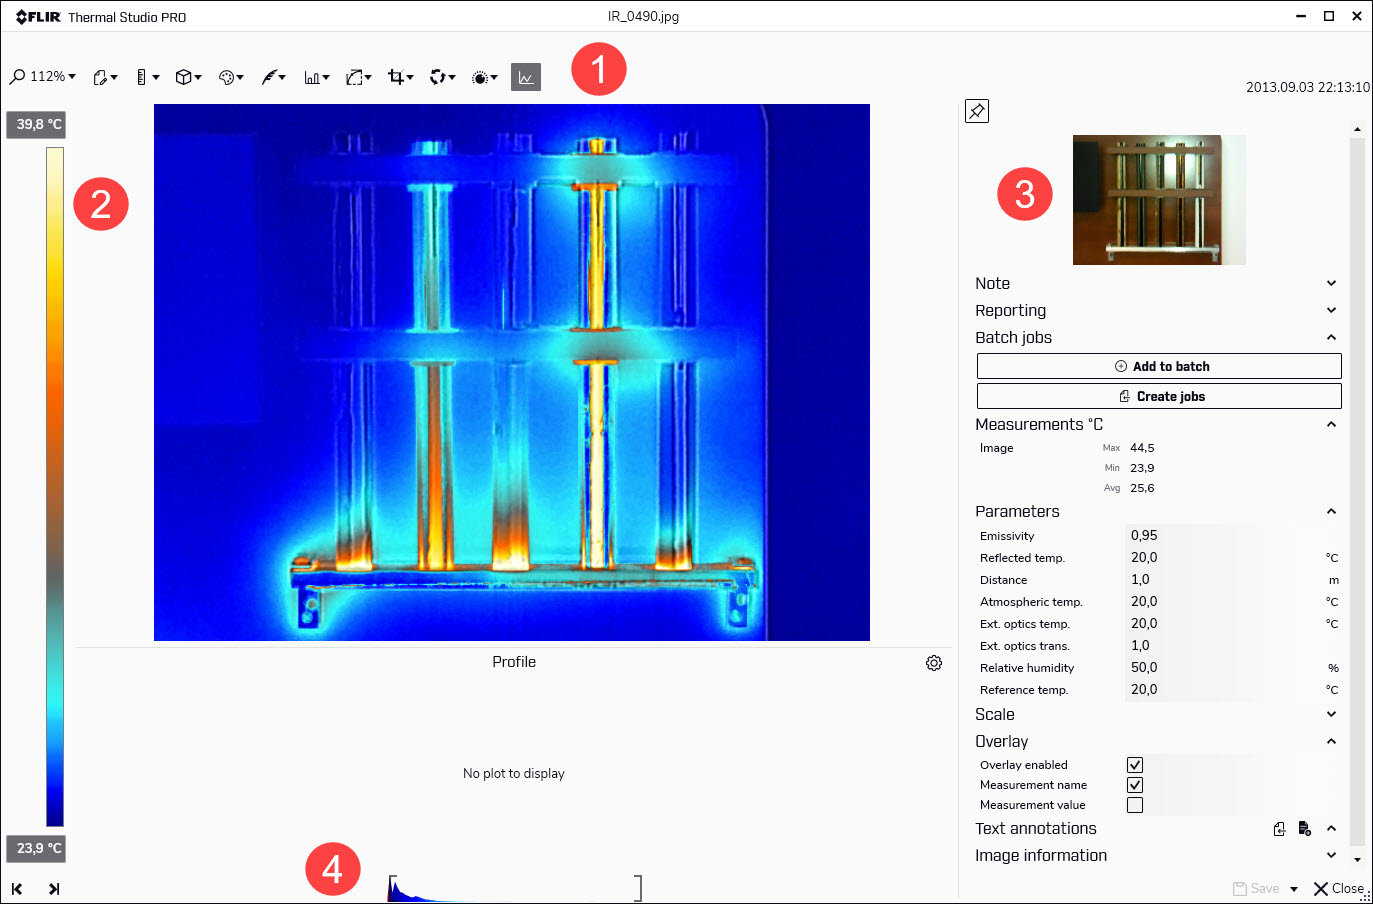
Image editor toolbar
The toolbar includes options such as zooming, adding measurements, changing palettes, and controlling isotherms and the color distribution. For more information on these features, see Edit images manually.
Temperature scale
Properties pane
Temperature span and level control
Temperature span and levels
At the bottom of the infrared image you have two sliders. By dragging these sliders to the left or to the right, you can change the top and bottom levels of the temperature span. If you change the span to temperatures closer to the temperature of the object you are analyzing, it will be easier to analyze any temperature anomalies.
To move the temperature span, click and hold the temperature span and then move it into position.
To change the bottom and top levels of the temperature span, click and drag the left (bottom level) and the right (top level) sliders into position.
Note how the image changes as you move the span or sliders.