Infrared image adjustment
General
An infrared image can be adjusted automatically or manually.
In automatic mode, the camera continuously adjusts the level and span for the best image presentation, using one of the following color distribution methods:
Histogram: The colors are distributed based on the thermal content of the image.
Linear: The colors are distributed evenly from the lowest to the highest temperature.
The color distribution method for the automatic mode is configured
by a setting. Select  (Settings) > Device settings > User interface options > Auto adjustment method.
By using the Auto adjustment region feature it is possible to select an area of the image, and then have the colorization of the image adjusted based on the temperatures within that selected area. For more information, see section Auto adjustment region.
In manual mode, you can adjust the temperature scale to values close to the temperature of a specific object in the image. This mode lets you center on the temperatures around the background of the gas, to make the gas appear more clearly. When measuring temperatures, manual mode will make it possible to detect anomalies and smaller temperature differences in the part of the image of interest. In manual mode, the colors are distributed evenly from the lowest to the highest temperature (linear color distribution).
In manual mode, you can adjust the image by touching the screen or by using the navigation pad. For more information, see sections Manual adjustment by touching the screen and Manual adjustment by using the navigation pad.
In live mode, touch the soft button
 to switch between automatic and manual image adjustment
modes.
to switch between automatic and manual image adjustment
modes.In preview/edit mode, manual image adjustment mode is active.
You can also assign image adjustment functions to the programmable buttons. For more information, see section Programmable buttons.
Switch between auto and manual: Allows you to switch between automatic and manual image adjustment modes.
Auto adjust the manual temperature scale: Allows you to perform an automatic adjustment of the image while remaining in manual image adjustment mode.
Adjustment of the temperature scale is not possible in HSM mode.
Example
Here are two infrared images of an isolator in a power line. To make it easier to analyze the temperature variations in the isolator, the temperature scale in the right image has been changed to values close to the temperature of the isolator.
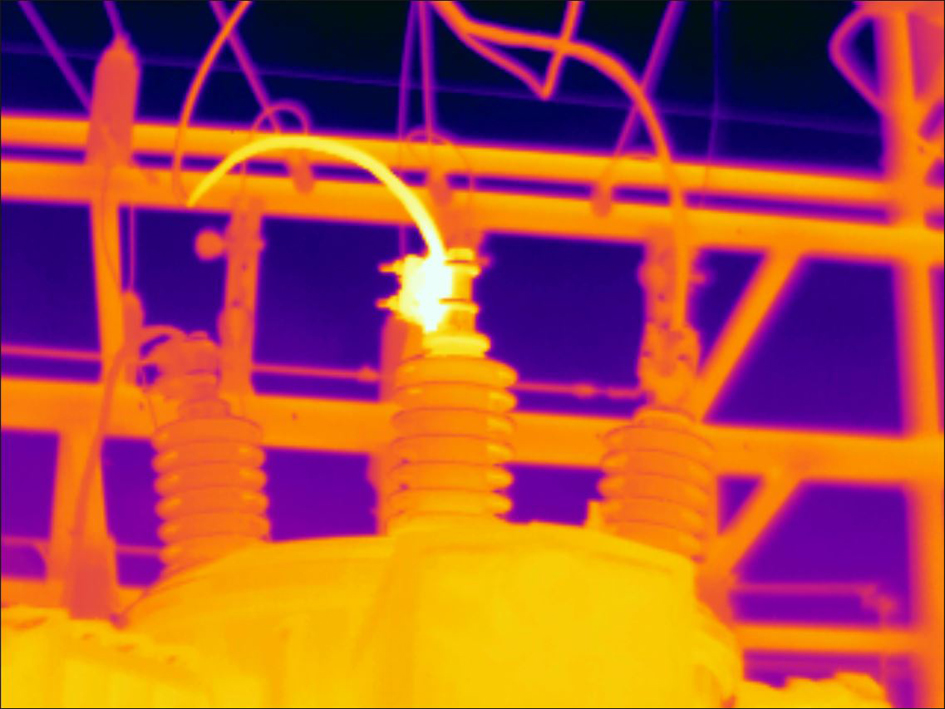
Automatic |
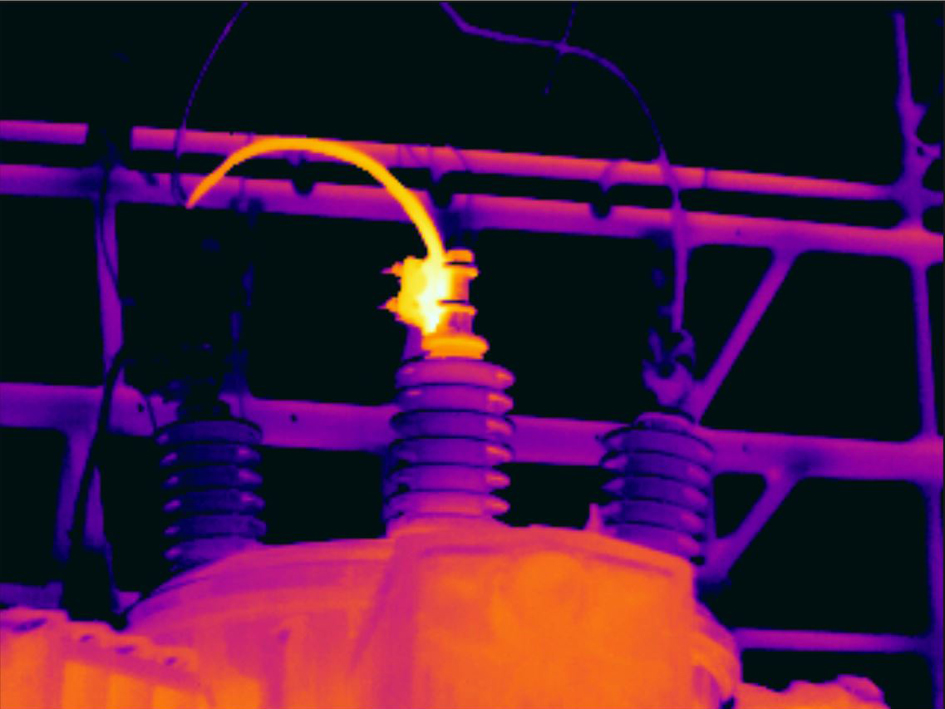
Manual |
Auto adjustment region
When you auto-adjust a thermal image, you adjust it for the best image brightness and contrast. This means that the color information is distributed over the existing temperatures of the image.
In some situations, the image may contain very hot or very cold areas outside your area of interest. In such cases you might want to exclude those areas and use the color information only for the temperatures in your area of interest. You can do so by selecting a smaller auto adjustment region.
Select the auto adjustment region under (Settings) > Device settings > User interface options > Auto adjustment region.
Manual adjustment by touching the screen
General
The touch functionality for manual image adjustments is enabled/disabled
by a setting. Select (Settings) > Device settings > User interface options > Manual adjustment using
touch > On/Off.
When manual image adjustment mode is active, an adjustment wheel is displayed to the right of the temperature scale. (Applicable when the manual adjustment by touch functionality is enabled.)
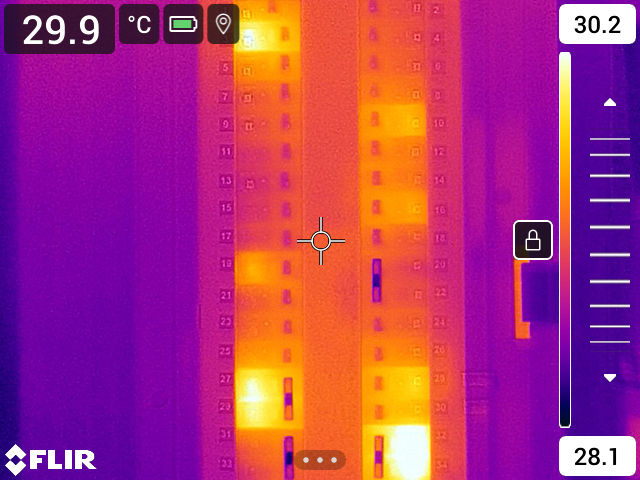
Figure 1. Manual adjustment mode active
Procedure
In live mode, touch the soft button
to enter manual image adjustment mode.To simultaneously change the temperature scale minimum and maximum limits, place your finger on the screen and move it up/down.
To change the minimum limit or the maximum limit, do the following:
Touch the maximum or minimum temperature that you want to change.
Place your finger on the screen and move it up/down to change the value of the highlighted temperature.
Auto-adjusting the image in manual mode
In manual image adjustment mode, you can auto-adjust the image by touching the screen. The image will be auto-adjusted based on the thermal content of the area around the touched point. The top and bottom levels in the temperature scale will be set to the maximum and minimum temperatures in that area. By using the color information only for the relevant temperatures, you will get more details in your area of interest.
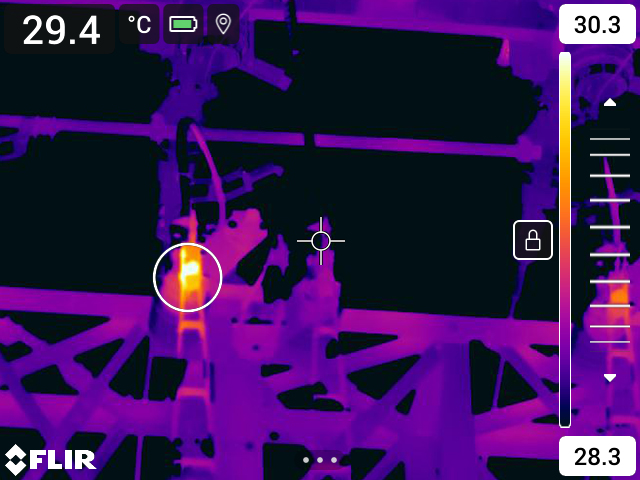
Locking the touch screen
When you have adjusted the image to levels that allow you to study your area of interest, you can lock the touch screen to prevent further unintentional adjustments.
To lock the screen, touch the  icon to the left of the temperature scale.
To unlock the screen, touch the  icon to the left of the temperature scale.
If you switch to automatic image adjustment mode, the screen automatically unlocks and your manual adjustments are lost.
Manual adjustment by using the navigation pad
Manual adjustment modes
There are two different settings for the manual adjustment mode (applicable for the navigation pad only):
Level, Span: With this setting, you can manually adjust the level and span by using the navigation pad.
Level, Max, Min: With this setting, you can manually adjust the level by using the navigation pad. You can also change the upper and lower temperatures individually.
Select the type of manual image adjustment mode under (Settings) > Device settings > User interface options > Manual adjustment mode.
Manual adjustment in Level, Span mode
This procedure assumes that you have configured the camera for manual image adjustments in Level, Span mode. Select Settings > Device settings > User interface options > Manual adjustment mode = Level, Span.
In live mode, touch the soft button
to enter manual image adjustment mode.Push the navigation pad up/down to increase/decrease the level.
Push the navigation pad left/right to increase/decrease the span.
Manual adjustment in Level, Max, Min mode
This procedure assumes that you have configured the camera for manual image adjustments in Level, Max, Min mode. Select Settings > Device settings > User interface options > Manual adjustment mode = Level, Max, Min.
In live mode, touch the soft button
to enter manual image adjustment mode.To simultaneously change the temperature scale minimum and maximum limits, push the navigation pad up/down.
To change the minimum limit or the maximum limit, do the following:
Push the navigation pad left/right to select (highlight) the maximum or minimum temperature.
Push the navigation pad up/down to change the value of the highlighted temperature.