Camera overview
View from the front
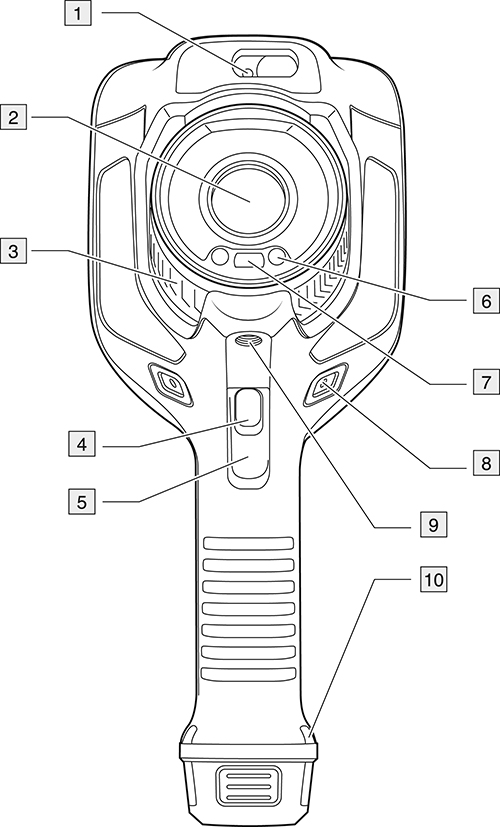
Laser distance meter.1
Infrared lens.
Focus ring.
Autofocus button.2
Trigger.
Lamp for the digital camera (left and right sides).
Digital camera.
Attachment point for the hand strap bracket (left and right sides).
Tripod mount.
Attachment point for the hand strap, wrist strap, or lanyard strap (left and right sides).
View from the rear
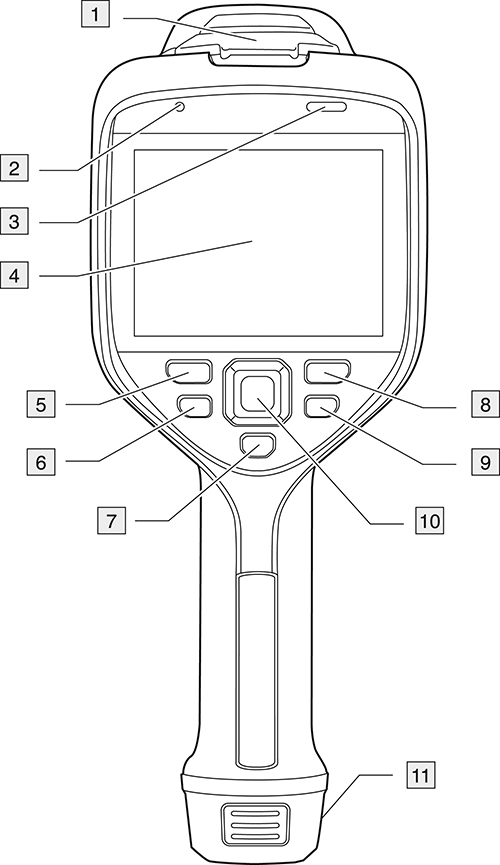
Cover for the USB connector and memory card slot.
Microphone.
Speaker.
Touch-screen LCD.
Image archive button.
Programmable button.
Button to operate the laser.
Back button.
On/off button.
Navigation pad with center push.
Battery.
Laser distance meter and laser pointer
The laser distance meter consists of a laser transmitter and a laser receiver. The laser transmitter also works as a laser pointer.
Laser transmitter and receiver
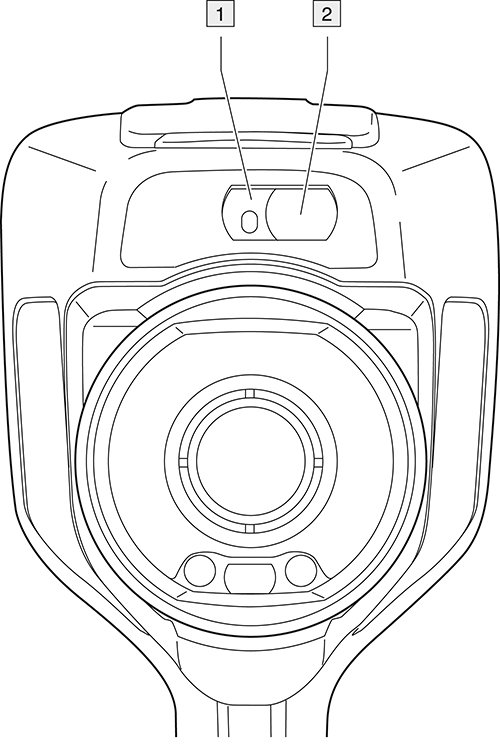
Laser transmitter.
Laser receiver.3
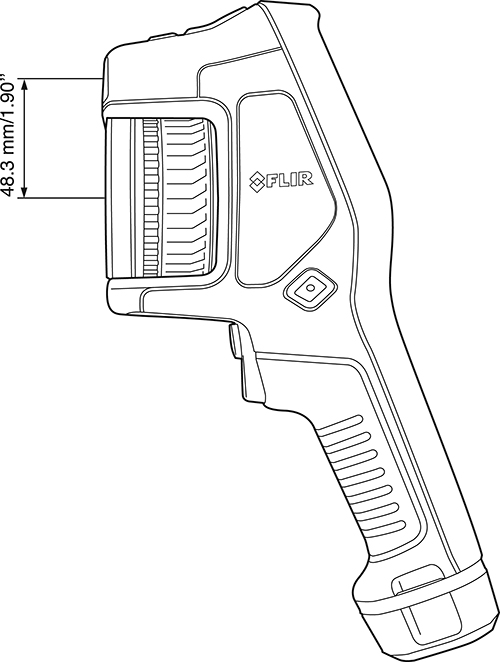
Difference in position
This figure shows the difference in position between the laser transmitter and the optical center of the infrared lens.
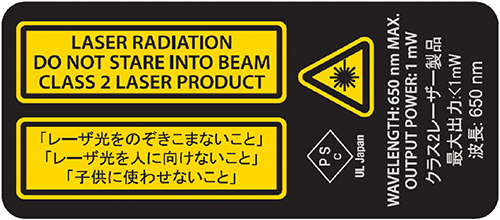
Laser warning label
A laser warning label with the following information is attached to the camera:
Laser rules and regulations
Wavelength: 650 nm. Maximum output power: 1 mW.
This product complies with 21 CFR 1040.10 and 1040.11 except for deviations pursuant to Laser Notice No. 50, dated June 24, 2007.
Screen elements
General
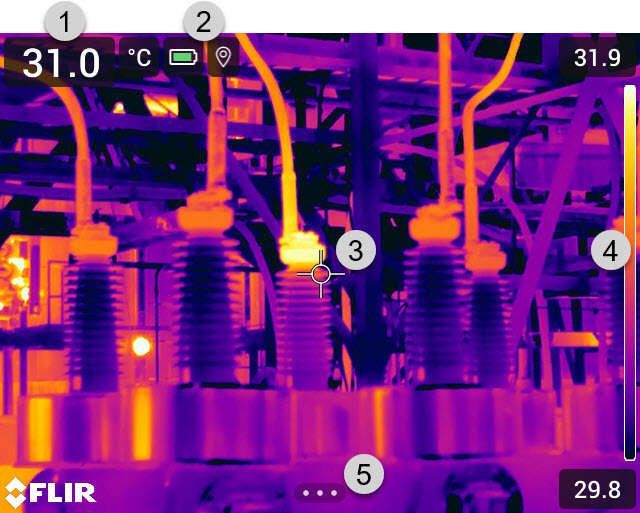
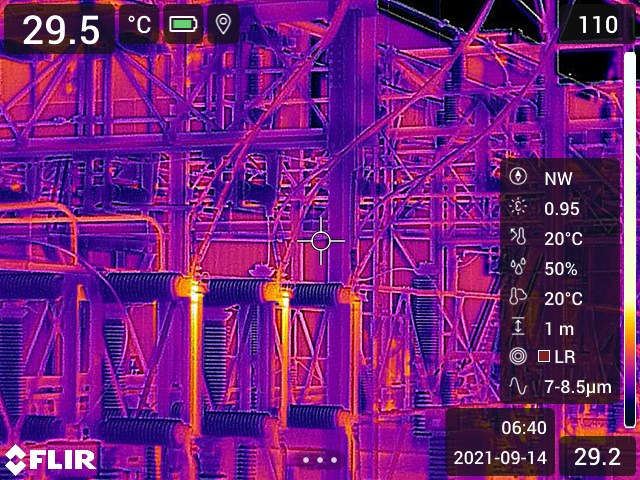
Result table.
Status icons.
Measurement tool (e.g., spotmeter).
Temperature scale.
Menu system button.
Menu system
To display the menu system, push the navigation pad or tap the
menu system button  .
.
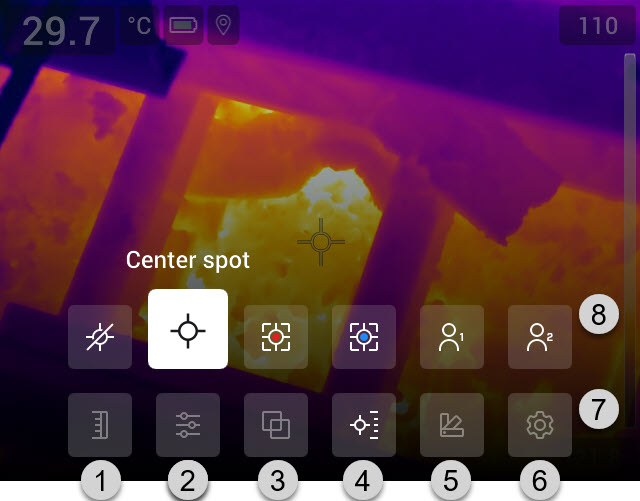
Temperature scale button.
Measurement parameters button.
Image mode button.
Measurement button.
Color button.
Settings button.
Main menu.4
Submenu.
Status icons and indicators
 |
Battery level
|
 |
The remaining storage capacity of the memory card is below 100 MB. |
 |
The GPS is enabled. If the icon is grey, the camera cannot find a GPS signal. |
 |
External infrared window compensation is enabled. |

 |
The camera is paired with a FLIR Ignite account. The camera is paired, but does not have contact with FLIR Ignite (no internet connection). |
 |
A Bluetooth headset is connected. |
 |
The laser is on. |
Swipe-down menu
To open the swipe-down menu, place your finger at the top of the screen and swipe down.
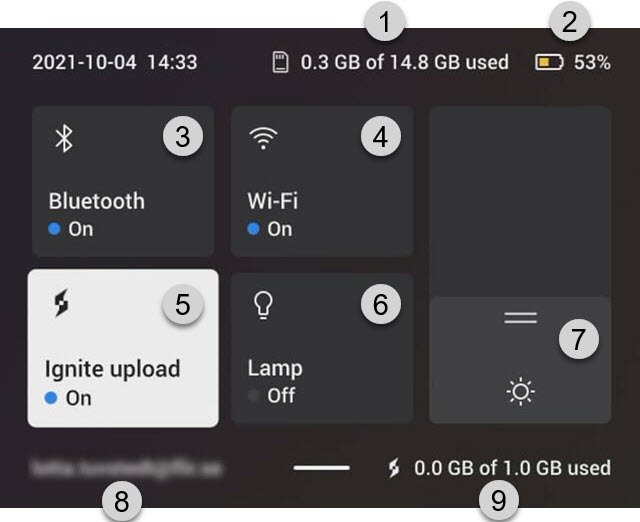
Storage status of the memory card.
Battery status indicator.
Bluetooth button: Touch to enable/disable Bluetooth. Touch and hold to open the Bluetooth settings menu. See also section Pairing Bluetooth devices.
Wi-Fi button: Touch to enable/disable Wi-Fi. Touch and hold to open the Wi-Fi settings menu. See also section Configuring Wi-Fi.
Ignite upload button: Touch to enable/disable automatic upload of images and videos. See also section Automatic upload.
NoteIf the camera is not paired with a FLIR Ignite account, you will be prompted to sign in to FLIR Ignite before you can enable automatic upload.
Lamp button: Touch to turn on/off the camera lamp.
NoteBefore you can turn on the camera lamp, you need to enable the lamp. Select
 (Settings) > Device settings > Lamp & laser > Enable lamp & laser or Enable lamp & laser
+ Use lamp as flash.
(Settings) > Device settings > Lamp & laser > Enable lamp & laser or Enable lamp & laser
+ Use lamp as flash.The availability of the camera lamp depends on the lens model.
-
Screen brightness slider: Use to control the brightness of the screen.
The FLIR Ignite user account that the camera is paired with. For more information, see section Pairing with FLIR Ignite.
Storage status of the FLIR Ignite account.
Image overlay information
The image information consists of items such as the date, emissivity, and atmospheric temperature. All image information is saved in the image file and can be viewed in the image archive. You can also choose to display selected items as image overlay information. All image overlay information displayed on the live image will also be displayed on saved images. For more information, see sections section Device settings and Hiding all overlay.
Navigating the menu system
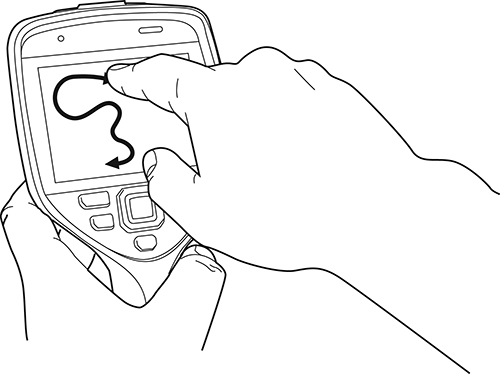
You can navigate the menu system in two ways:
Using your finger or a stylus pen specially designed for capacitive touch usage.
Using the navigation pad and the back button
 .
.
 |
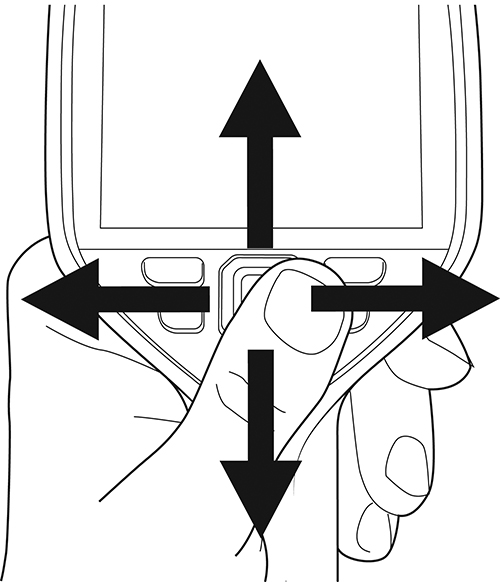 |
Navigating using the navigation pad
You navigate the menu system by using the navigation pad and the back button:
To display the menu system, push the center of the navigation pad.
To navigate in menus, submenus, and dialog boxes, and to change values in dialog boxes, push the navigation pad up/down or left/right.
To confirm changes and settings in menus and dialog boxes, push the center of the navigation pad.
To leave dialog boxes and to go back in the menu system, push the back button
.