Thermal imaging basics
Focus
It is very important to adjust the focus correctly. If the camera is out of focus, there is risk of missing a gas leak. Incorrect focus adjustment also affects the temperature measurements.
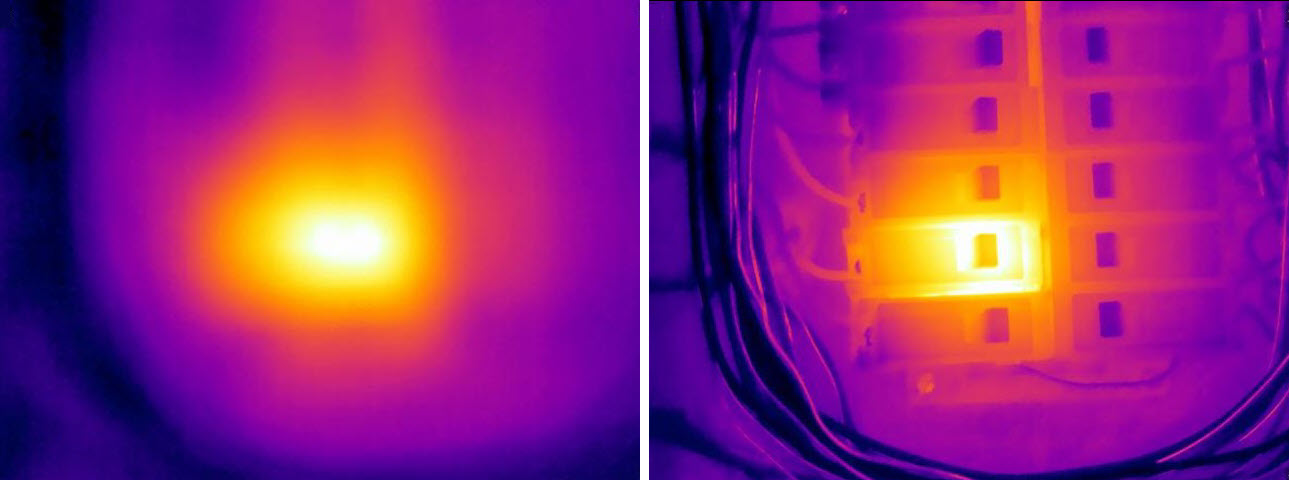
Figure 1. In the unfocused image (left), you can only see a diffuse hotter area. The focused image (right) clearly shows which object is being observed and where the object is warm.
A focused and sharp image makes the object and heat pattern easy to recognize. A blurred image not only makes it harder to identify the object and any faults, but can also lead to measurement errors which are more serious the smaller the measurement object. Even if all other parameters are set correctly, the measurement values from an unfocused thermal image are highly likely to be incorrect.
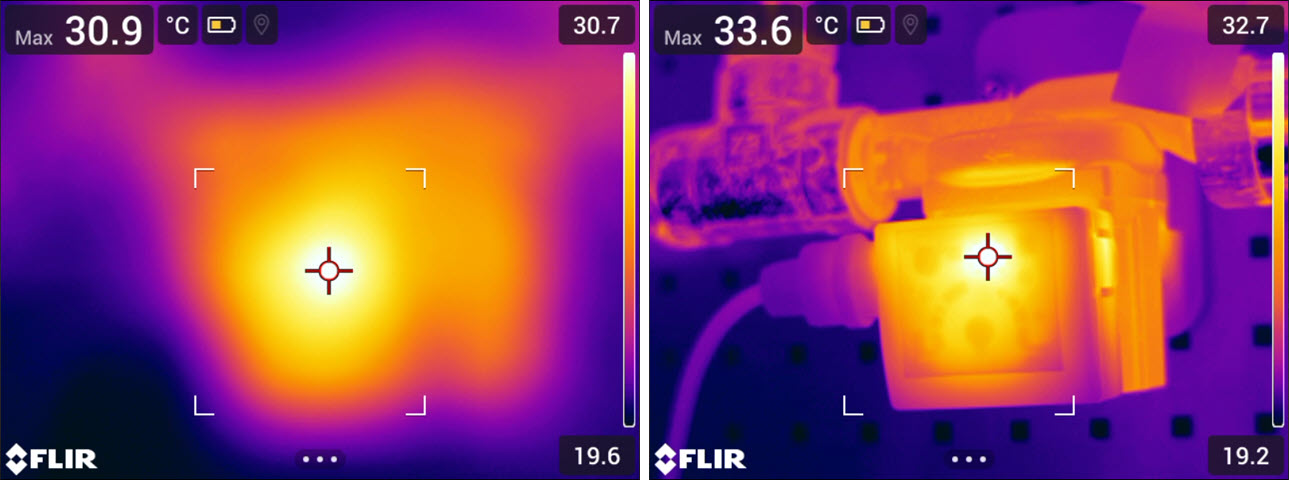
Figure 2. The measured temperature is higher in the focused image than in the unfocused image.
Adjust focus
You can adjust the focus manually by using the focus ring, or autofocus by pushing the center of the Focus/Zoom button. See also section Focus.
Applicable to the FLIR Gx models: You can only adjust the focus manually by using the focus ring.
Temperature range
The camera is calibrated for different temperature ranges. The available temperature range options depend on the camera model.
The temperature range setting has an impact on the sensitivity of the camera and on the integration (exposure) time. What temperature range to select depends on the thermal conditions in the scene.
If the selected temperature range is too low, the image will be oversaturated, as objects with higher temperatures emit more thermal radiation than colder objects. If you select a temperature range that is too high, the thermal image will be “underexposed”.
A general guideline for gas detection is to start with the lowest camera temperature range, but change if the image becomes oversaturated.
For accurate temperature measurements, you must select a temperature range that matches the expected temperature of the object you are inspecting.
Change the temperature range
To change the temperature range, do one of the following:
Push the Temperature range button and then select a temperature range by using the joystick or touching the screen. See also section Temperature range.
On the Settings menu, select Camera temperature range. This displays a menu where you can select the temperature range.
Thermal image adjustment
Thermal image adjustment, or thermal tuning, means adjusting the temperature scale of a thermal image, in order to maximize the brightness and contrast in the image.
In automatic mode, the camera continuously adjusts the image for the best presentation. The camera selects the coldest and warmest temperatures in the image as the lower and upper limits of the temperature scale. The colors are then distributed over that temperature interval (histogram color distribution).
In manual mode, you can adjust the temperature scale to values close to the temperature of a specific object in the image. The colors are distributed evenly from the lowest to the highest temperature (linear color distribution).
Manual mode lets you center on the temperatures around the background of the gas, which can make the gas appear more clearly.
When measuring temperatures, manual mode will make it possible to detect anomalies and smaller temperature differences in the part of the image of interest.
Manual image adjustment is not possible in High Sensitivity Mode (HSM) mode.
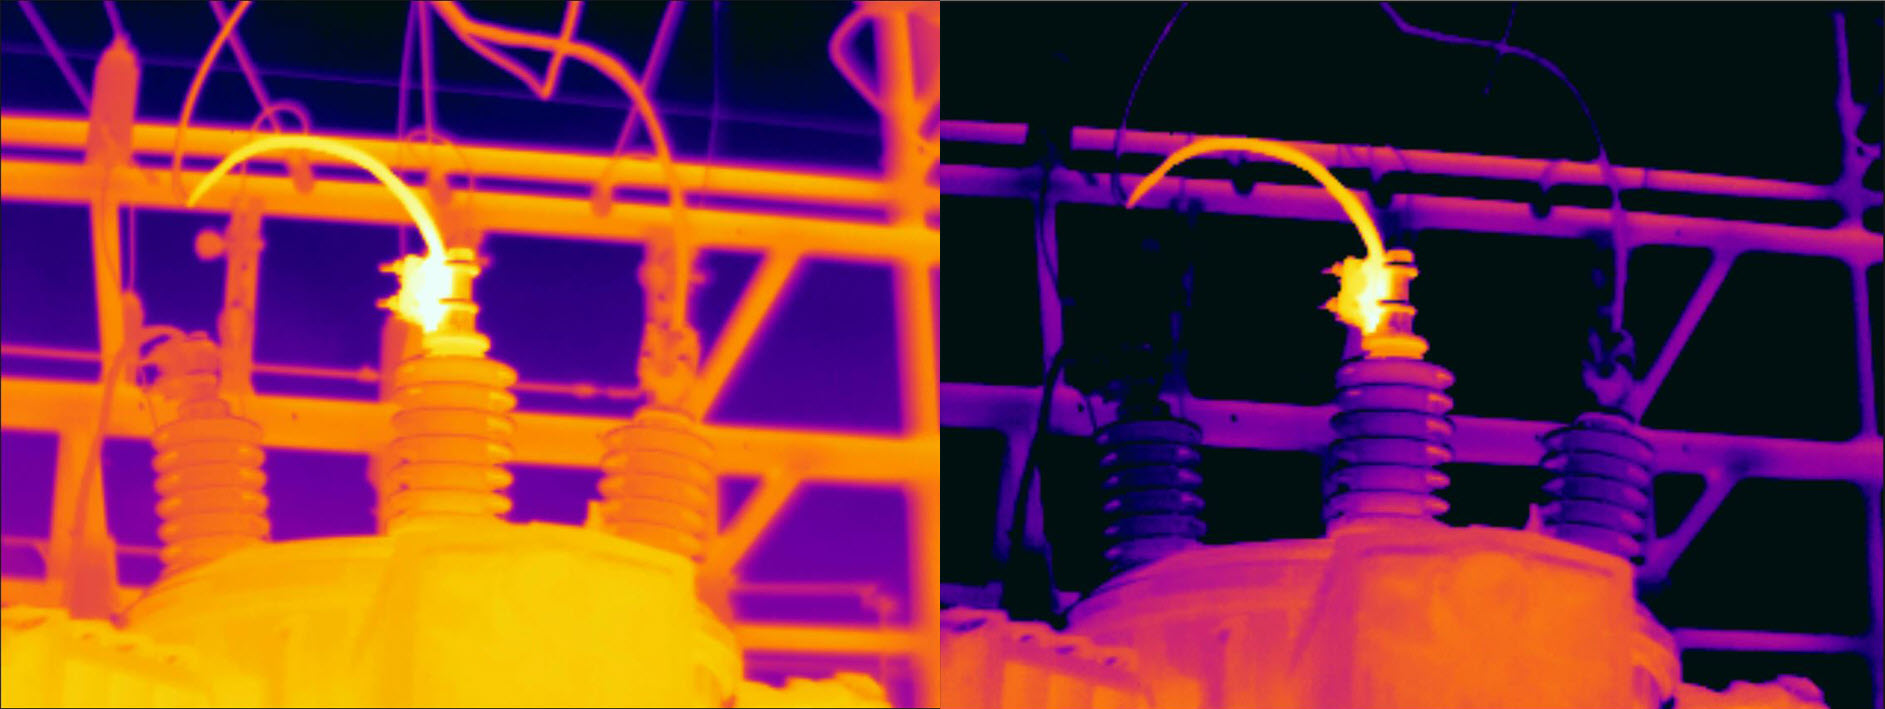
Figure 3. A thermal image of a power line in automatic mode (left) and in manual mode (right). To make it easier to analyze the temperature variations in the isolator, the temperature scale in the right image has been changed to values close to the temperature of the isolator.
Manual mode
To enter manual adjustment mode, select Temperature scale > Manual on the main toolbar.
In preview/edit mode, manual adjustment mode is active.
To easily switch between the automatic and manual adjustment modes, you can assign the function Switch between auto and manual to one of the programmable buttons, see section Programmable buttons.
Manual adjustment by touching the screen
The touch functionality for manual adjustments is enabled by a setting. On the Settings menu, select Device settings > User interface options > Manual adjustment using touch.
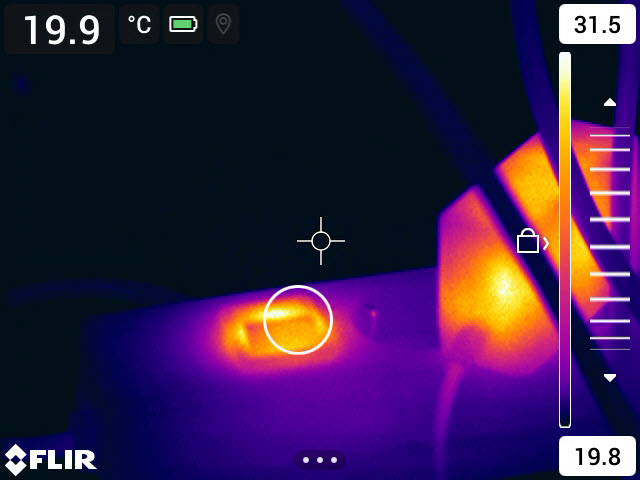
When manual mode is active, an adjustment wheel is displayed to the right of the temperature scale. (Applicable when the manual adjustment by touch functionality is enabled.)
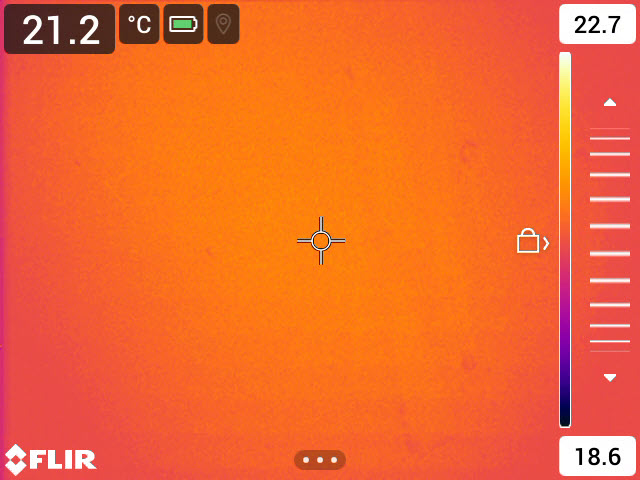
Figure 4. Manual adjustment mode active
To manually adjust the image, do the following:
To enter manual adjustment mode, select Temperature scale > Manual on the main toolbar.
To simultaneously change the maximum and minimum limits of the temperature scale, place your finger on the screen and move it up/down.
To change the maximum or minimum limit, do the following:
Tap the maximum or minimum temperature.
Place your finger on the screen and move it up/down to change the value of the highlighted temperature.
1-Touch auto-adjustment
In manual mode, you can auto-adjust the image by touching the screen. The image will be auto-adjusted based on the thermal content of the area around the touched point. The top and bottom levels in the temperature scale will be set to the maximum and minimum temperatures in that area.
By using the color information only for the relevant temperatures, you will get more details in your area of interest.
You can also assign the function Auto adjust the manual temperature scale to a programmable button, see section Programmable buttons. This allows you to make an automatic adjustment of the image while remaining in manual mode.
Lock touch screen
When you have adjusted the image to levels that allow you to study your area of interest, you can lock the touch screen to prevent further unintentional adjustments.
To lock/unlock the screen, tap the icon to the left of the temperature scale.
If you switch to automatic mode, the screen automatically unlocks and your manual adjustments are lost.
Manual adjustment using the joystick
Manual adjustment modes
There are two different settings for the manual adjustment mode (applicable for the joystick only):
Level, Span: With this setting, you can manually adjust the level and span with the joystick.
Level, Max, Min: With this setting, you can manually adjust the level with the joystick. You can also change the upper and lower temperatures individually.
To change the type of manual adjustment mode, select Settings > Device settings > User interface options > Manual adjustment mode.
Manual adjustment in Level, Span mode
To enter manual adjustment mode, select Temperature scale > Manual on the main toolbar.
Move the joystick up/down to increase/decrease the level.
Move the joystick left/right to increase/decrease the span.
Manual adjustment in Level, Max, Min mode
To enter manual adjustment mode, select Temperature scale > Manual on the main toolbar.
To simultaneously change the temperature scale minimum and maximum limits, move the joystick up/down.
To change the minimum or maximum limit, do the following:
Move the joystick left/right to select (highlight) the maximum or minimum temperature.
Move the joystick up/down to change the value of the highlighted temperature.
Auto adjustment region
In automatic mode, the camera distributes the colors over the existing temperatures in the image.
In some situations, the image may contain very hot or very cold areas outside your area of interest. In such cases, you may want to exclude those areas and distribute the colors only over the temperatures in your area of interest. This can be done by selecting a smaller auto adjustment region.
To change the auto adjustment region, select Settings > Device settings > User interface options > Auto adjustment region.
Color palettes
The camera supports a number of different color palettes. Frequently used palettes include the iron, gray, and rainbow palettes.
The iron palette is intuitive and also easy to understand for those without much experience in thermography. It offers a good balance between geometric and thermal resolution.
Gray tones are particularly suited to resolving small geometric details, but are less suited to displaying small differences in temperature.
The rainbow palette is more colorful and alternates between light and dark colors. This results in greater contrast, but this can lead to a noisy image for objects with different surfaces or many temperatures.
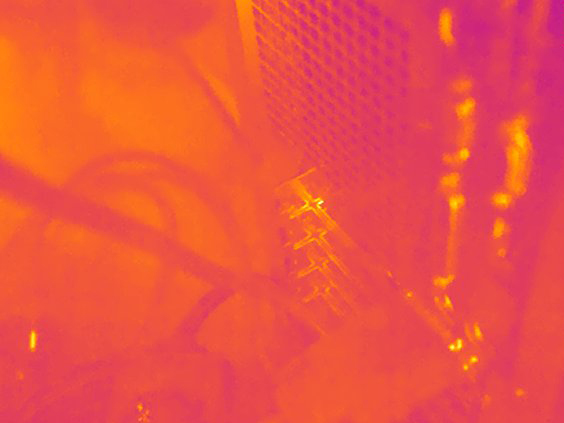
Iron |
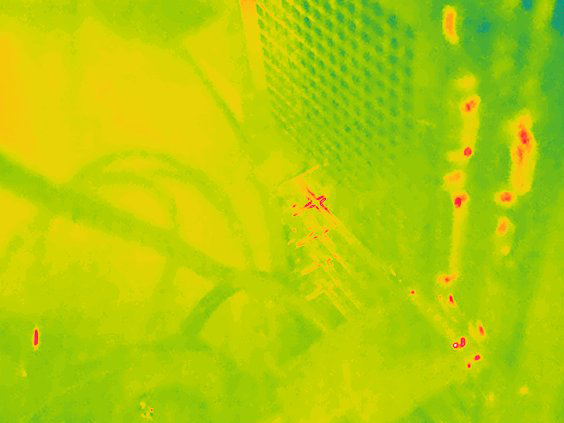
Rainbow |
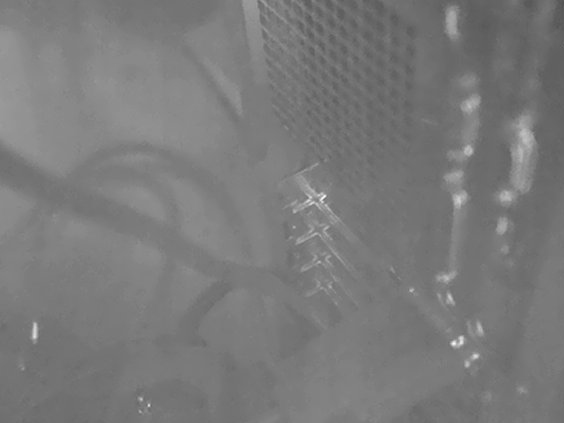
Gray (White hot) |
Gray (Black hot) |
Change the color palette
On the main toolbar, select Color. This displays a toolbar where you can select a color palette.
Performing a non-uniformity correction (NUC)
General
Some users may observe a noisy or degraded thermal image from their G615 camera due to environmental changes or internal heating of camera components leading to a non-uniform pixel response. As a best practice to ensure optimum image quality, the performance of a non-uniformity correction (NUC) is recommended anytime the image becomes spatially noisy.
Performing a NUC manually
To perform a manual NUC, push and hold down the Back button  for more than 2 seconds.
Performing a NUC is typically not needed during normal operating procedures. The NUC should be performed against a uniform temperature scene such as the camera lens cap. The temperature of the uniform scene (e.g. the lens cap) needs to be within the selected measurement range to be able to perform a NUC, otherwise the present image will create an artifact that will appear as a superimposed ghost image. Make a new NUC towards a uniform scene or restart the camera.