User interface
This chapter provides an overview of the FLIR Thermal Studio user interface.
General
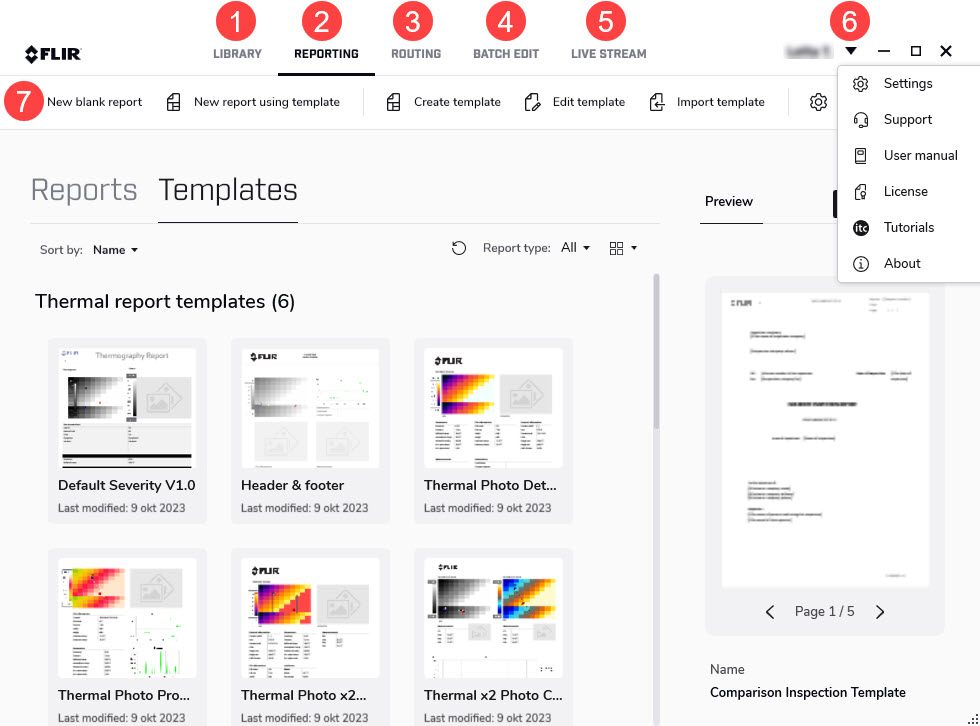
Library tab
This tab shows the File Explorer of the computer your are working on. Here you can navigate to any folder where you have saved your thermal images, both locally on your computer and on any connected network shares.
When you click a folder, the images in that folder are presented in the center pane. When you click an image in the center pane, information about that image is shown in the pane to the right.
Reporting tab
This tab is used to create reports. You can create reports from scratch or by using templates.
Routing tab
This tab is used to create routes and inspection reports.
Batch edit tab
This tab is used to create and run jobs in batches. Use the batch processing feature for automation of repetitive tasks when editing and normalizing thermal images.
Live stream tab
This tab is used to live stream and control USB connected cameras.
Drop-down menu
Click the arrow to display the drop-down menu.
Toolbar
The toolbar includes functions that are relevant for the selected tab. The toolbar adapts to the window size, meaning that some functions may be available in a group when the window is minimized.
Settings
The application settings are configured on the Settings window.
To open the Settings window, do one of the following:
Click the arrow at the upper right corner and then click Settings.
On the top toolbar, click the Settings icon.
Some settings require a restart of the FLIR Thermal Studio application before a change goes into effect.
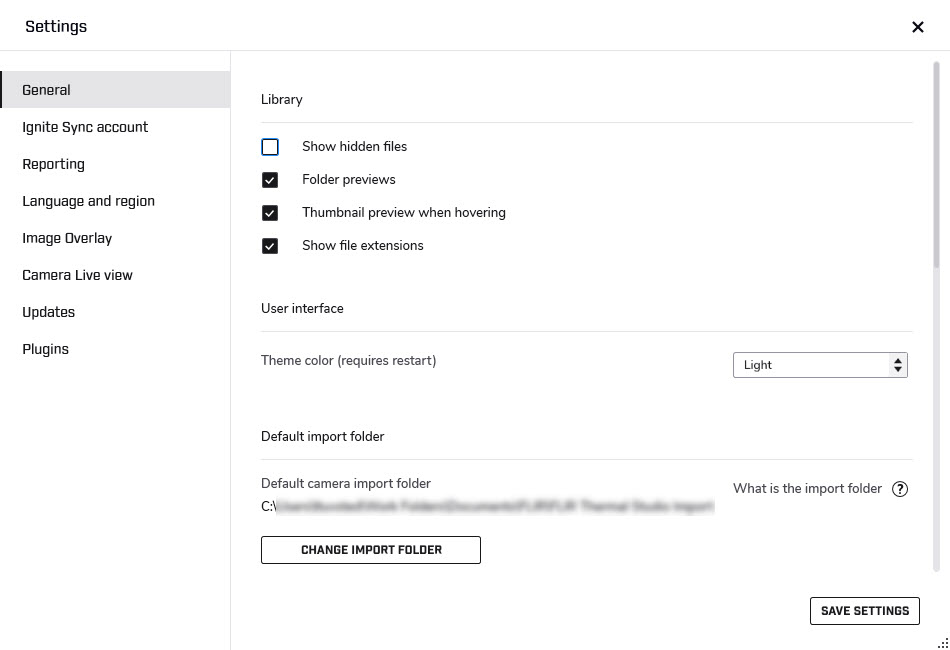
General
Library
Change the file and preview options for the File Explorer.
User interface
Change the theme of the user interface.
Default import folder
Change the file path to the folder for imported files from camera.
Palettes
Palettes folder: Change the file path to the folder where your custom palettes are located.
Output
When the Open output folder when done check box is selected, the folder with the result files will open when the task is completed.
Output folder: Change the file path to the folder where you want to store the result files.
Other
Select the Enable analytics check box to collect data on how the FLIR Thermal Studio application is used. This data can be sent to FLIR for analysis and troubleshooting.
Ignite Sync account
FLIR Ignite is a cloud storage service for thermal images. FLIR Ignite Sync is a PC–based (Windows 10) application that allows you to sync your image library with your computer, for easy access when creating reports.
To install FLIR Ignite Sync, click Install Ignite Sync.
Ignite Sync path displays the path to the sync folder as set up in the FLIR Ignite Sync application.
Reporting
Select the Reporting options and the Default fonts to be used in your reports.
Language and region
Select the language and units to be used in the user interface.
Image Overlay
Select if and how you want to use an image overlay when editing images manually in File Explorer and when running batch processing. When you select or deselect a check box in the list of settings, the result is immediately presented in the example image. Note that the Overlay enabled check box must be selected before the settings can be changed.
Camera Live view
Select options for camera captures and recordings.
Updates
Select how you want to manage updates of the FLIR Thermal Studio application.
Automatically check for updates
With this option enabled, a check for updates will automatically be performed every time the application is started.
Prompt to install updates
With this option enabled, the user will be asked to install any available updates if the Automatically check for updates option is enabled.
Check if updates are available
Click to manually check if any updates are available for download.
Proxy settings
If updates need to be downloaded via a proxy service, configuration is needed. In the Proxy settings dialog box, select the Use proxy check box, and then enter the requested information. Click OK to save.
Plugins
Click License to activate a plug-in. For more information, see Plug-in activation.
After activation, you can change the settings for the plug-in here.
The Routing functionality is included in FLIR Thermal Studio Pro, without license activation.