Initial camera setup
Camera configurator tool
The camera configurator tool is the application interface used to access and manage all camera functions. It provides users with the ability to perform live monitoring, define monitored areas, configure alarms, review historical data trends, manage user accounts, and perform additional system‑level operations.
Access the camera configurator tool
Follow these steps to open the configurator tool and set up user accounts.
Connect the device.
Connect the camera to your computer using a PoE cable.
AP mode connection also works as an alternative way to connect.
Make sure the camera is powered on.
Open the configurator tool.
Open a web browser on your computer.
In the address bar, enter the provided Ethernet IP address (default address http://flir-acoustic-camera-acxxxxxx.local). Replace xxxxxx with the camera serial number.
The Camera configurator tool log in interface will load in the browser, see Figure 1
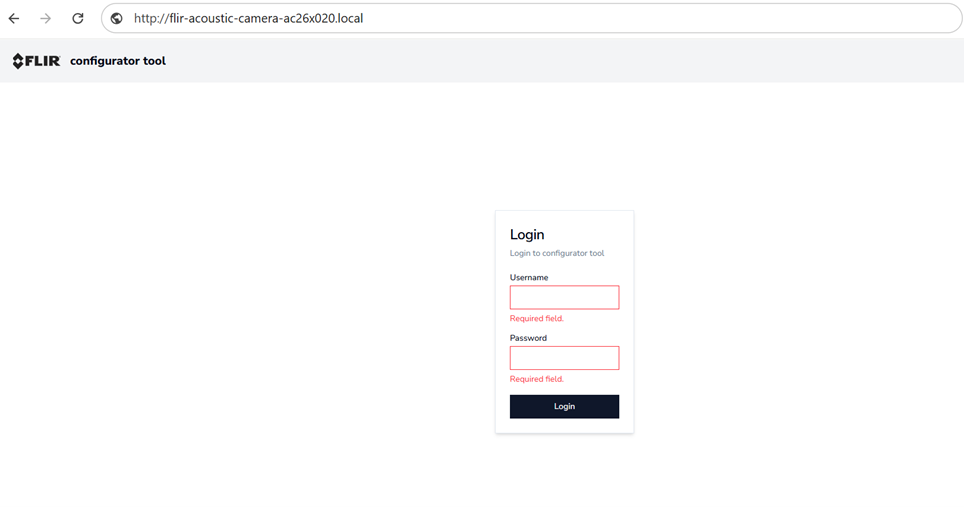
Figure 1. Camera Log in page.
Log in.
Enter the default username and password when prompted:
Default username: admin.
Default password: xxxxx.
Find the default password on the login information card that came with the camera.
NoteMake sure to keep the default username and password in a safe place, they will be required if a factory reset of the device is performed. If the credentials information is lost, please contact customer support.
After login, the main configurator interface is shown, see Figure 2.
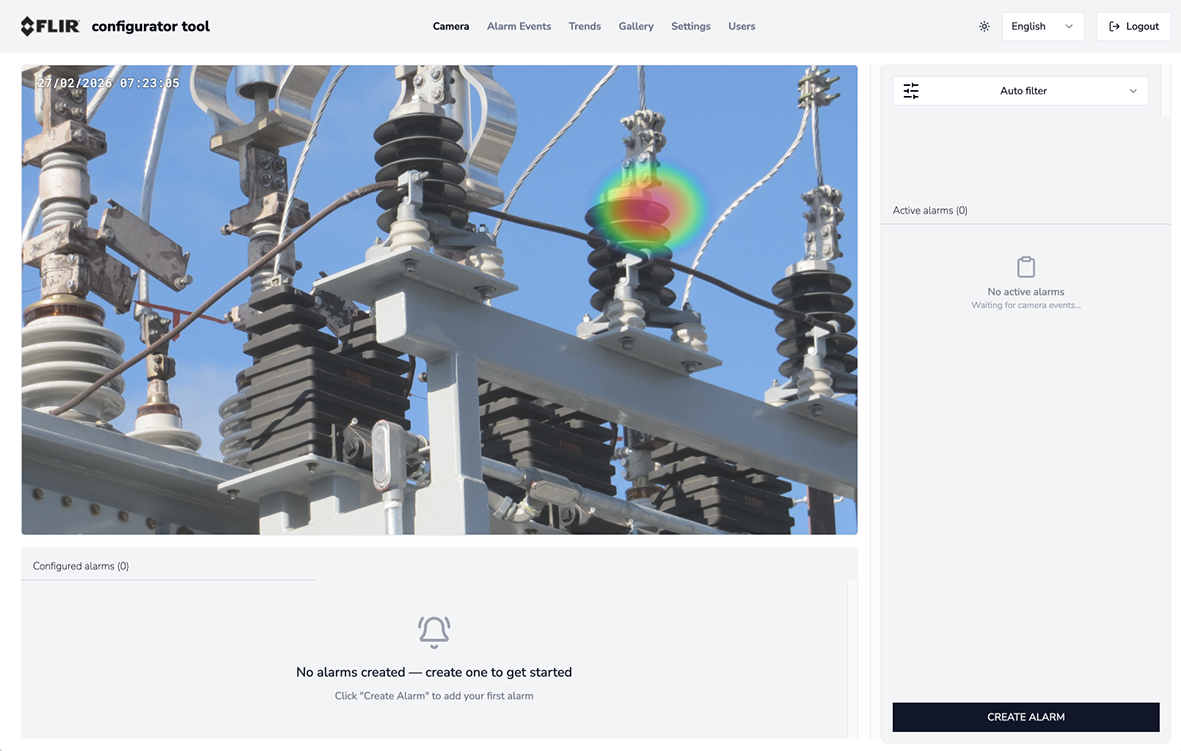
Figure 2. Configurator tool landing page, live camera view.
User role description
Admin:
Full access to all configuration settings.
Can create, modify, or delete user accounts.
Can read, write, and modify all parameters in the configurator tool.
Read and write:
Can read, write, and modify configuration settings.
Can not create, edit, or delete user accounts.
Read only:
Can view all configuration pages and settings.
Can not change any configuration parameters.
Root:
This is the default system user and can not be modified or deleted.
Root user rights are similar to the admin user.
If the camera is reset, see section Factory reset, all other user accounts are removed, but the Root user will remain.
Manage network connections
Connecting to an available Wi‑Fi network.
In the configurator tool, navigate to Settings > Network > Connection.
Currently connected Ethernet network details are shown, see Figure 3.
Turn on Connect to WiFi network.
From the available networks drop-down menu, select your desired Wi‑Fi network.
Enter the Wi‑Fi password and click Connect.
When connected, the IPv4 address will be displayed. You can use the new IP address to access the configurator tool over Wi‑Fi, see Figure 4.
Remove the cable connection to your PC and access the camera over Wi-Fi.
NoteThe PC and the camera must be connected to the same Wi‑Fi network to access the configurator tool.
To connect to a different Wi-Fi network, connect the camera with an Ethernet cable and access the configurator tool with the Ethernet IP address. See section Access the camera configurator tool.
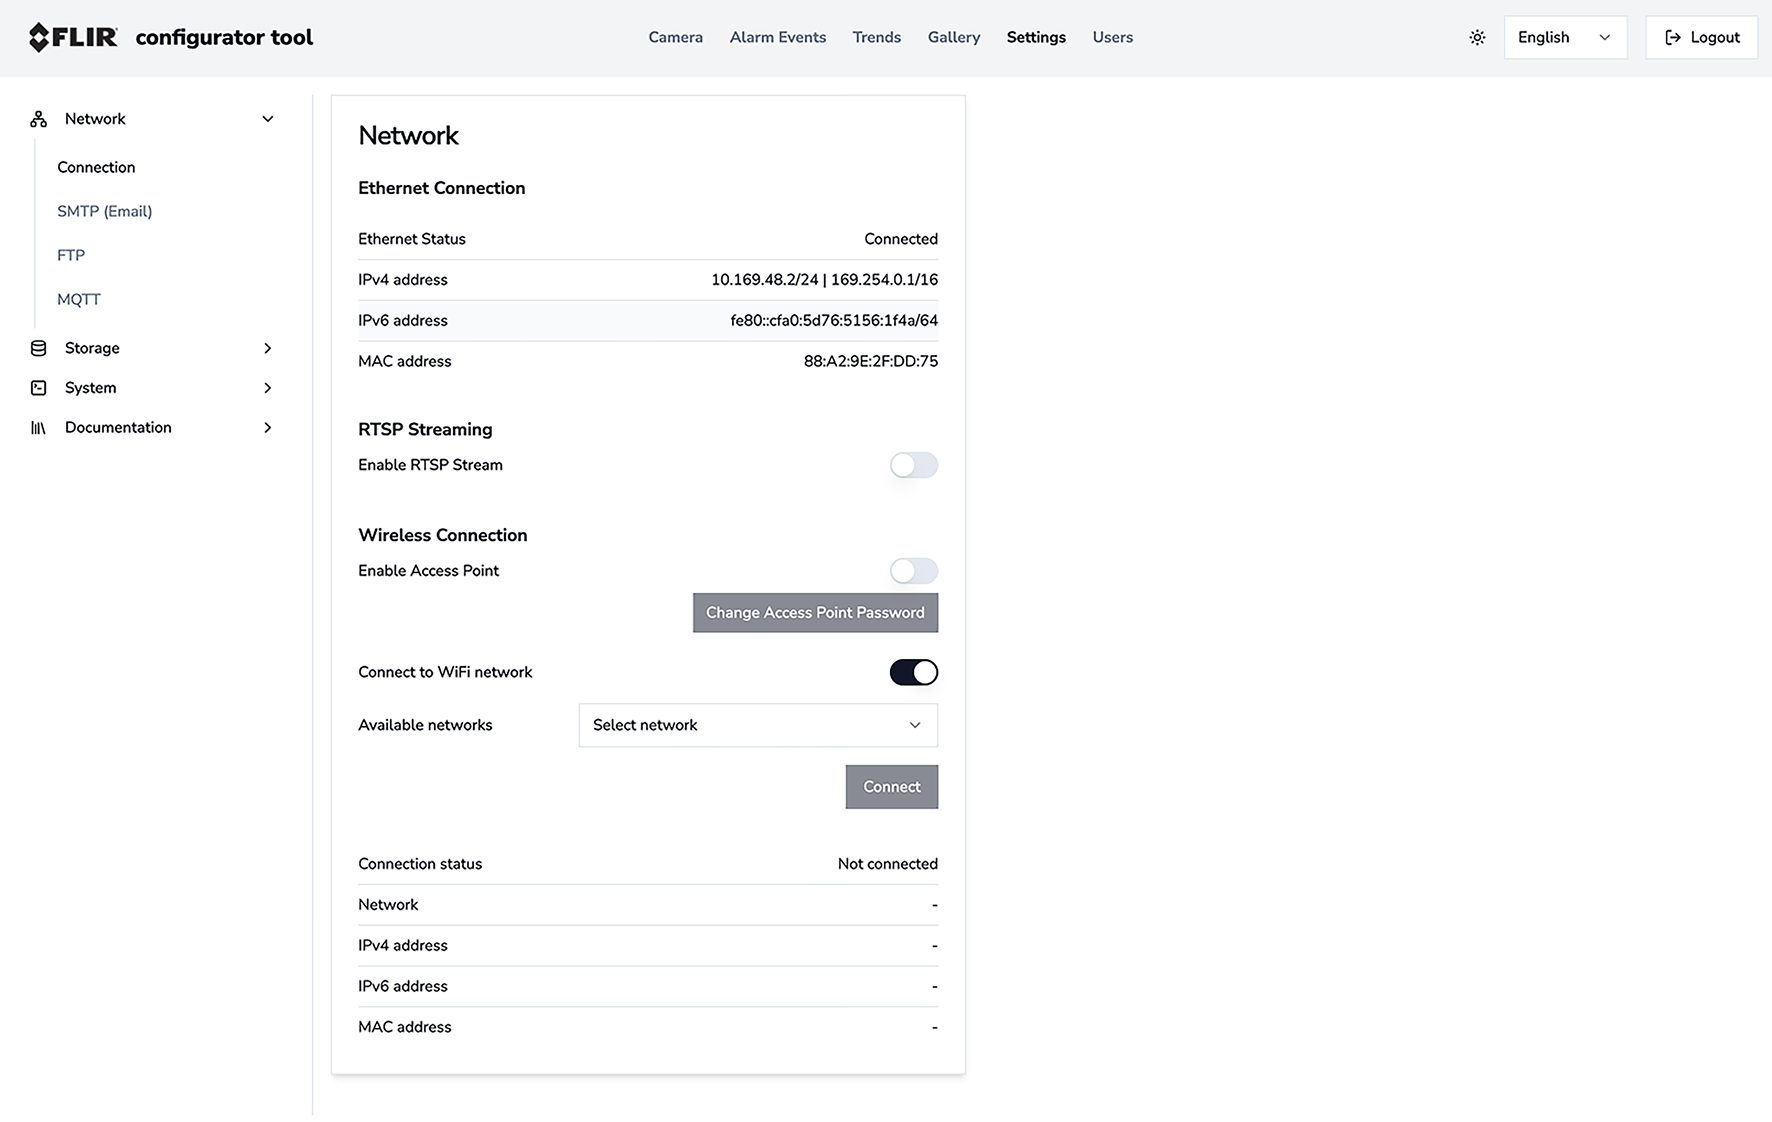
Figure 3. Ethernet network connection details.
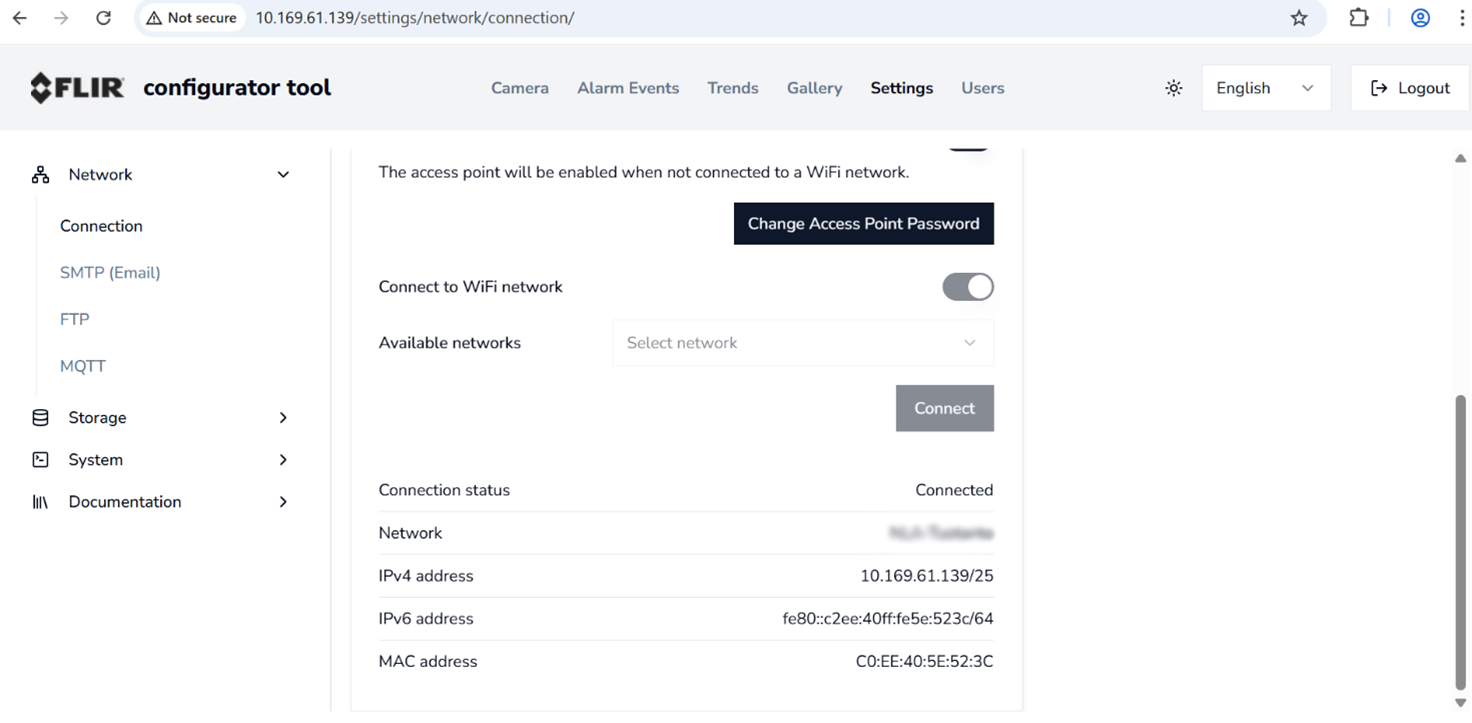
Figure 4. Wi-Fi network connections details
Enable access point
Users can keep Enable access point turned on, see Figure 4, if they want the camera to automatically create its own Wi‑Fi network (hotspot) whenever:
the primary Wi‑Fi connection is unavailable, or
the camera is being set up for the first time.
When this option is enabled, the camera acts as a fallback access point, allowing users to connect their PC directly to the camera’s Wi‑Fi network without requiring an Ethernet cable or an external router.
Turn off Enable Fallback Access Point to disable this feature.
Connecting to the camera’s access point
On your computer, select the camera’s SSID from the list of available Wi‑Fi networks.
The SSID is shown as: Flir-Acoustic-Camera-AC20xxxx.
Enter the access point password. The default password is the same one provided with the camera for the first login.
To change the password, select Change Access Point Password.
Accessing the camera configurator tool
When connected to the access point network, open a web browser and enter the following local address: http://flir-acoustic-camera-acxxxxx.local.
Replace xxxxx with the camera’s serial number.
After accessing the configurator, enable Connect to WiFi Network and select the desired Wi‑Fi SSID. Once the camera connects to this Wi‑Fi network, it will automatically disconnect from the access point mode. You will then need to use the camera’s Wi‑Fi IP address to access the configurator tool.
The camera’s power LED (yellow-green) flashes when it is in access point mode.
Disabling Enable Fallback Access Point turns off this functionality.
Recommended settings
To make sure a stable and reliable connection between the camera and the computer when using access point mode, follow these recommended computer settings.
When connecting to the camera’s access point, always select Security Key (password) instead of PIN when prompted.
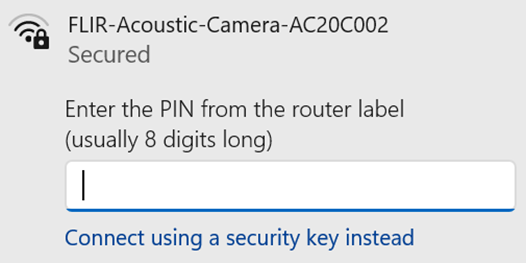
Figure 5.
Uncheck “Connect Automatically” for all regular Wi‑Fi networks that the computer normally uses. This prevents the computer from automatically switching away from the camera’s access point.
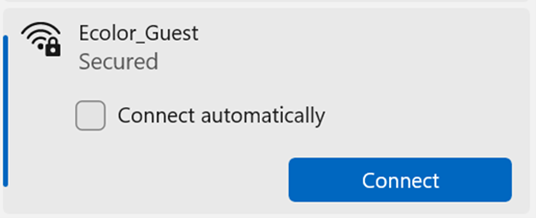
Figure 6.
Check Connect Automatically only for the camera’s access point Wi‑Fi network. This ensures the PC reconnects to the camera if the connection temporarily drops.
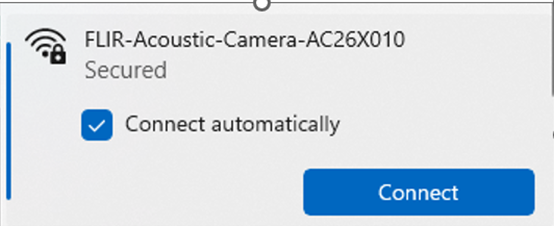
Figure 7.
RTSP Streaming
The camera supports Real‑Time Streaming Protocol (RTSP) for broadcasting live video to compatible media players, see section Real‑Time Streaming Protocol.
To enable streaming, turn on Real‑Time Streaming on the Network connection page of the configurator tool. Once enabled, an RTSP streaming URL will be displayed, see Figure 8.
Copy this URL and paste it into any RTSP‑compatible media player, such as VLC Media Player, to begin live streaming. Refer to your chosen media player’s documentation for instructions on configuring and optimizing RTSP playback.
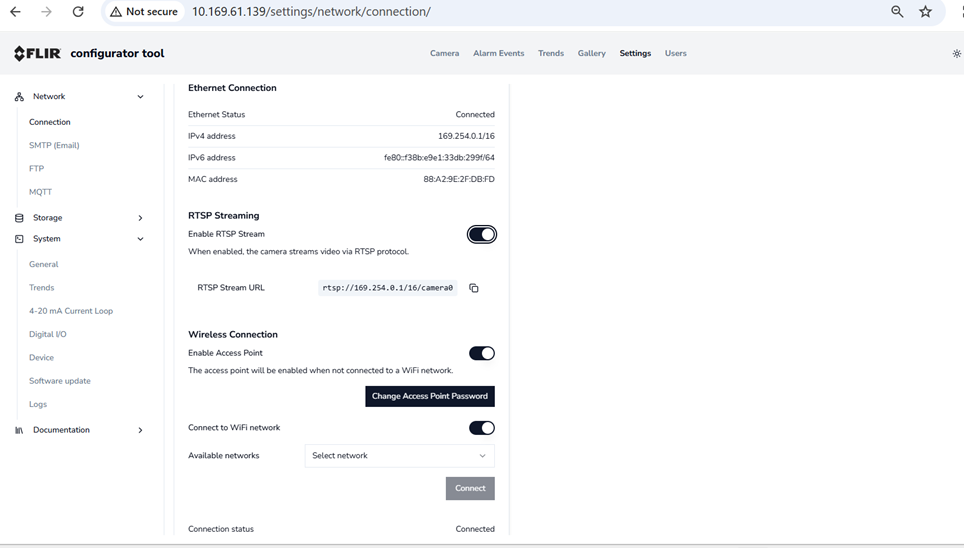
Figure 8. Enabling RTSP Live-Streaming.
Enabling RTSP streaming exposes the camera feed to potential security risks. Please read the following carefully:
The RTSP stream does not require authentication.
The stream is unencrypted and transmitted in plain text.
Anyone on the same network can access and view the stream content.
Create a new user account
Navigate to Settings > Users, see Figure 9.
Select Create User.
Enter a new username and password of your choice.
Select the user role from the list.
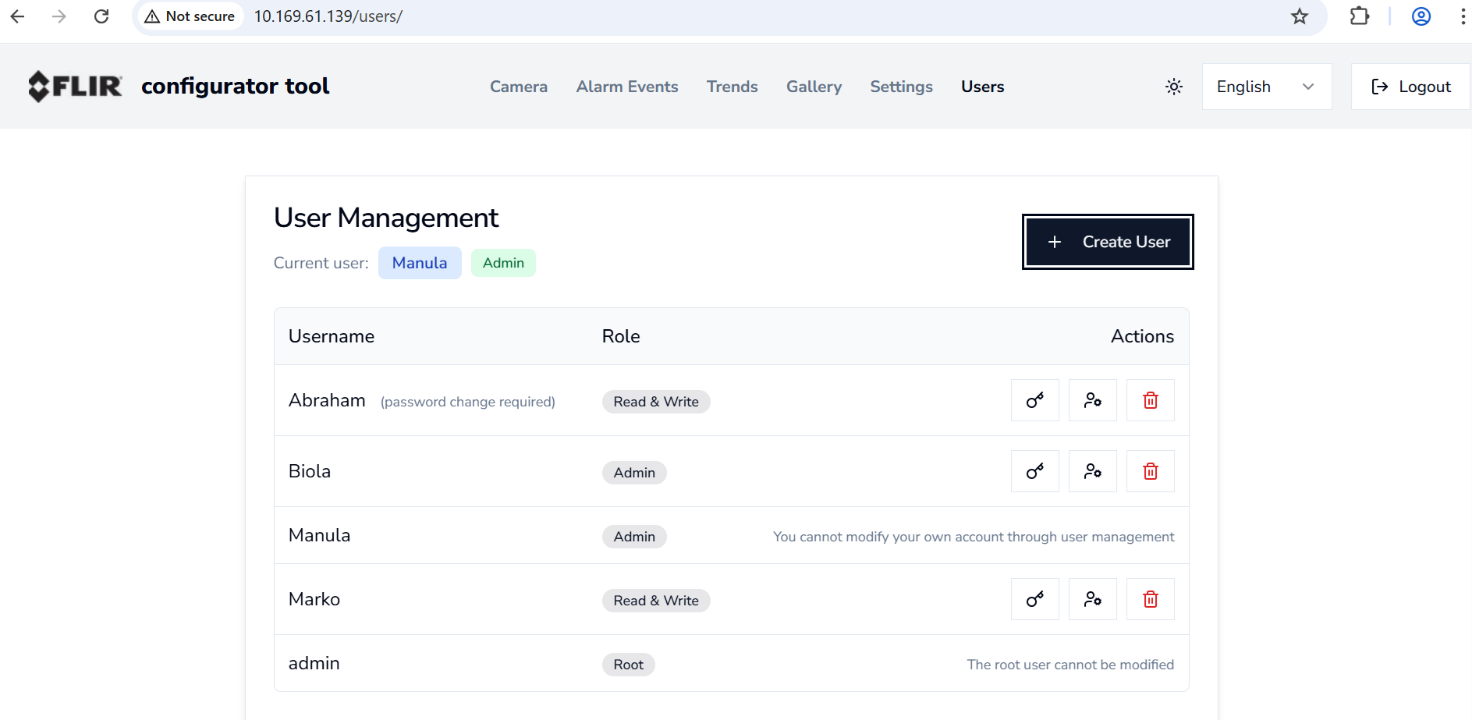
Figure 9. User management settings.