Live stream
This chapter describes how to live stream, record radiometric video, and control USB connected cameras.
Connect camera
On the computer, start FLIR Thermal Studio and select the Live stream tab.
Turn on the camera.
Connect the camera to the computer with a USB cable. This displays the Device connected dialog.
In the Device connected dialog, you can select to import all files, download all inspections, or view all files.
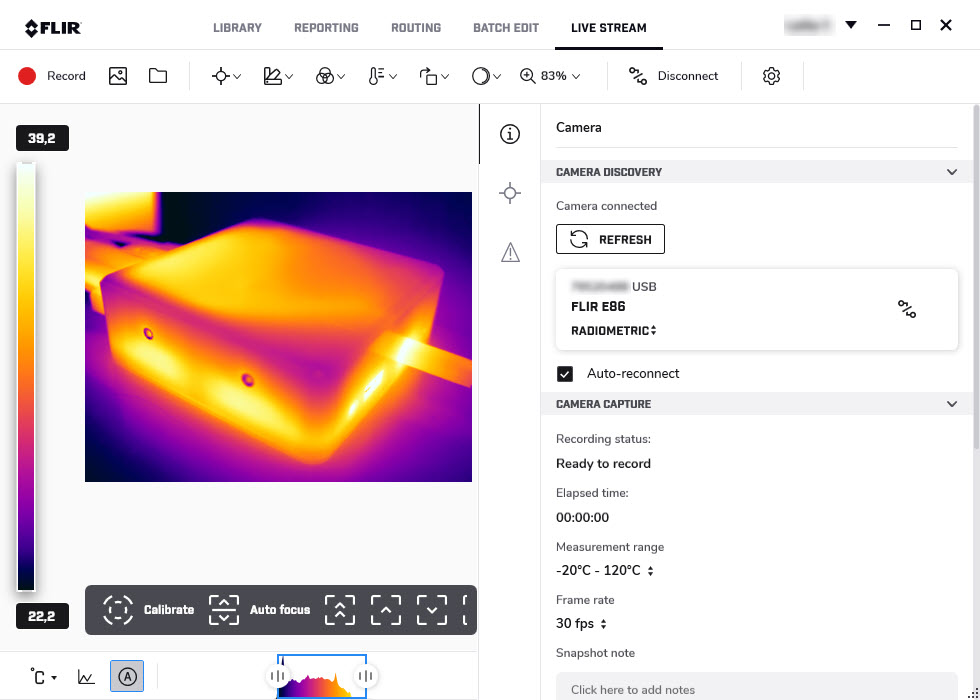
On the Live stream tab, select the camera and then click Connect. This displays the live image stream from the camera.
NoteClick Refresh to update the camera list.
If you select the Auto-reconnect check box, the camera will connect automatically next time.
Control camera
When the camera is connected, you can record radiometric video, save snapshots, calibrate the camera, and adjust the camera focus. There are also functions similar to the ones in the image editor, such as measurement tools, isotherm controls, and temperature scale adjustment.
Periodic saving (time-lapse)
You can set the camera to save images periodically (time-lapse).
The settings for the time-lapse is found in the right pane. The time interval between each saved image is defined by the Time-lapse (dd.hh.mm.ss).
Recording timer (dd.hh.mm.ss) sets the duration of time-lapse. The recording process begins when clicking the Record icon, and the camera captures images at regular intervals throughout the sequence.