Pre-installed apps
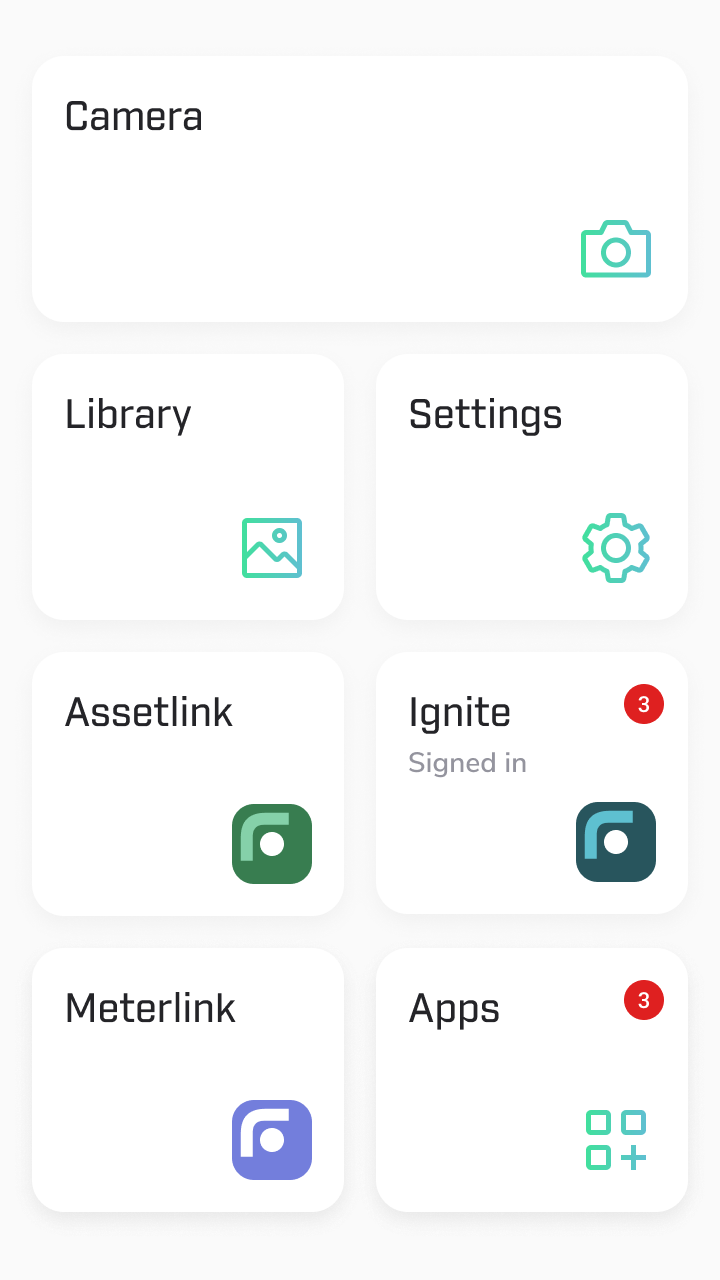
Camera
Library
Flir Ignite
Settings
Flir Apps
Flir Assetlink
Files
Camera
Image modes
The camera can capture thermal and visual images at the same time. In image mode, select which type of image to display on the screen.
The camera supports the following image modes:
Thermal MSX (Multi Spectral Dynamic Imaging): An infrared image where the edges of the objects are enhanced with visual image details.
Thermal: An infrared image.
Picture in picture: An infrared image frame is displayed on top of the visual image.
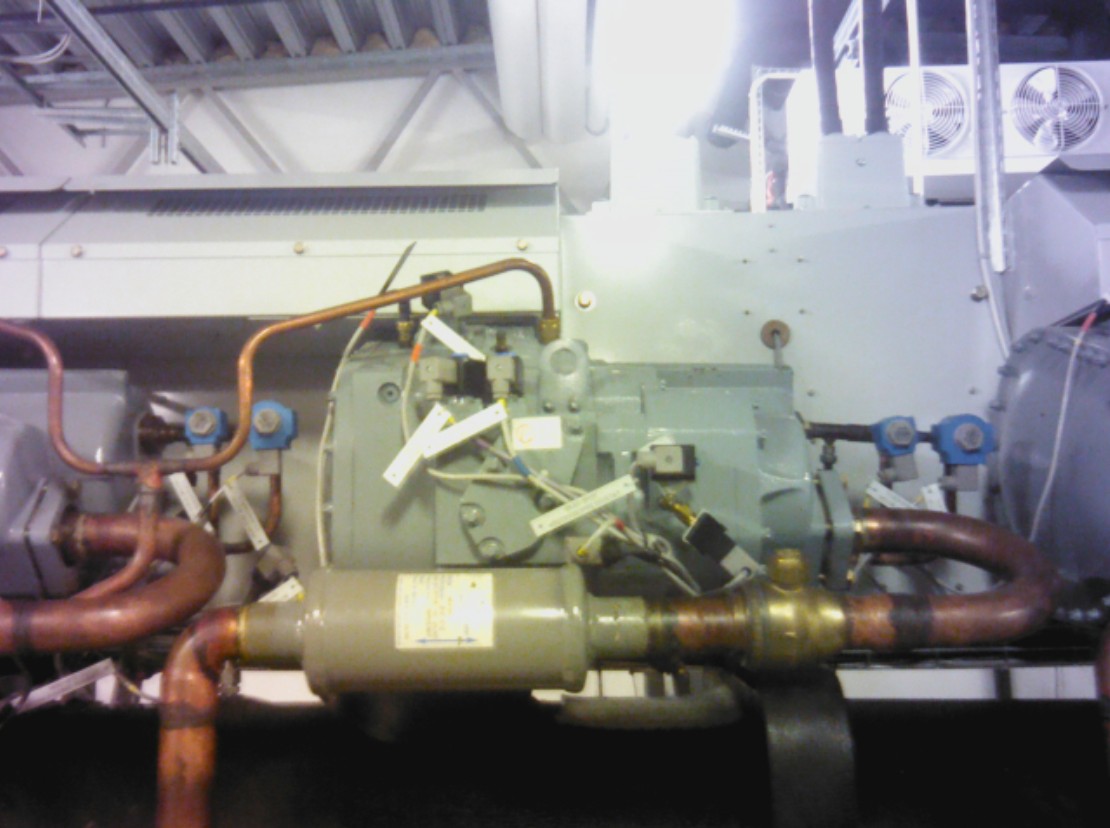
Digital camera: The visual image captured by the digital camera.
For the Thermal MSX, Thermal, and Picture in picture modes, all thermal and visual information is stored when an image is saved. This means that you can edit the image later, in the camera image library or in a Flir Thermography software, and select any of the image modes.
For the Digital camera image mode, a digital image with full resolution is stored when an image is saved. However, no thermal information is stored.
The following images are sample images only, they were not taken with an Flir iXX camera.
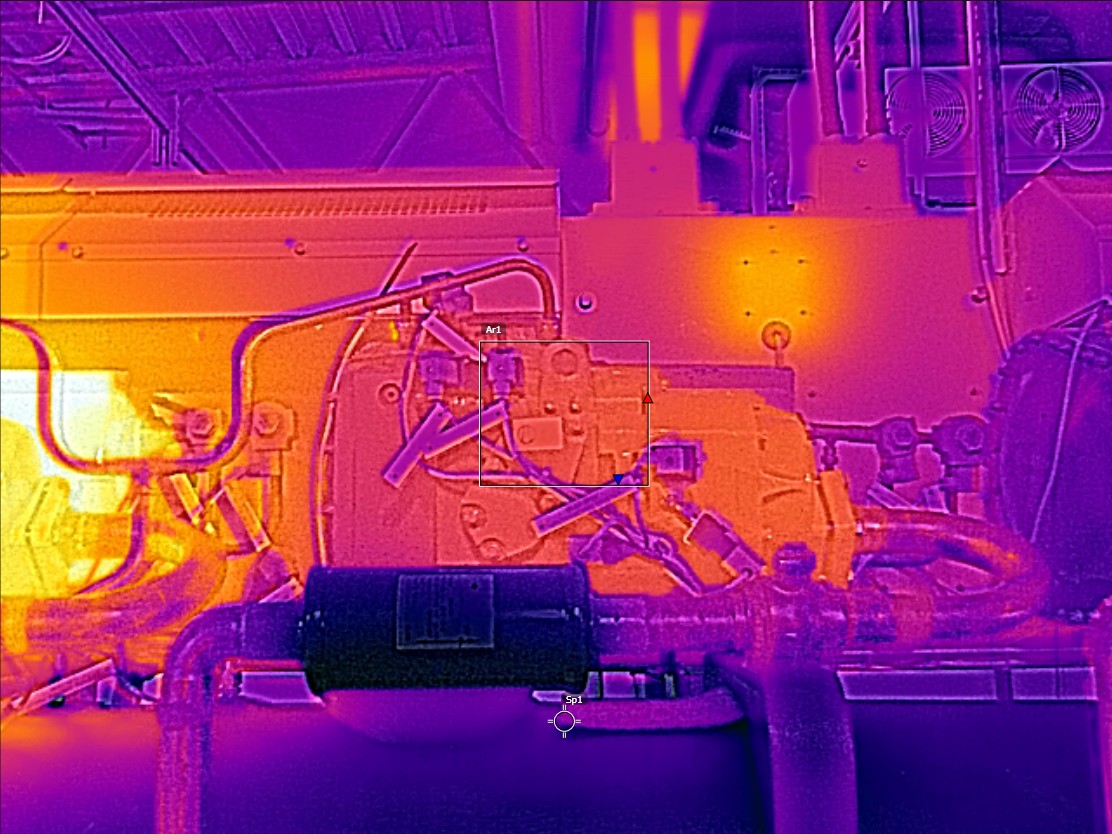
Thermal MSX |
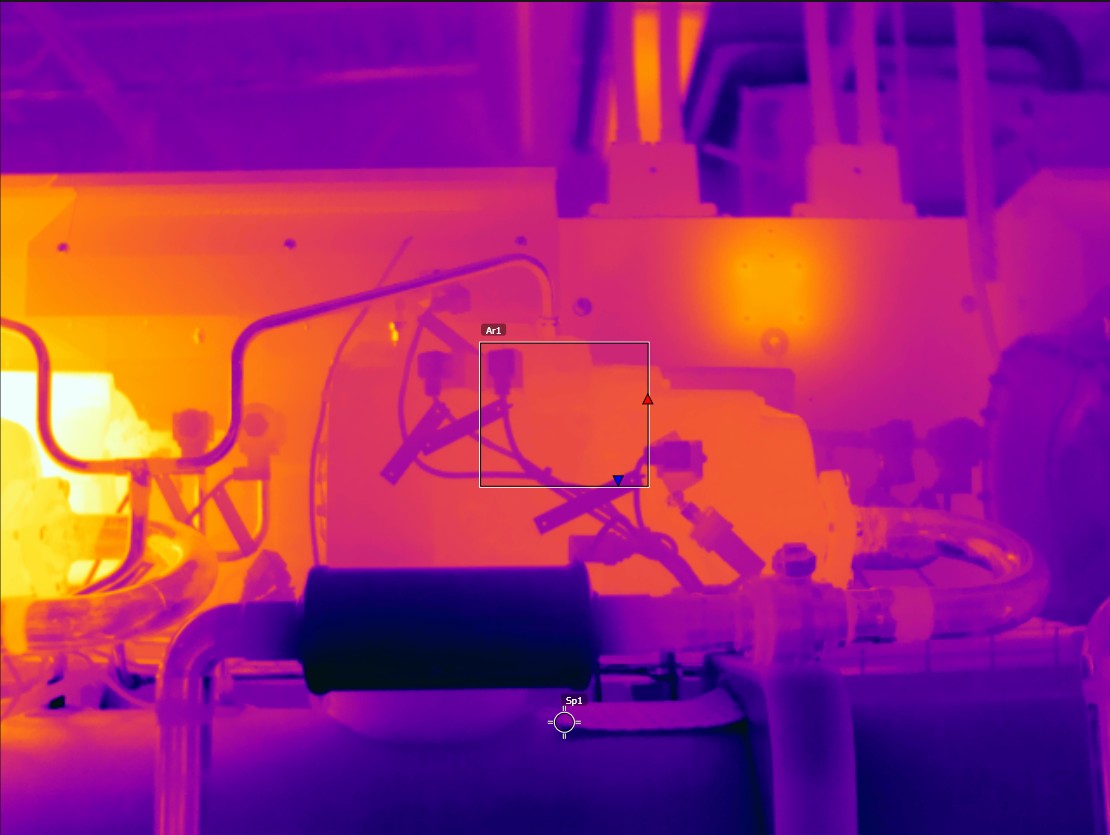
Thermal |
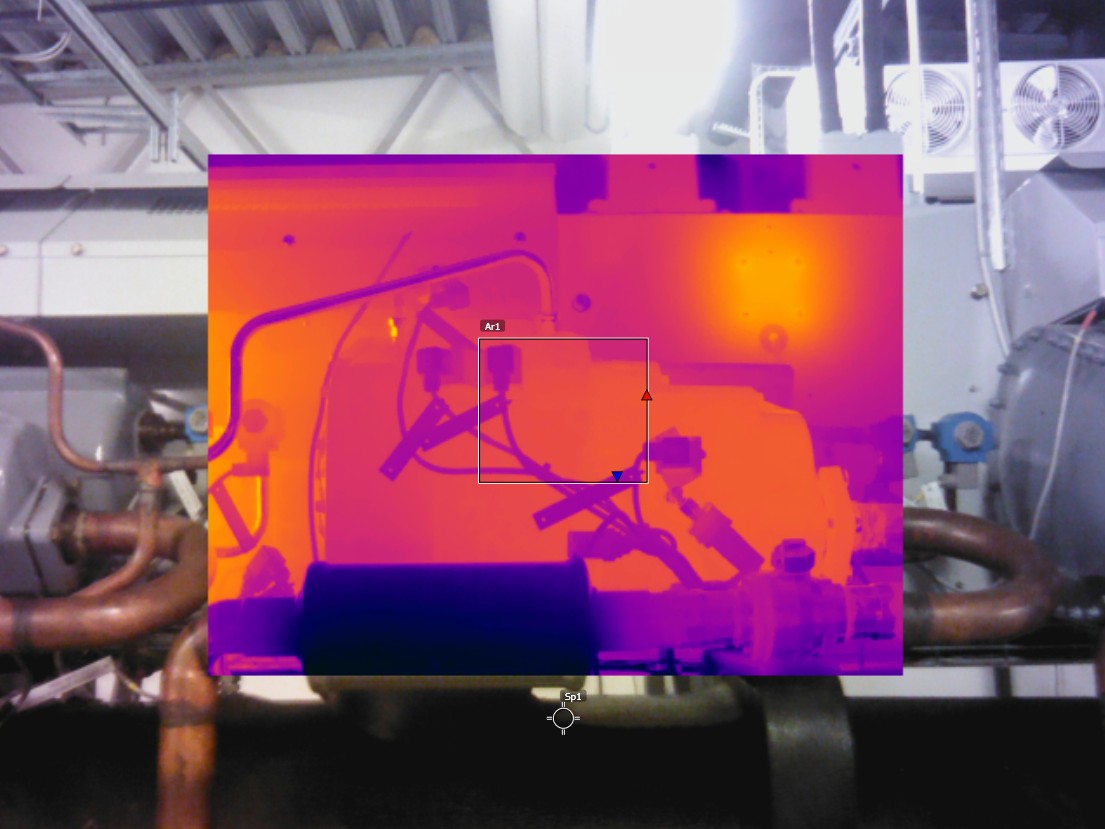
Picture in picture |
Digital camera |
Change image mode
On the main toolbar, select Image mode.
A new toolbar will show.
Select an image mode.
Align the thermal and visual images
In Thermal MSX and Picture in picture modes, the camera displays a combination of thermal and visual images.
To align the thermal and visual images, do the following:
Tap the distance indicator at the top of the screen.
Move the slider to align the images.
Measuring temperatures
Basic steps to temperature measurements
Select a temperature range that matches the expected temperature of the object you are inspecting.
Adjust the temperature scale manually or automatically, see section Thermal image adjustment, to detect anomalies and smaller temperature differences.
Select the color palette that best suits the situation.
For accurate temperature measurements, it is important to use appropriate measurement parameters.
Measurement tools
To measure a temperature, use different measurement tools, e.g. a spot or a box.
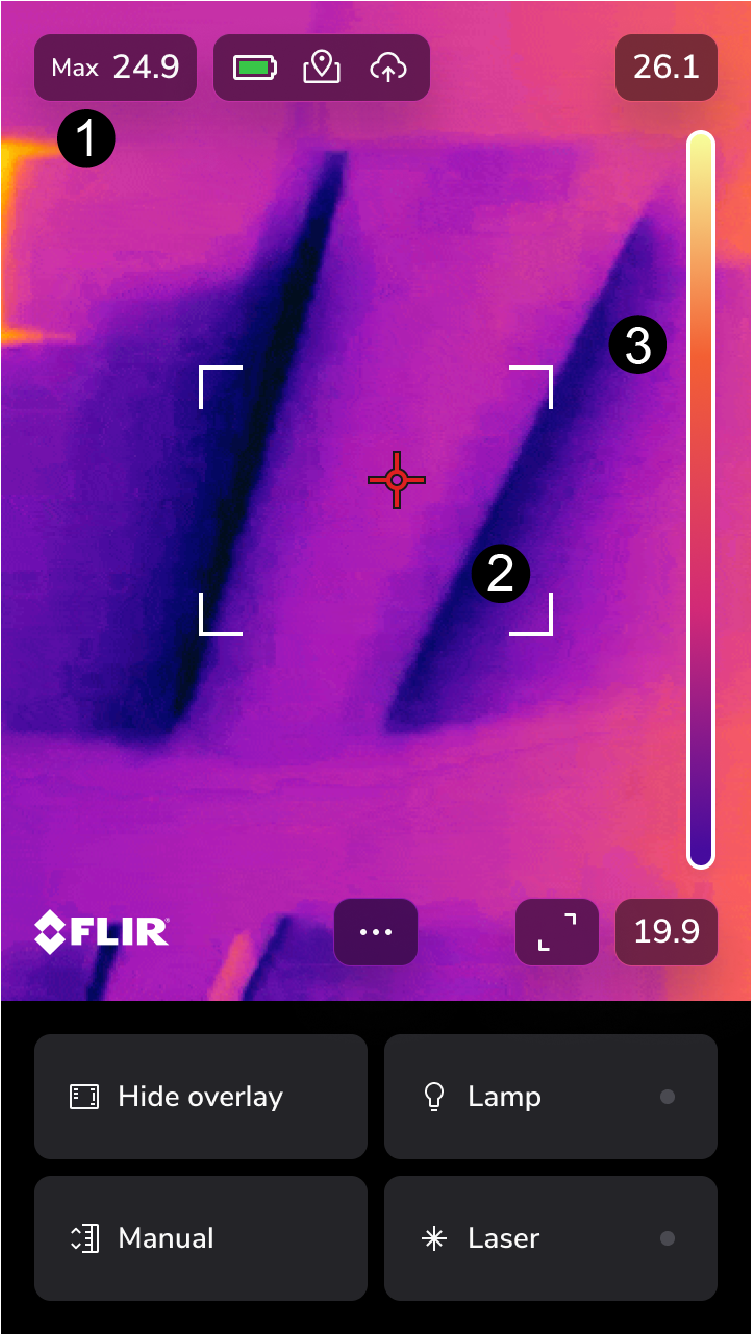
Result table
Hot spot box
Temperature scale
Move a spot
Activate edit mode by tapping the spot on the screen. The spot is now displayed with a handle.
Press the navigation pad or tap the Menu button. This displays a toolbar.
On the toolbar, do the following:
Select Move. Push the navigation pad up/down/left/right to move the tool.
It is also possible to use the touchscreen to move the spot and to resize the box.
Select Center to center the spot on the screen.
To exit edit mode, do one of the following:
Press the navigation pad and select Done.
Tap the screen outside the tool.
Thermal image adjustment
Thermal image adjustment, or thermal tuning, means adjusting a thermal image in order to maximize the brightness and contrast in the image.
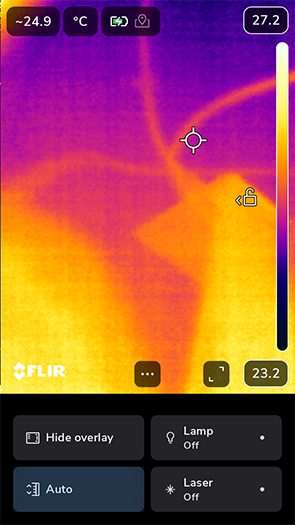
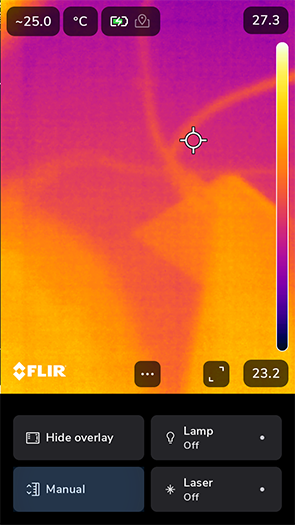
In automatic mode, the camera continuously adjusts the image for the best presentation. If needed, adjust the temperature scale in manual mode to get more contrast.
The following images are sample images only, they were not taken with an Flir iXX camera.
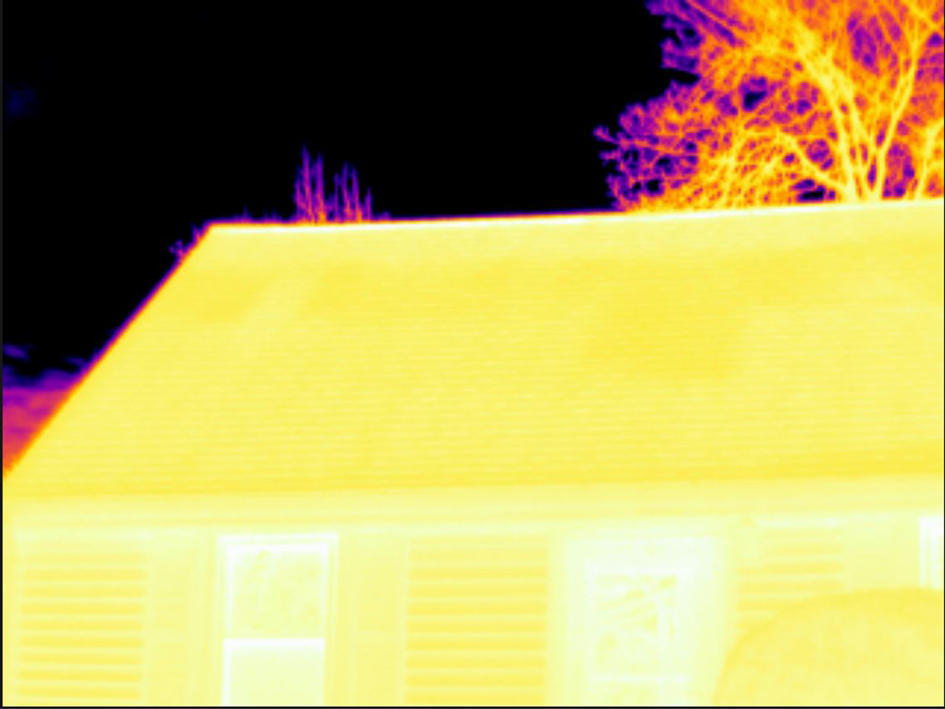
Automatic |
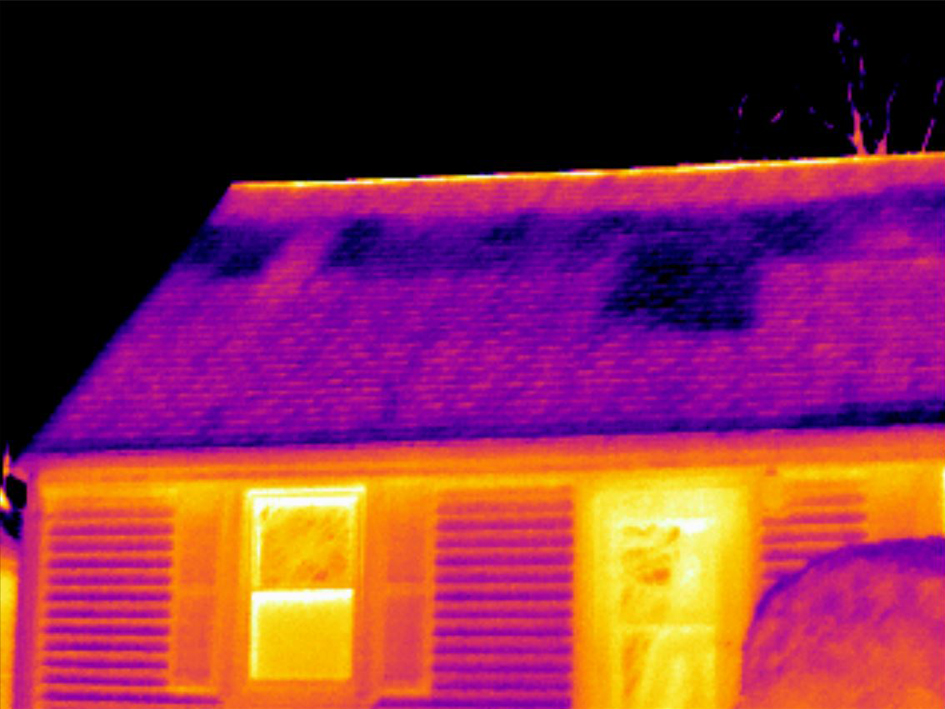
Manual |
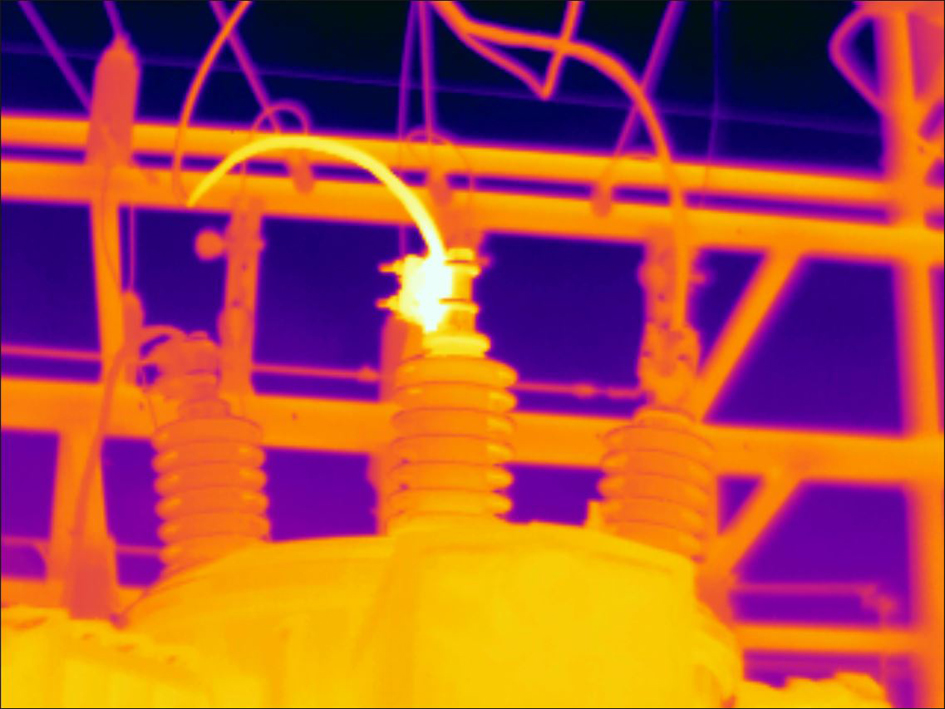
Automatic |
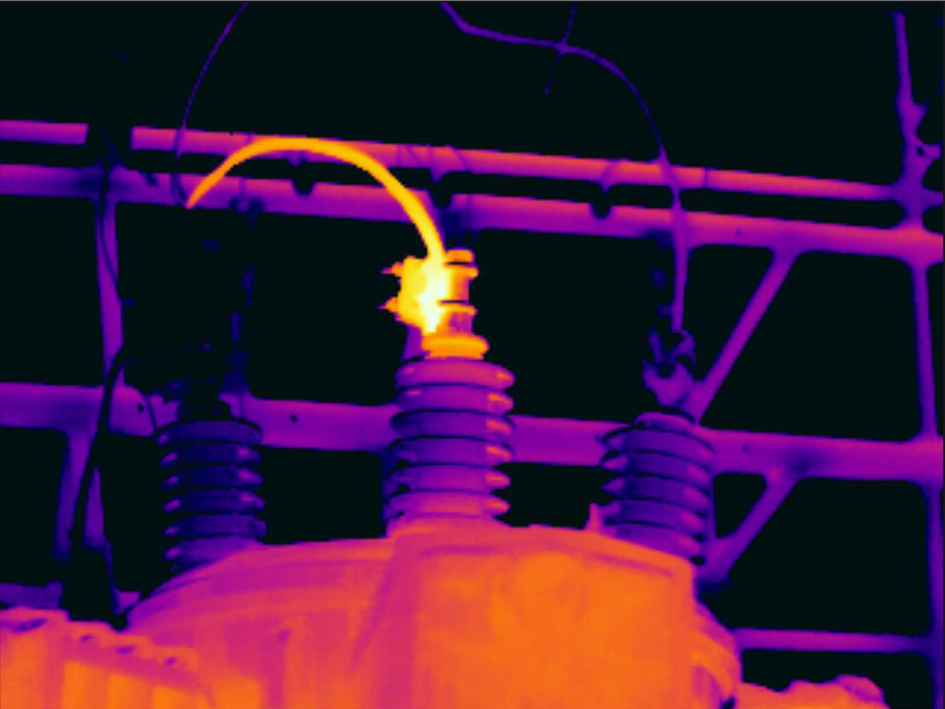
Manual |
Change mode
To change the image adjustment mode:
Open the main toolbar.
Select Image adjustment.
Select Auto or Manual
Manual adjustment by touching the screen
When manual mode is active, an adjustment wheel is displayed to the right of the temperature scale.
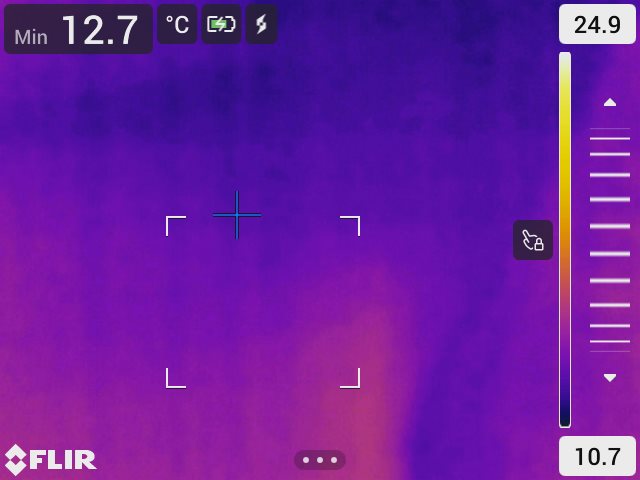
To manually adjust the image, do the following:
To enter manual adjustment mode, select Image adjustment > Manual on the main toolbar.
To simultaneously change the maximum and minimum limits of the temperature scale, place your finger on the screen and move it up/down.
To change the maximum or minimum limit, do the following:
Tap the maximum or minimum temperature.
Place your finger on the screen and move it up/down to change the value of the highlighted temperature.
or
Press the Up/Down/Left/Right buttons.
1-Touch Level/Span
In manual mode, auto-adjust the image by touching the screen. The image will be auto-adjusted based on the thermal content of the area around the touched point. The top and bottom levels in the temperature scale will be set to the maximum and minimum temperatures in that area.
Use only the color information for relevant temperatures to get more information in your area of interest.
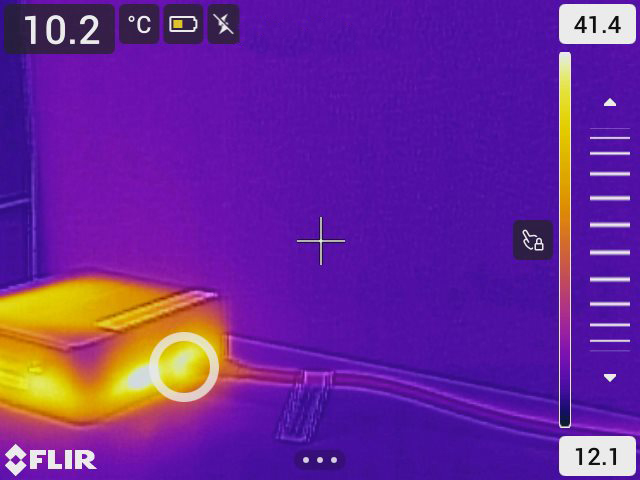
Lock touch screen
When the image is adjusted to levels that allow the area of interest to be studied, lock the touchscreen to prevent further accidental adjustments.
To lock/unlock the screen, tap the icon to the left of the temperature scale.
If you switch to automatic mode, the screen automatically unlocks and your manual adjustments are lost.
Color palettes
The camera supports a number of different color palettes. Frequently used palettes include the iron, white hot, and rainbow palettes.
The iron palette is intuitive and also easy to understand for those without much experience in thermography. It offers a good balance between geometric and thermal resolution.
The rainbow palette is colorful and alternates between light and dark colors. This results in greater contrast, but this can lead to a noisy image for objects with different surfaces or many temperatures.
White hot are particularly suited to resolving small geometric details, but are less suited to display small differences in temperature.
The following images are sample images only, they were not taken with an Flir iXX camera.
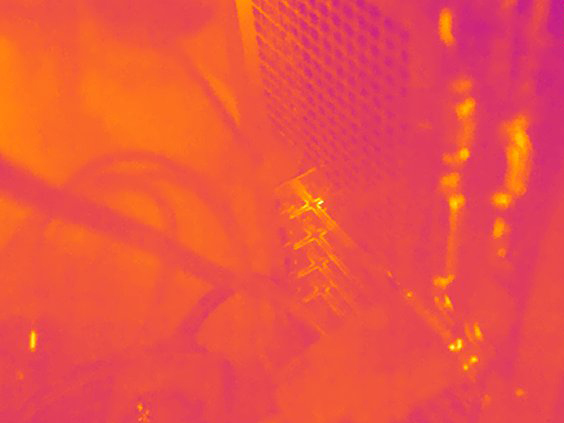
Iron |
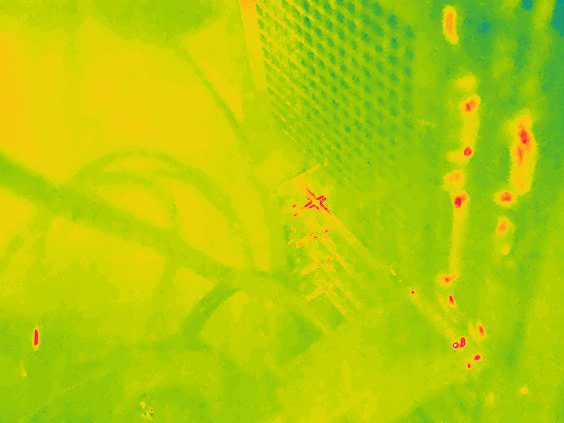
Rainbow |
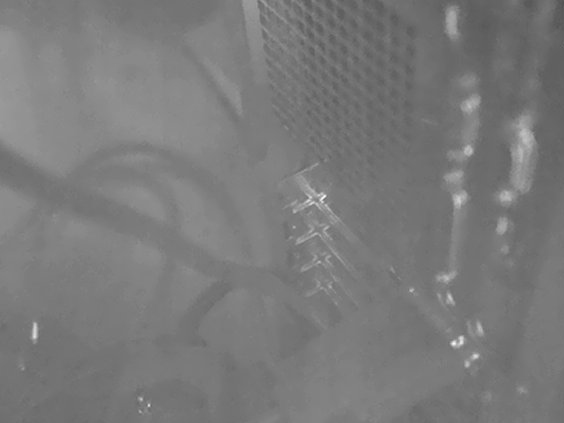
White hot |
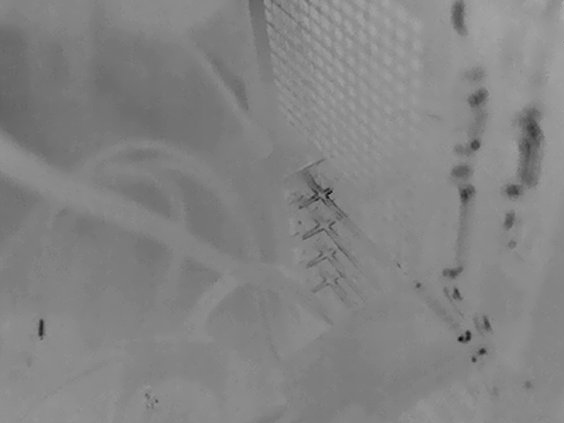
Black hot |
Above and Below
By using Above and Below (isotherms), anomalies can easily be discovered in an infrared image. The isotherm command applies a contrasting color to all pixels with a temperature above or below the specified temperature level.
The following images are sample images only, they were not taken with an Flir iXX camera.
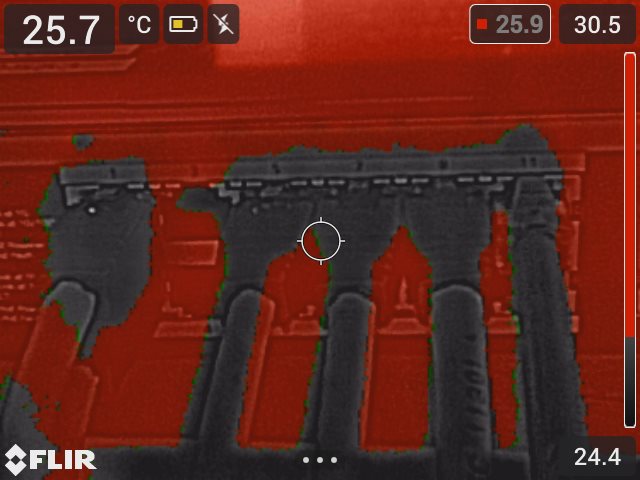
Above alarm: Highlights all pixels with a temperature above the specified temperature level. |
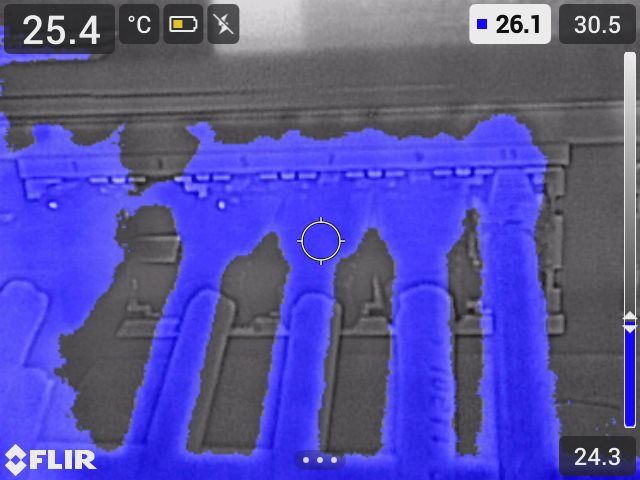
Below alarm: Highlights all pixels with a temperature below the specified temperature level. |
Measurement parameters
The single most important parameter to set is Emissivity. This parameter determines how much of the radiation comes from the object being inspected. If the value is 1, all radiation comes from the object. If the value is 0 all radiation that the camera sees comes from other objects that is reflected in the object.
Emissivity: The emissivity determines how much of the radiation originates from the object as opposed to being reflected by it. There are three settings: Values (default), Materials and Surfaces.
Reflected temperature: The temperature of objects that are reflected in the object under inspection. This value is important if the emissivity is low.
Relative humidity: The relative humidity of the air between the camera and the object of interest.
Atmospheric temperature: The temperature of the air between the camera and the object of interest.
Distance: Distance deals with atmospheric absorption and has an effect on larger distances.
External IR window compensation must be activated if a protective window or external lens is used.
Recommended values
The following values are recommended:
|
Emissivity |
0.95 |
|
Reflected temperature |
+20°C (+69°F) |
|
Relative humidity |
50% |
|
Atmospheric temperature |
+20°C (+69°F) |
|
Distance |
1 m (3.3 ft.) |
Operate the laser pointer
Do not look directly into the laser beam. The laser beam can cause eye irritation.
The laser pointer must be enabled in settings before it can be used. Go to Settings app > Lamp & laser > Enable lamp & laser.
The laser pointer may not be enabled in all markets.
To operate the laser pointer, do the following in the Camera app:
To turn on the laser, tap laser at the bottom of the screen, the indicator will show On (green dot).
To turn off the laser pointer, tap laser at the bottom of the screen, the indicator will show Off (grey dot).
The laser icon (
 ) is displayed on the screen when the laser pointer is
on.
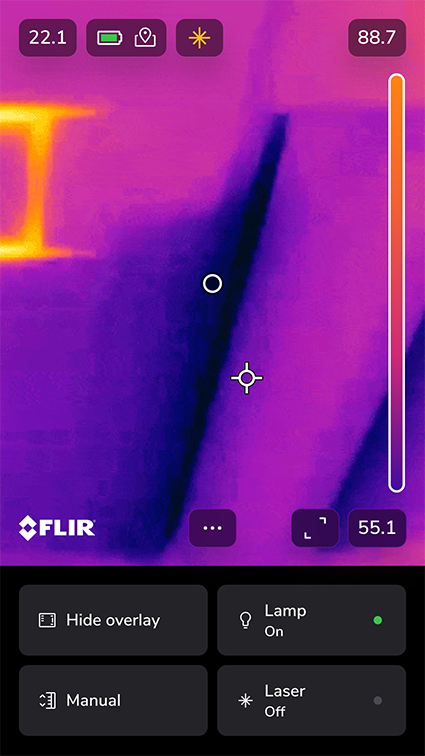
Performing a NUC manually
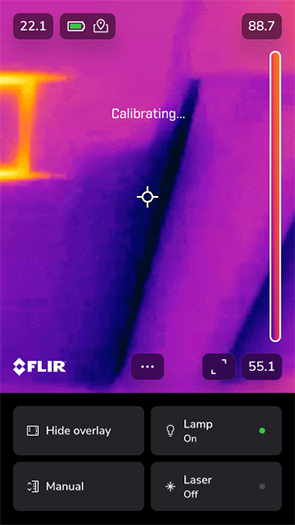
To perform a manual NUC, push and hold down the Manual/Auto button.
|
|
|
Performing a NUC is typically not needed during normal operating procedures. The NUC should be performed against a uniform temperature scene such as the camera lens cap. The temperature of the uniform scene (e.g. the lens cap) needs to be within the selected measurement range to be able to perform a NUC, otherwise the present image will create an artifact that will appear as a superimposed ghost image. Make a new NUC towards a uniform scene or restart the camera.
Task switch
With Task switch it is easy to switch between apps and close apps running in the background.
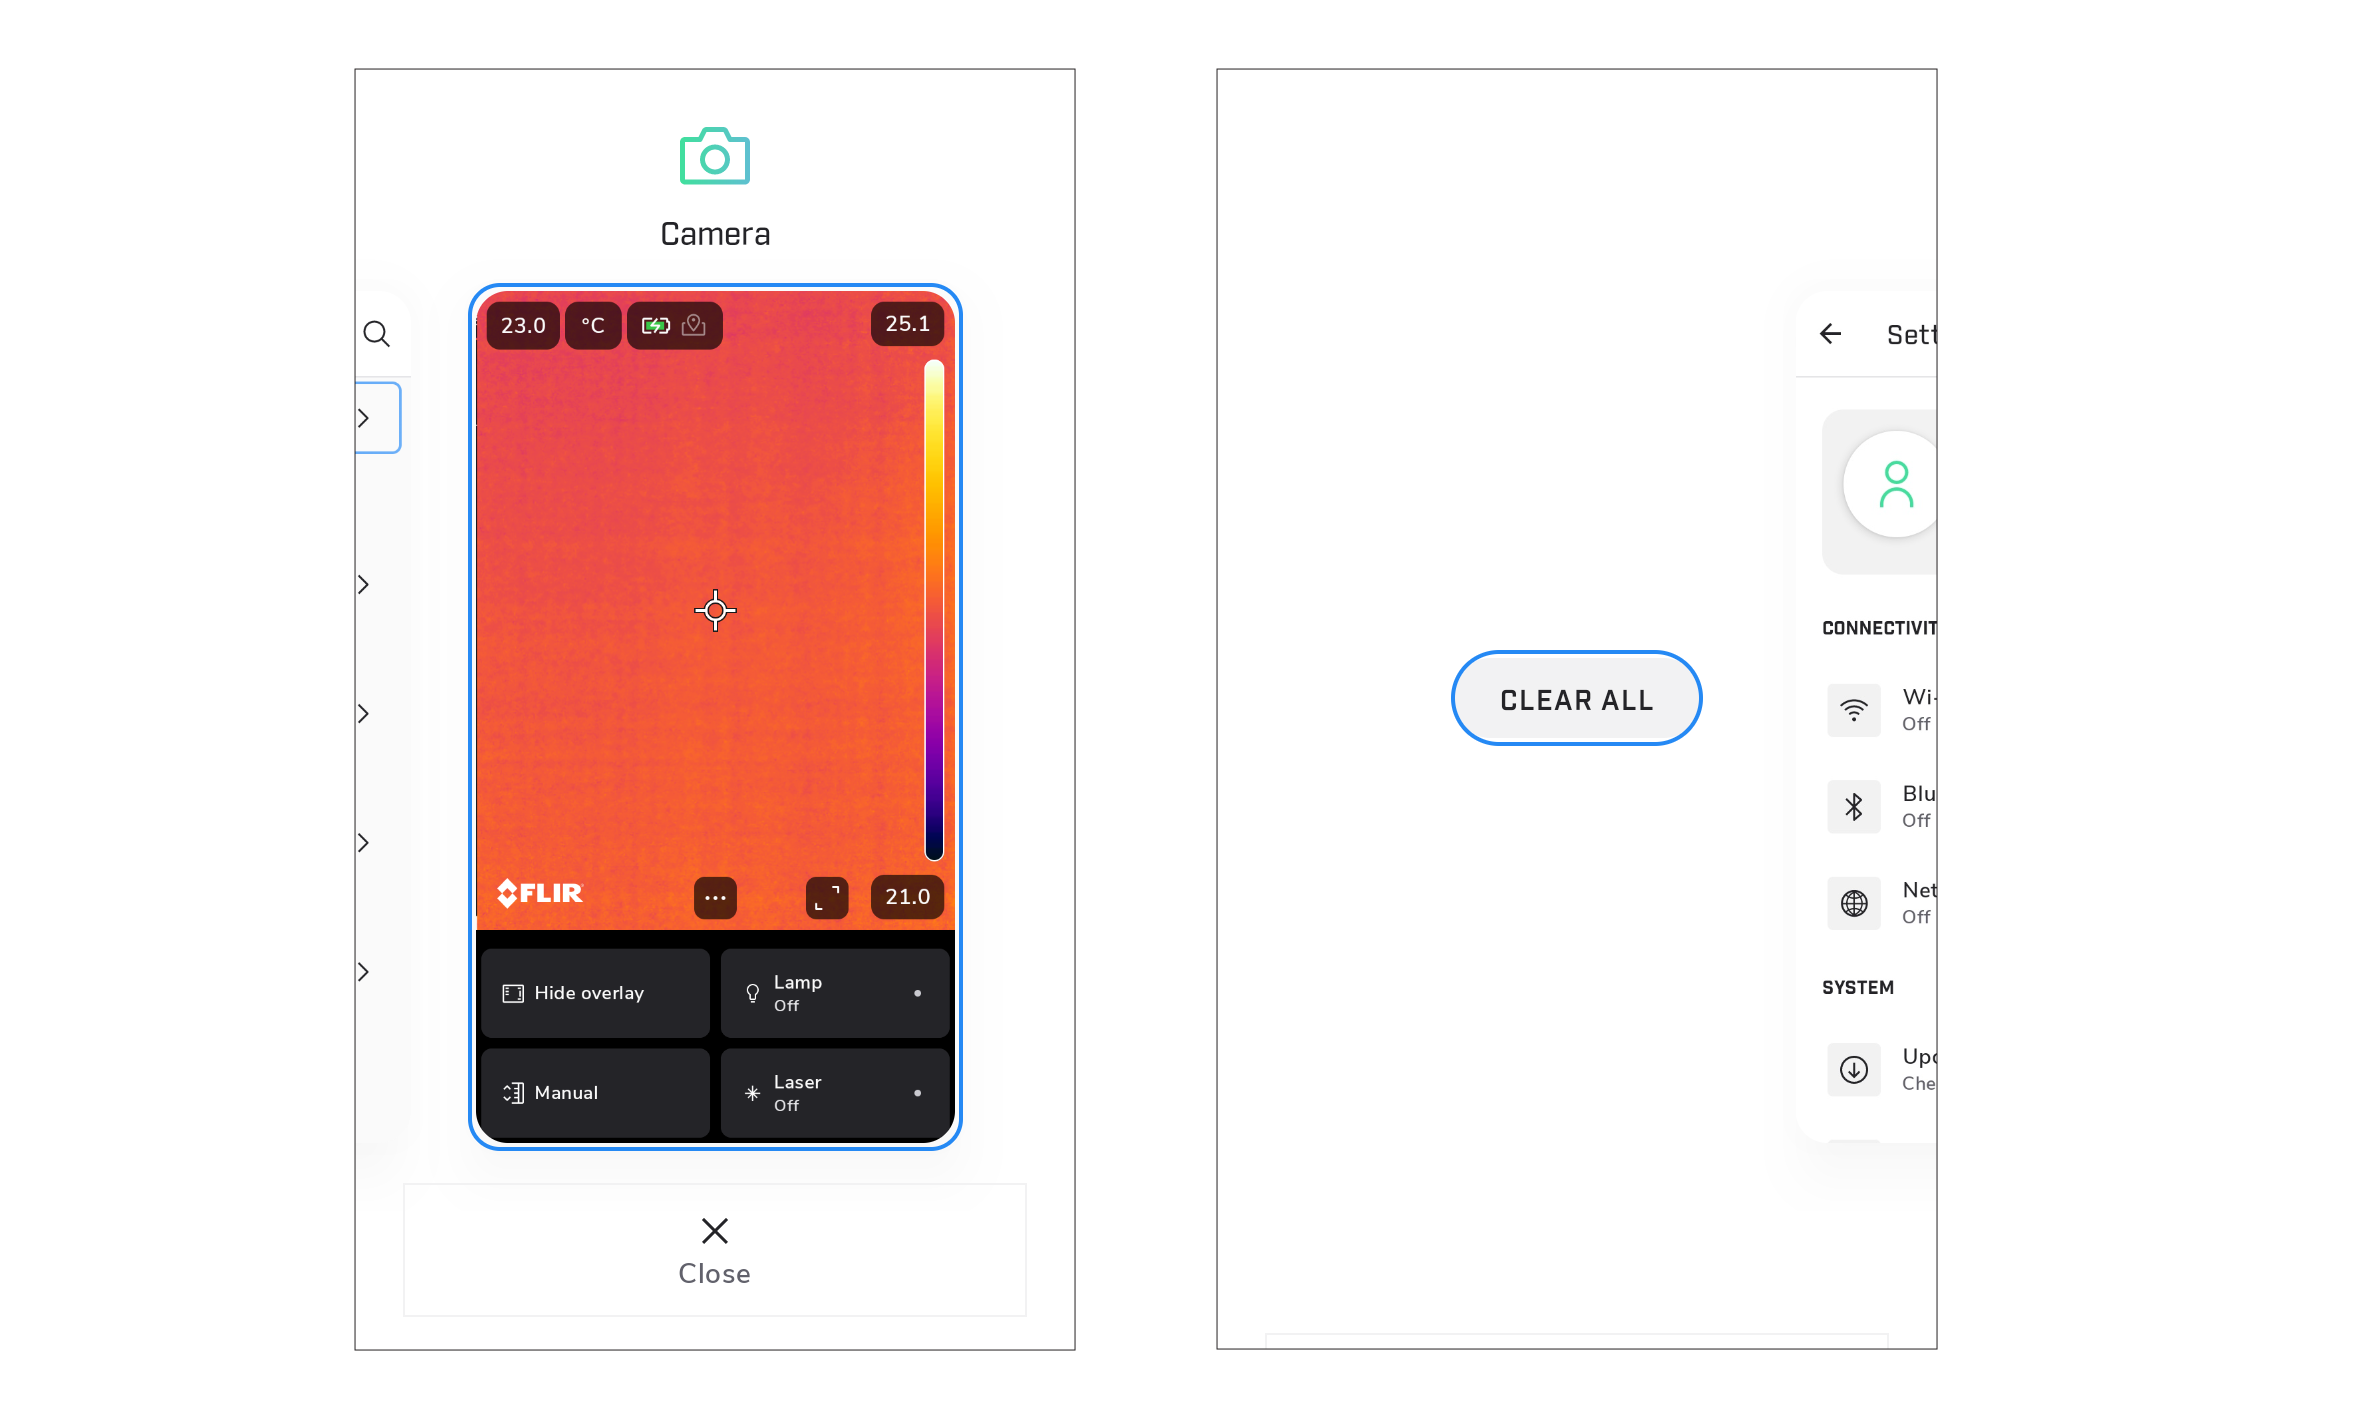
Double-click the camera home button.
Use the D-pad, up, down, left, right and select buttons on the camera to close an app or switch to another.
Meterlink
Use Meterlink to keep track of important readings around your facility and easily share them with your team.
Activate Bluetooth on the camera
Open the settings app.
Activate Bluetooth.
Open Meterlink
Open the Camera app.
Click on the Bluetooth icon on the screen.
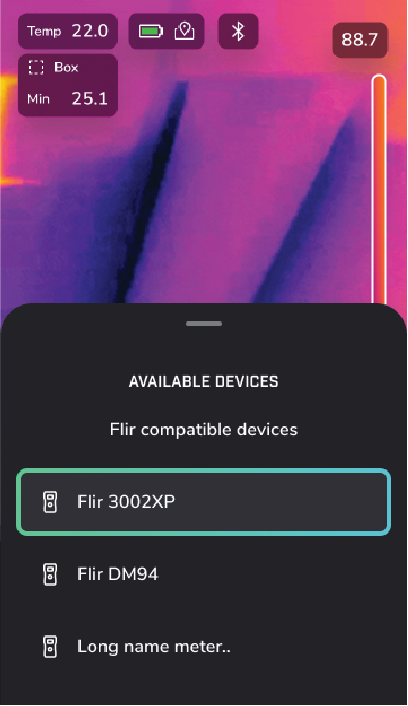
A list of nearby devices opens.
Select one or several devices.
The unit value is displayed in the camera screen.
Press the Trigger button to take an image.
The image is saved in the Library app.
Open the Library app to view or edit the image.
Disconnect the device
Click on the Bluetooth icon on the screen.
A list of devices opens.
Click on the trash can to disconnect the device.
Library
In the camera, the image archive is called Library. The Library can include one or several folders. New images will be saved to the active folder, at the top level of the Library app.
Open image files
Go to a folder in the Library app.
Select the image you want to view.
Tap the left/right icon to view the previous/next image.
Select the IR or DC icon to switch between the thermal image and visual image.
Select the pen icon at the top of the screen to edit the image.
Add a folder
Select
 to display the top toolbar.
Select Add folder.
Enter a folder name and press the center pad (or tap the checkmark icon).
The new folder automatically becomes the active folder and appears at the top in the Library app.
Rename a folder
Select
to display the top toolbar.Select Select.
Select the folder to rename.
Select
.Select Rename.
Change the active folder
New images are saved to the active folder.
Select
to display the top toolbar.Select Select.
Select the folder that new images should be saved to.
On the right toolbar, select
 .
The selected folder is moved to the top of the Library.
Move files between folders
Go to a folder in the Library app.
Select
.Select the files you want to move.
On the right toolbar, select
 .
Select the destination folder.
Upload files and folders
You can manually upload images and folders to your Flir Ignite account when the camera is connected to the internet. For more information, see section Manual upload.
Delete files and folders
Delete folders
Select
to display the toolbar.Select Select.
Checkmark the folder to be deleted.
Select
and click Delete.
Delete a file
Open the file in the Library app.
Select
and click Delete.
Delete multiple files
Go to a folder in the Library app.
Select
.Select Select.
Checkmark the images(s) to delete.
Select
and click Delete.
Alternatively:
Go to a folder in the Library app.
Select
and click Select
all.Click Delete.
Edit a saved image
Open an image.
On the top toolbar, select
 . This opens the image in edit mode.
Adjust level/span (changing max./min. limits of the image).
Click on the three dots. This displays a toolbar, where you can do the following:
Exit edit mode.
Change the measurement parameters.
Change the image mode.
Add a measurement tool.
Change the color palette or set a color alarm.
Save and exit edit mode.
To get the edited image stored online, make a manual upload of the image. See section Manual upload.
Settings
In the Settings app, you can set the camera to your preferences and view information about your camera.
The Settings app includes the following:
Flir Account
Firmware updates
Language
Date/Time
Display settings
Battery & power saving
Storage
Geolocation
App settings.
Temperature unit
Distance unit
Temperature range
Lamp & laser
Overlay information
Save options
Wi-Fi
Bluetooth
Network (only applies to camera models with LTE)
Register camera
About camera
Reset options
Product improvement
USB Preferences (when connected to USB)
Developer options (when enabled)
Screen lock
Keyboard
Flir Account
Sign in to Flir Account and view information about the Flir Ignite account the camera is paired with.
Enable/disable automatic upload of images.
For more information about Flir Ignite and online storage of images, see section Flir Ignite.
Firmware updates
Check for updates and install new firmware versions. The camera must be connected to the internet. See section Update the Camera.
Language, time & units
Select the language, units, date and time formats to be used in the camera.
Display settings
Color theme: Select light or dark theme for the user interface.
Screen brightness: Adjust the brightness of the screen.
Screen timeout
The period of inactivity before the camera enters standby mode.
Temperature range
Go to Temperature range.
Select a temperature range that matches the expected temperature of the object to be inspected.
Lamp and laser
The laser pointer must be enabled in settings before it can be used, Settings app > Lamp & laser > Enable lamp & laser.
The laser pointer may not be enabled in all markets.
To operate the laser pointer, see Operate the laser pointer.
Save options & storage
Photo as separate JPEG: A visual image is always saved in the same JPEG file as the thermal image.
Add note after saving: The note tool will be displayed when an image has been saved.
Wi-Fi
Connect the camera to a Wi-Fi network as part of the initial setup of the camera or at any time via the Settings app:
In the Settings app, scroll down to Connectivity.
Select Wi-Fi.
Turn on Wi-Fi.
Select one of the available networks.
NotePassword-protected networks are indicated with a padlock icon and will require a password the first time you connect to the network. After that, the camera will automatically connect to the network. To disable the automatic connection, select the network in the list and then select Forget network.
Some networks do not broadcast their existence. They appear in the list as Untitled. To connect to such a network, choose Connect manually.
Register camera
Register the camera to receive an extended warranty and other benefits.
See section Register the camera
About camera
Information about the camera and regulatory information.
Camera information menu
To get to the camera information menu:
In the home menu, select Settings.
Select About camera > Camera information.
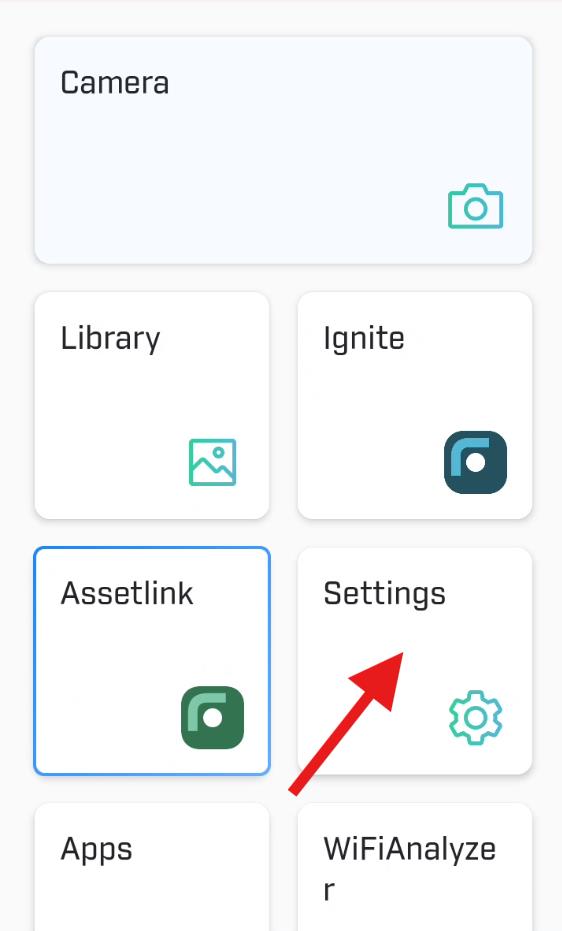
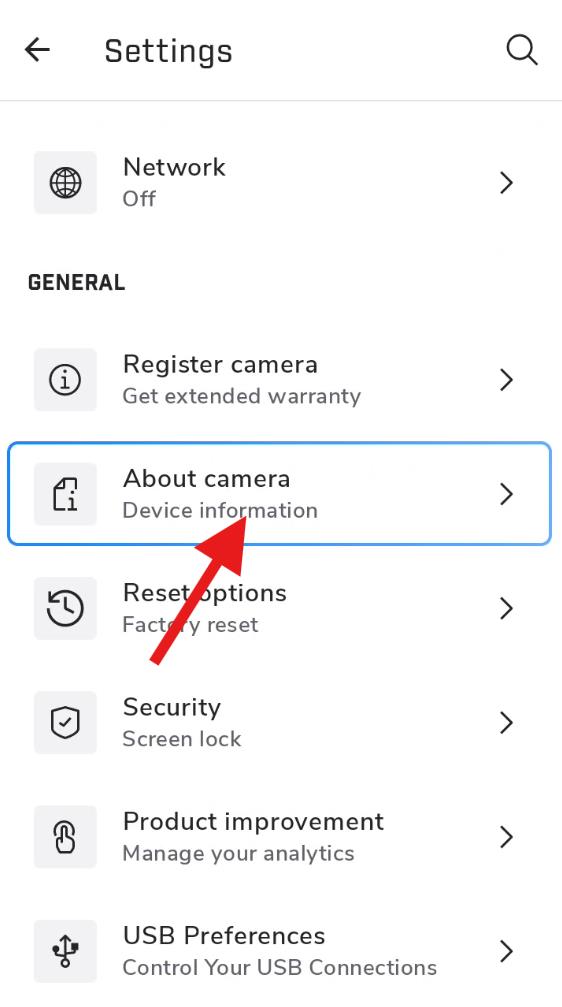
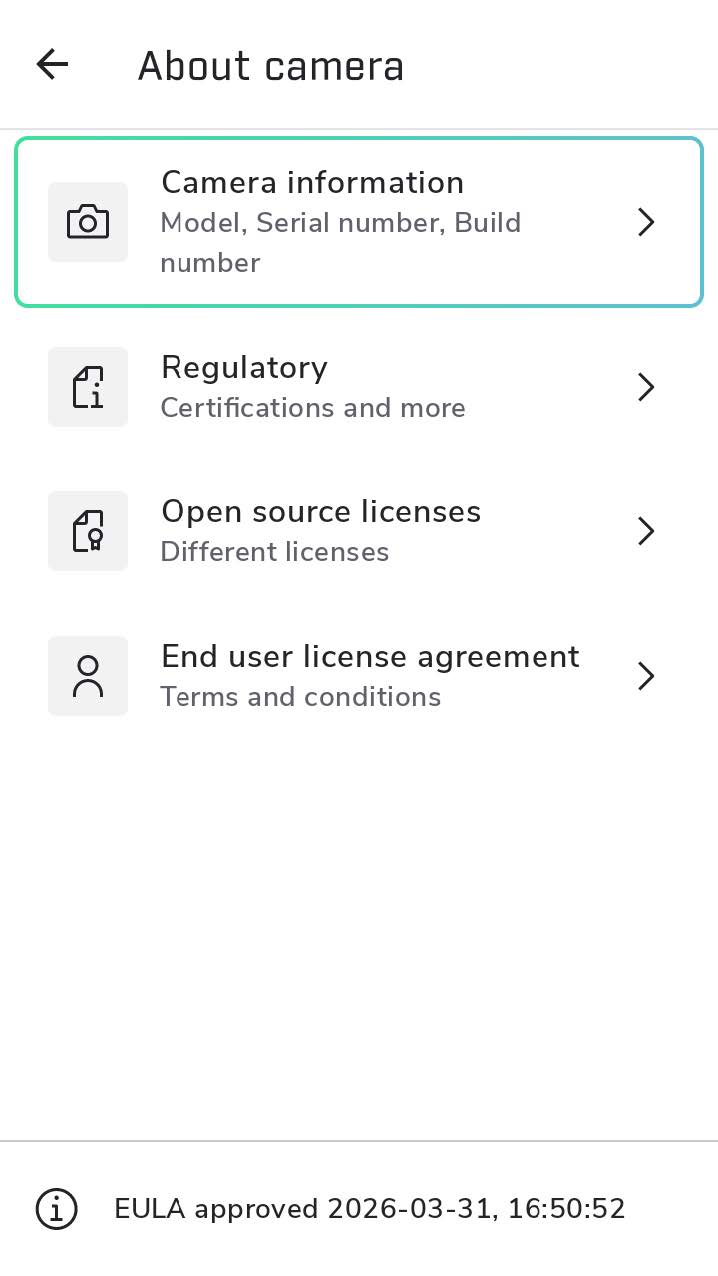
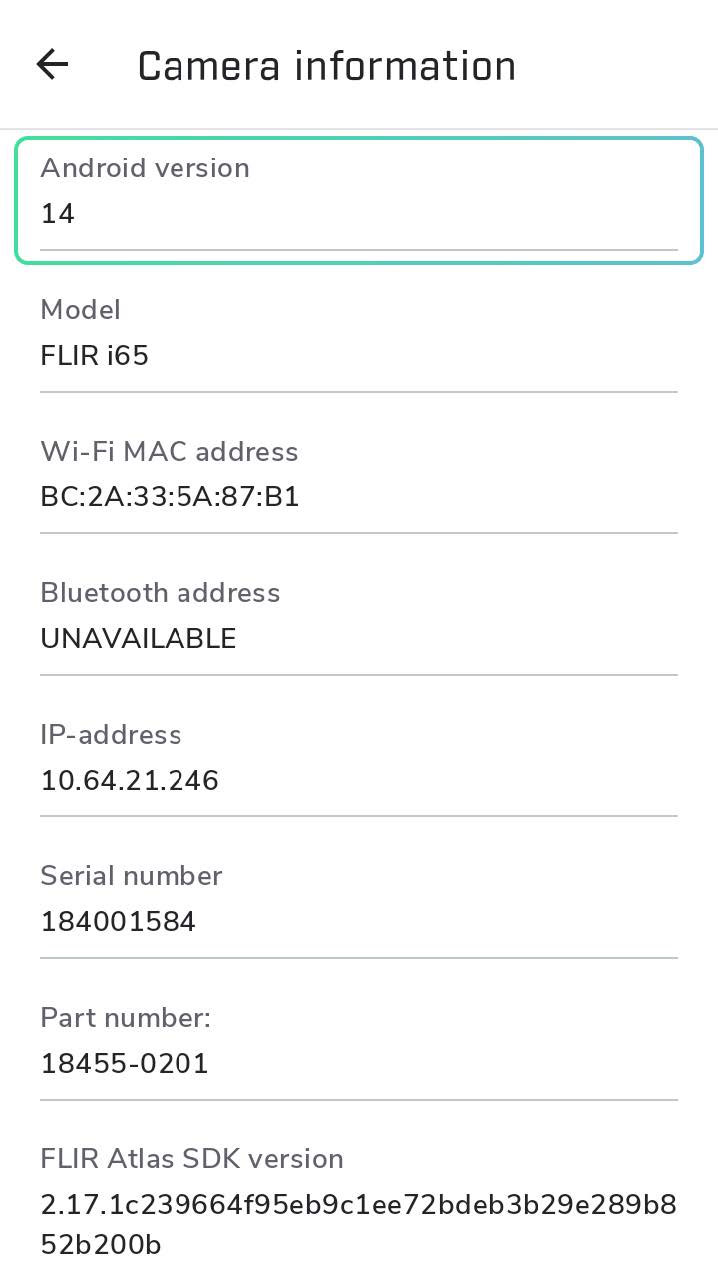
Figure 1. Camera information.
Regulatory menu
To get to the regulatory menu in the camera:
In the home menu, select Settings.
Select About camera > Regulatory.
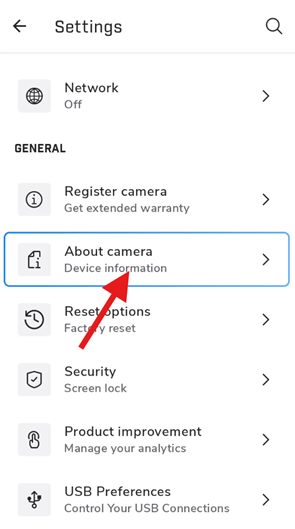
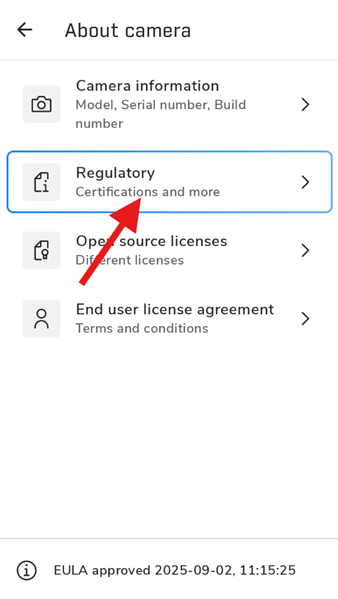
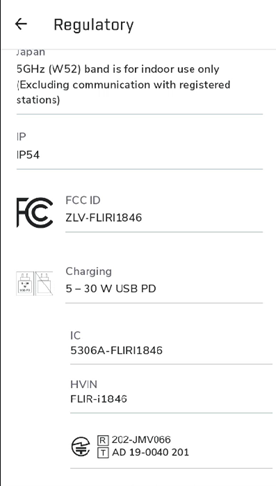
Figure 2. Regulatory menu.
Reset options
Reset camera and Reset image counter.
Reset camera: Resets all camera settings, including regional settings. Removes all images, downloaded apps, and files from the device. The camera restarts and prompts you to set the regional settings.
Reset image counter...: Resets the image numbering. The next image number is based on the highest existing number in the image archive.
NoteWhen you select a reset option, a dialog box shows more information. Select whether to continue with the reset or cancel the action.
Flir Assetlink
Flir Assetlink is a platform that help users plan and follow specific routes during inspections. It helps to make sure that all necessary areas are inspected efficiently and consistently and enables users to compare current asset performance with previous results.
To use Flir Assetlink you need a Flir Assetlink account. To create an account, go to https://assetlink.flir.com and click Sign in.
To learn more about Flir Assetlink and read the user manual go to https://docs.flir.com.
Download route with iXX camera
Download route with Wi-Fi
Make sure the camera is connected to Wi-Fi and paired with an Flir iXX account, see .
Open the Flir iXX app.
Select ADD ROUTES.
Select an organization, if available.
Select a workspace, if available.
Select a site.
A list of routes opens.
Click the download icon to download selected routes.
In the camera, open Route to find the downloaded route.
Download route with USB cable
Connect the USB-C cable from the computer to the camera.
Open Settings > USB preferences > File transfer.
Save the route on the camera.
Do an inspection with the Flir iXX camera
Select a route to inspect from the available routes.
Click CREATE NEW INSPECTION, to start a new inspection.
or
Select an ongoing inspection.
Select INSPECT to start an inspection.
The camera goes live.
Tap the reference image in the corner of the screen to view the image in picture in picture mode. The infrared image overlays the visual image, which makes it easy to compare the two images.
A reference image is available only after you complete the inspection and upload it to Flir Assetlink. You must then download the route back to the camera.
The reference image menu will appear.
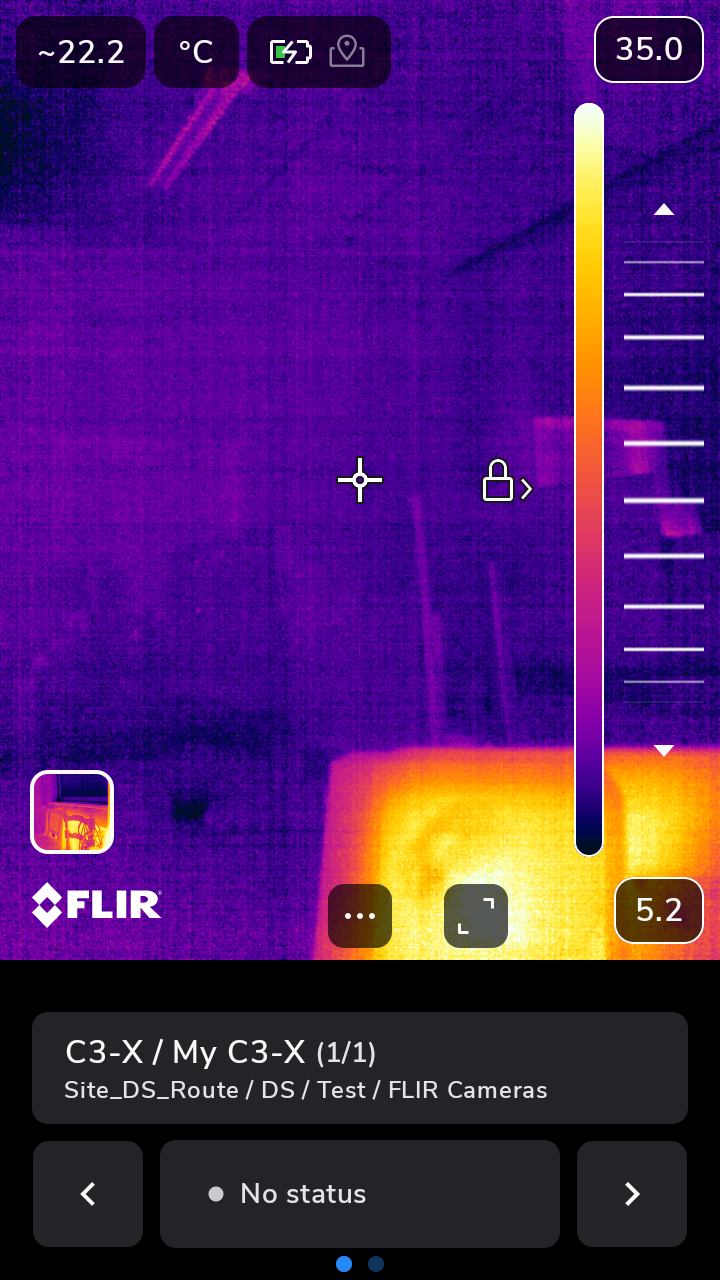
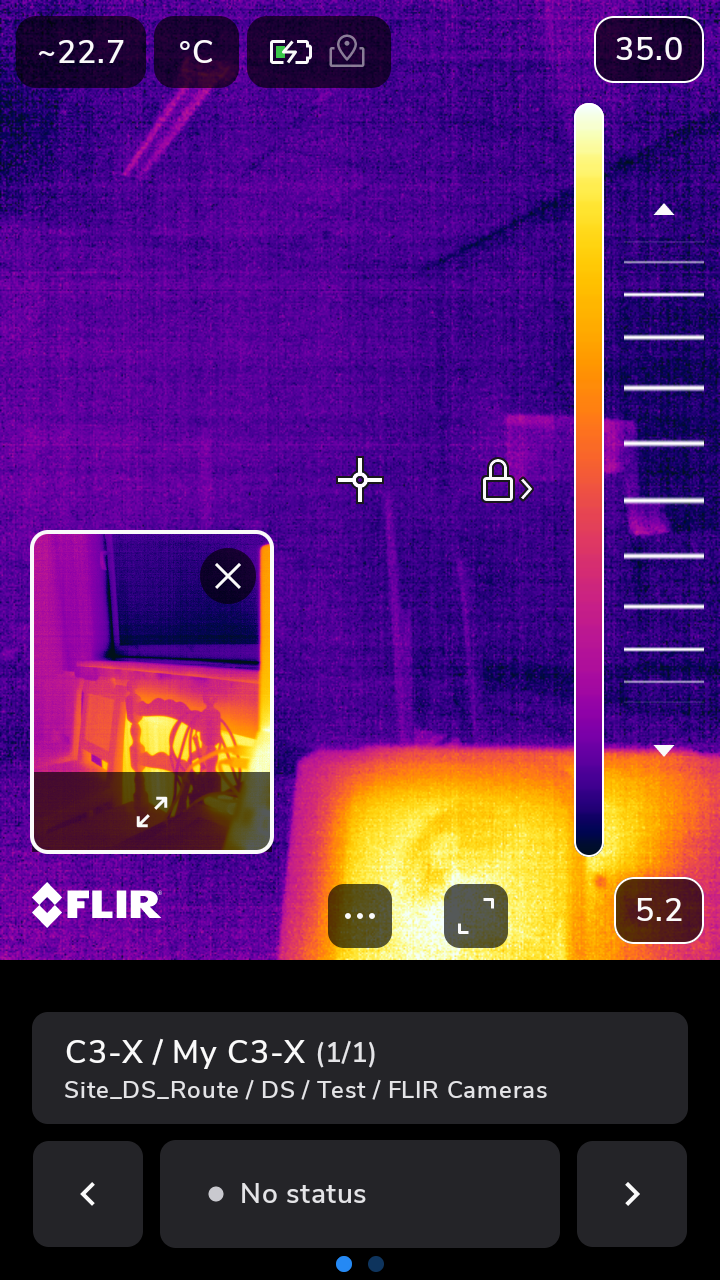
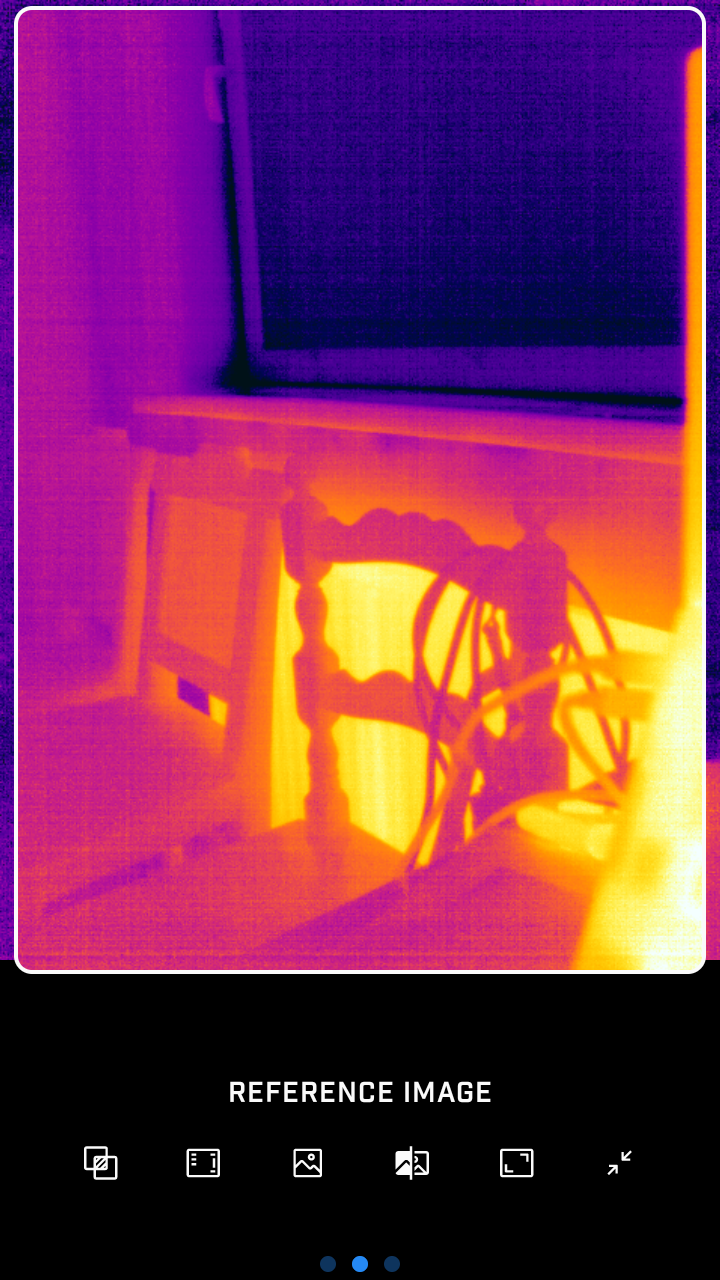
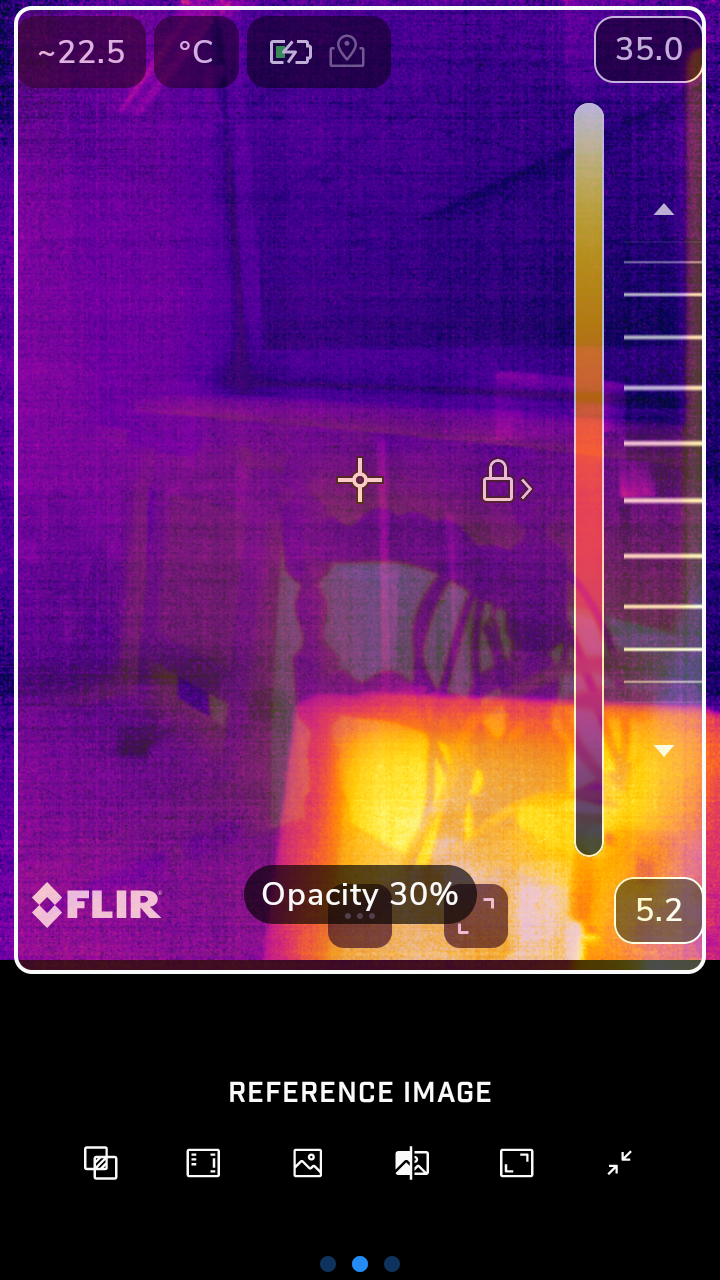
Slide with your finger on the screen to control the opacity of the reference image.
When the camera is in the correct position at the inspection point, take an image. The camera saves the image automatically.
To set status for the image, click the No status button.
Select status from the list.
To access the inspection list or enter an inspection comment, click Set status.
To get to the next inspection point, tap the arrow.
Upload inspection results to Flir Assetlink
When the inspection route is done, click Summary. The file is ready to be uploaded to Flir Assetlink.
Upload inspection with Wi-Fi
Select Upload to Assetlink.
The camera now uploads the Inspection file (.route) to your Flir Assetlink account. The Inspection file includes the inspection data and images.
Upload inspection with USB cable
Connect the USB cable from the computer to the camera.
Select Export to device to save the inspection file (.route) to your local storage.
Select a location in Files to save the .route file to.
Flir Ignite
Setup
Set up the camera to upload images to Flir Ignite.
If automatic upload is enabled, new images will automatically be uploaded to the Flir Ignite account. You can also upload files manually.
To be able to upload images, connect the camera to the internet and pair the camera with a Flir Ignite account.
Create a Flir Ignite account
To create a Flir Ignite account, go to https://ignite.flir.com and click Sign up.
Create an Flir Ignite account in the Ignite app when doing the onboarding or at a later time.
To create an account :
Make sure the camera is connected to Wi-Fi, see section Wi-Fi.
Open the Ignite app. Click on the toolbar and select Sign in.
Create an account for Flir Ignite.
Automatic upload
When automatic upload is enabled, new images are uploaded automatically when the camera is connected to the internet and paired with Flir Ignite.
To enable automatic upload, do the following:
Make sure the camera is connected with a Flir Ignite account.
Open the Library or the Settings app.
Log in to your account and select Auto upload.
Manual upload
Manually upload files and folders from the Library app when the camera is paired with a Flir Ignite account and connected to the internet.
Upload a file
Open the file in the Library app.
Push the navigation pad or tap the screen to display the top toolbar.
On the top toolbar, select
. Select
 .
Upload multiple files
Go to a folder in the Library app.
On the top toolbar, select
. Select the files you want to upload.
Select
.
Upload folders
Go to the top level in the Library app.
On the top toolbar, select
. Select the folders you want to upload.
Select
.
Access Flir Ignite
Access Flir Ignite from a browser on your desktop, tablet, mobile device or through the Flir Ignite app.
To access Flir Ignite, go to https://ignite.flir.com.
For more information, refer to the Flir Ignite user manual.
Flir Apps
Flir Apps provides access to both Flir-developed and third-party apps. Users can explore, try, and install apps directly from the platform.
Apps may be free or require a separate purchase or subscription.
A red dot will show on the Flir Apps icon in the app overview when updates are available for installed apps.
Each app contains a details page with information such as app description, version information, supported languages, etc.
Download an app
Open Flir Apps.
Click SIGN IN OR CREATE ACCOUNT (for first time users).
Enter e-mail address and password.
Click Sign in.
Select the app to download.
Click INSTALL.
Update an app
In the app overview, a red dot indicates apps with available updates.
Open Flir Apps.
Select the app with an available update.
Click INSTALL.
Third-party apps
These apps may require a separate user account and may be free or paid.
Payment and account setup for third-party apps are handled outside of the Flir Apps platform, following each app’s own instructions.
To download third-party apps, see section Download an app.