Review and edit inspections
View images and associated data
When the inspection is complete, go to Inspections or Asset library to view images and associated data.
To view images and associated data taken during an inspection, do the following:
Go to Inspections. All uploaded inspections are shown.
Figure 1. See all the Inspections, the Inspection status, what date it is uploaded/updated and how many inspection points each inspection has.
Select an inspection.
Click on the inspection to see the result.
In the inspection list that appears, select an asset to view the inspection points.
Figure 2.
The information about the inspection point is shown on the right.
Click the pencil icon to open the image taken for an inspection point.
Figure 3.
Figure 4. The edit view shows the latest images as well as the full history for a specific inspection point. The image history makes it easier to see changes over time.
To view the data:
Click
 to view the measurement data.
Click
 to view images details, for example date and camera
model.
to view images details, for example date and camera
model.Click
 to view the location where the image was taken.
Click
 to view notes about the image.
Click
 to view the data in a graph.
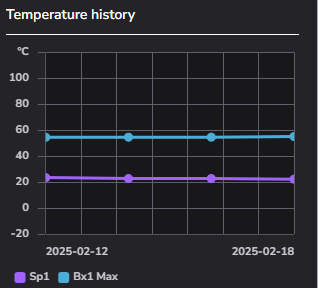
Figure 5. A temperature graph.
Below the image, all images from the same inspection point taken during previous inspections are shown.
Click on Switch to comparison view (1) to compare two images side by side.
Click on Transfer image settings (2) to transfer measurements and settings to all images.
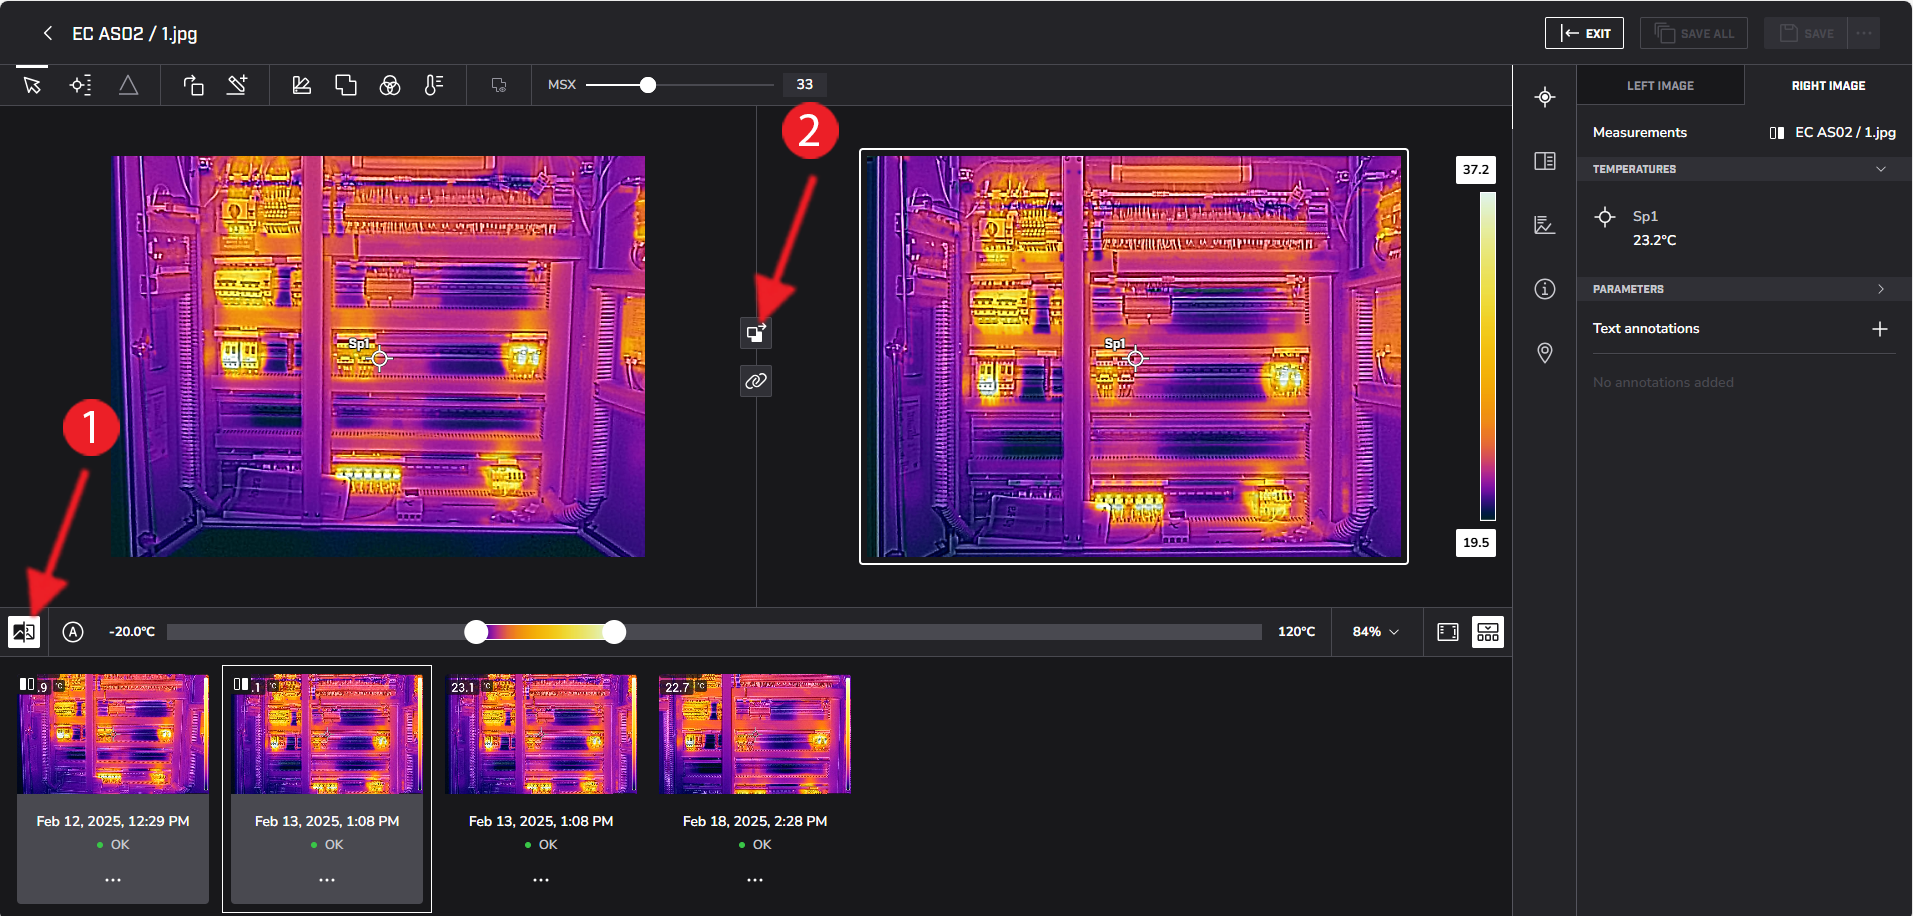
Click EXIT to leave the image mode.
Approve inspection
Go to Inspections.
Select an inspection.
Check the inspection to make sure it is correct.
Click APPROVE in the upper right corner.
When the user approves the inspection, the asset's condition is calculated based on the inspection status. For more information, see Asset condition
Make changes in an approved inspection
Select the inspection.
Click OPEN FOR EDITING in the upper right corner.
Once the changes are complete, click APPROVE.