Inspections
Main steps
Download the prepared route from Flir Assetlink to the camera.
Inspect your assets by following the route in the camera.
Upload the results from the camera to Flir Assetlink.
Do an inspection with the iXX camera
This chapter describes how to do an inspection with the iXX camera.
Select a route to inspect from available routes.
Click CREATE NEW INSPECTION, to start a new inspection.
or
Select an ongoing inspection.
Select INSPECT to start an inspection.
The camera goes live.
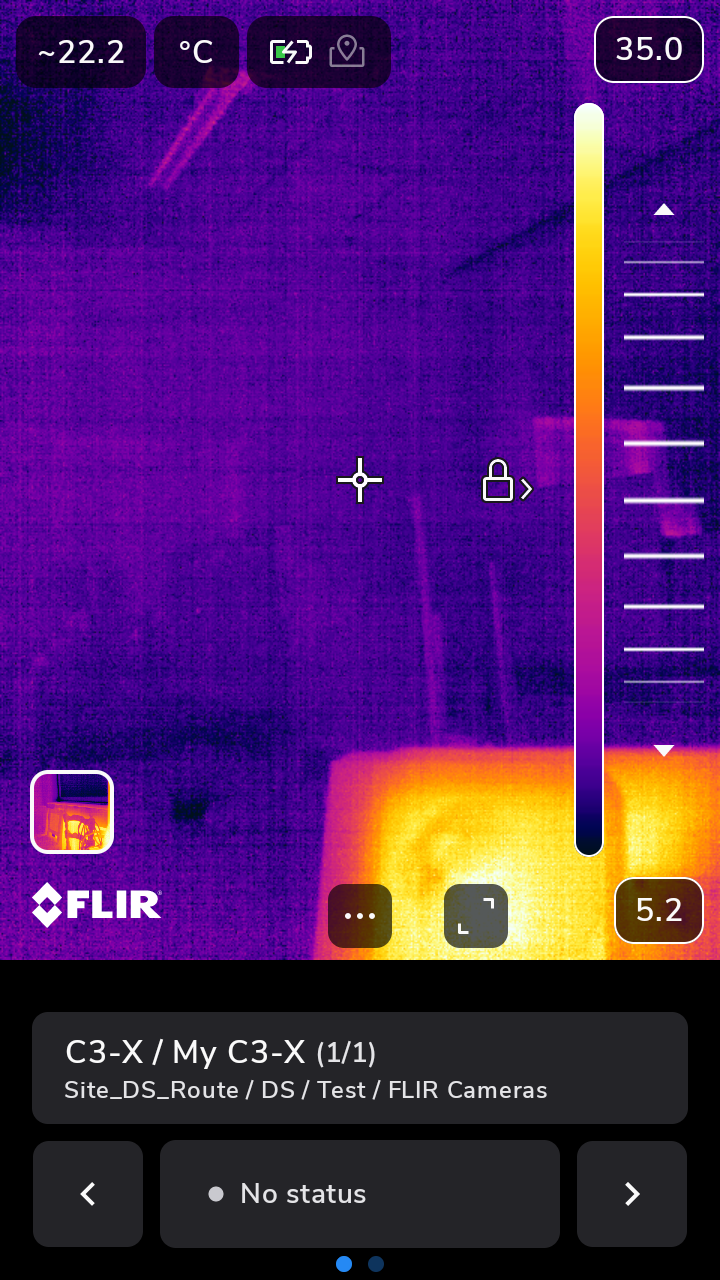
Tap the reference image shown in the corner of the screen to view picture in picture, an infrared image is displayed on top of the visual image, which makes it easy to compare the images.
NoteA reference image is only available when an inspection is made and uploaded to Flir Assetlink, then downloaded to camera again.
The reference image menu appears.
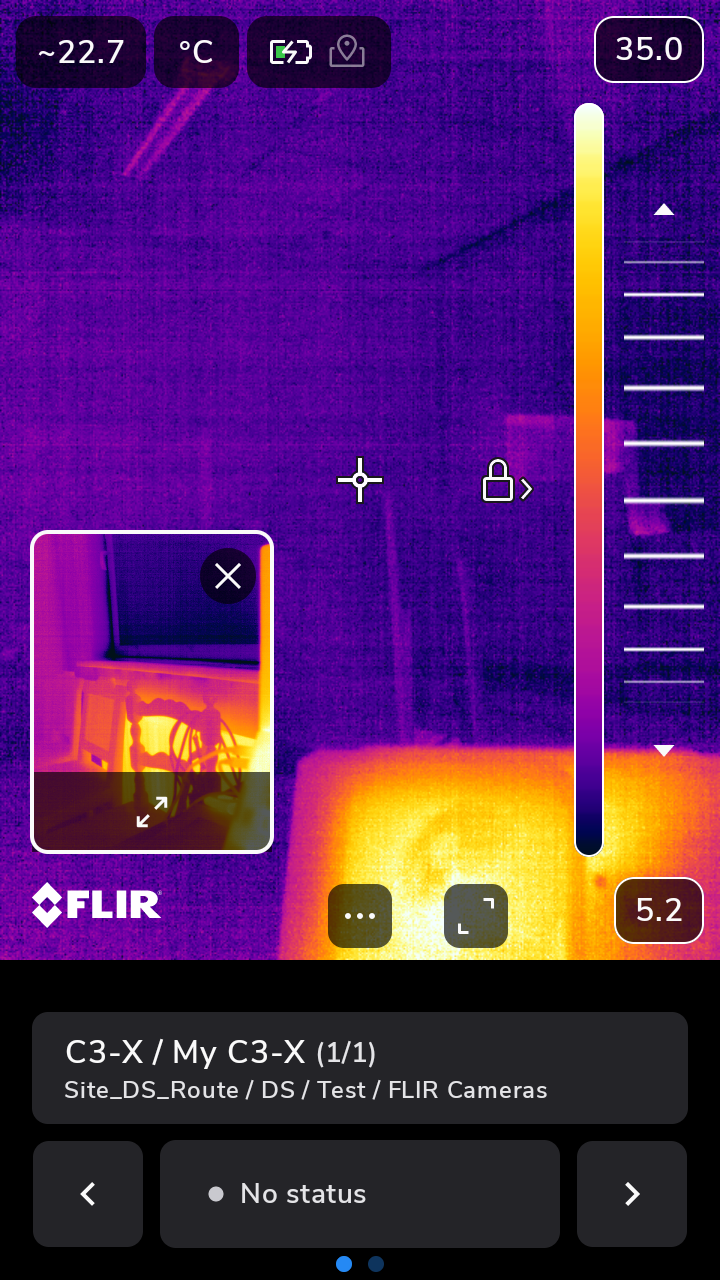


Slide with your finger on the screen to control the opacity of the reference image.
When the camera is in the correct position at the inspection point, take an image. The camera automatically saves the image.
To set status for the image, click the No status button.
Select status from the list.
To access the inspection list or enter an inspection comment, click Set status.
To get to the next inspection point, tap the arrow.
Select Finish to complete the inspection.
Upload inspection results to Flir Assetlink
When the inspection route is done, click Summary. The file is ready to be uploaded to Flir Assetlink.
Upload inspection with Wi-Fi
Select Upload to Assetlink.
The camera now uploads the Inspection file (.route) to the users Flir Assetlink account. The Inspection file includes the inspection data and images.
Upload inspection with USB cable
Connect the USB cable from the computer to the camera.
Select Export to device to save the inspection file (.route) to your local storage.
Select a location in Files to save the .route file to.
Do an inspection with the Txx/Exx camera
This chapter describes how to do an inspection with the Txx/Exx camera.
Go to Settings > Routing > Routes.
Select a downloaded route and select Start Inspection.
The live image shows the name of the inspection point to be inspected.
To view a description of the inspection point, e.g., instructions or reminders, click on the document icon.
NoteThe document icon is only displayed if there is a description and/or comment available for the inspection point.
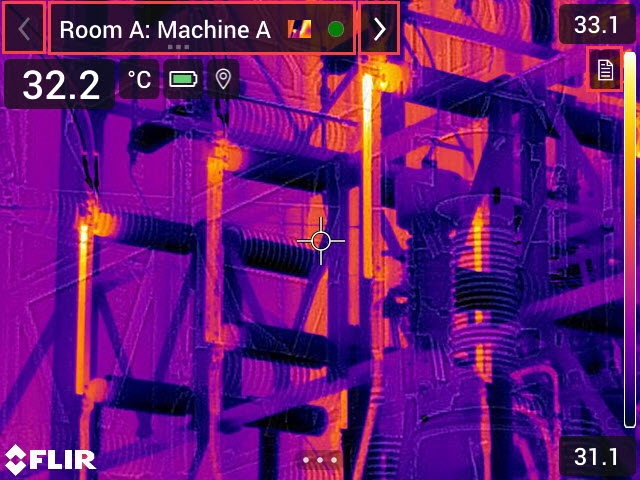
Figure 1.
When the camera is in the right position at the inspection point, take an image. The camera automatically saves the image.
To edit the inspection point data, click on the current point indicator. This displays a drop-down menu where you can change the status, add a comment, and delete the image.
To read more about current point indicator, see section Camera user interface.
NoteMake sure the current point indicator displays the inspection point to be edited. If not, use the back or next arrow.
Click on the next arrow to continue to the next inspection point.
Continue the inspection until you have completed all inspection points.
NoteOpen the inspection list to see the progress of the inspection and make any additional changes. To open the inspection list, click on the current point indicator and select Inspection list.
When the inspection is completed, select Settings > Routing > Ongoing routing. The current route is found at the top of the menu.
To complete the inspection select Finish.
The camera now creates an Inspection file (.route) with the inspection data and images and stores the file in the Inspections folder located at the root of the memory card.
If the camera is turned off in the middle of an inspection, the camera will always save all data. When the camera is turned on again, it will display the first uncompleted inspection point.
It is possible to pause the ongoing inspection and start another inspection, resume an inspection at any time and continue from the first unfinished inspection point.
While an inspection is ongoing, the camera stores the inspection results internally. The camera does not add the inspection results to the Inspection file (.route) until after you have paused, finished, uploaded, or deactivated the Inspection route function.
Upload inspection results to Flir Assetlink
When the inspection route is done, click Finish. The file is ready to be uploaded to Flir Assetlink.
Upload inspection via the network
Make sure the camera is connected to your network.
Make sure the camera is paired with your Flir Assetlink account.
Select Settings > Routing .
Select the ongoing inspection and click Finish.
Select Upload to Assetlink.
The camera now uploads the Inspection file (.route) to your Flir Assetlink account. The Inspection file includes the inspection data and images.
Upload inspection with SD card/USB cable
Insert the SD card from the camera into the computer or connect the USB cable.
In Flir Assetlink, select Inspections > IMPORT INSPECTIONS.
Find the file to upload in SD card/Inspections.
Import inspections
Upload the inspection either from the camera, see how to upload inspection results in section Upload inspection results to Flir Assetlink alternatively Upload inspection results to Flir Assetlink (depending on camera), or upload the inspection via the Assetlink website.
Create a new inspection directly on the web, add assets and images, without the need for an inspection route.
Add images to an existing inspection file to supplement missing images or for a clearer overview.
Import your existing inspections via the web.
Import an inspection file (.route) via the web
Go to Inspections.
Click on IMPORT INSPECTIONS. A pop-up window will appear with the two options, Import .route file and Import inspection images.
Select Import .route file to import an inspection and click CHOOSE.
Find the inspection to be added.
Click on the three dotted menu (···) and select Edit inspection.
Click Edit inspection to review and edit the uploaded inspection.
Add images to inspection via the web
Images can be added to the inspection in two ways:
By modifying an existing inspection, see section Add images to inspection points in an existing inspection.
By creating a new inspection and uploading images, see section Create an empty online inspection and add images.
To edit an image, go to Inspections and select the desired inspection point from the list. A pop-up row will show, select Edit images.
Add images to inspection points in an existing inspection
Open an existing inspection.
Select Edit inspection. To edit an inspection see section Inspection edit mode.
Add or verify assets and inspection points as needed.
Add images to the selected inspection points, see section Add image to existing inspection point
Approve the inspection when complete. This triggers the asset condition calculations, see section Approve inspection.
Create an empty online inspection and add images
Click on IMPORT INSPECTIONS.
Select Import inspection images.
Add assets and inspection points as needed, see section Inspection edit mode.
Upload images to the inspection points, see section Add image to existing inspection point.
Approve the inspection when complete. This triggers the asset condition calculations, see section Approve inspection.
Inspection edit mode
In edit mode use the Library, on the right panel, to add assets and inspection points to your inspection.
If creating a new inspection, an existing route can be imported to be further populated with images, see section Add image to existing inspection point.
Click Done to save the changes.
Approve the inspection when complete. This triggers the asset condition calculations, see section Approve inspection.
Add image to existing inspection point
Select the desired inspection point.
Click the + Add Images button.
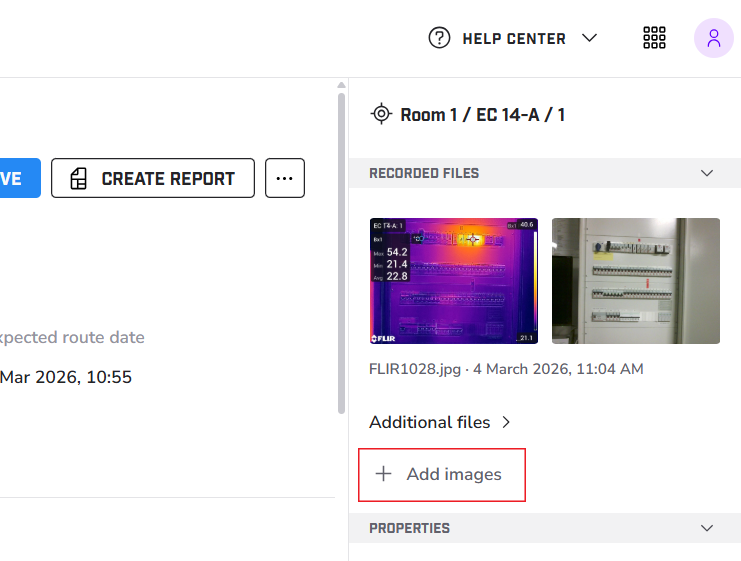
Figure 2. Add image.
Upload the image to the inspection point.