User interface
Screen elements
General
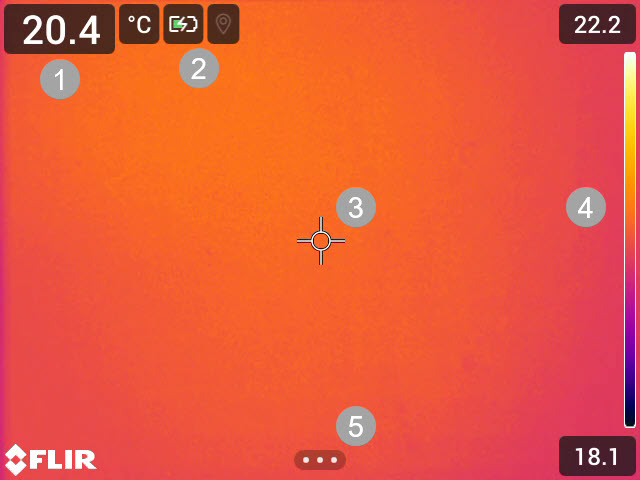
Result table
Status icons and indicators
Spotmeter
Temperature scale
Menu button
Status icons and indicators
 |
Battery level
|
 |
The available storage space on the memory card is running low. |
 |
The GPS is enabled. If the icon is grey, the camera cannot find a GPS signal. |
 |
External infrared window compensation is enabled. |

 |
The camera is paired with a FLIR Ignite account. The camera is paired, but does not have contact with FLIR Ignite (no internet connection). |
 |
A Bluetooth headset is connected. |
 |
The laser is on. |
Mode selection menu
The camera can operate in different modes. You select the mode on the Mode selection menu.
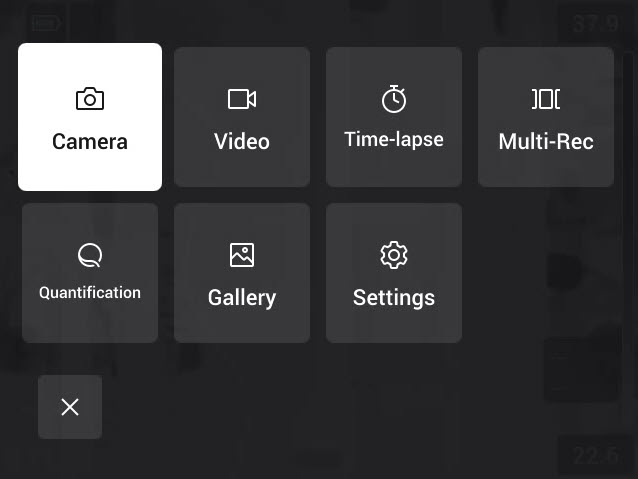
Figure 1. Mode selection menu
Camera: Save images using the Record button.
Video: Record videos using the Record button.
Time-lapse: Save images periodically.
Multi-Rec: Save recordings of video sequences in different image modes. See also section Multi-Rec.
Quantification: Measure and quantify a gas leak. See also section Quantification.
Gallery: Video and image archive.
Settings: Open the Settings menu.
The availability of the features on the Mode selection menu depends on the camera model.
Navigation
To display and navigate the Mode selection menu, turn the mode wheel. Wait a short while and the camera will enter the highlighted mode.
You can also display the Mode selection menu from the main toolbar, and navigate by using the joystick or touch screen.
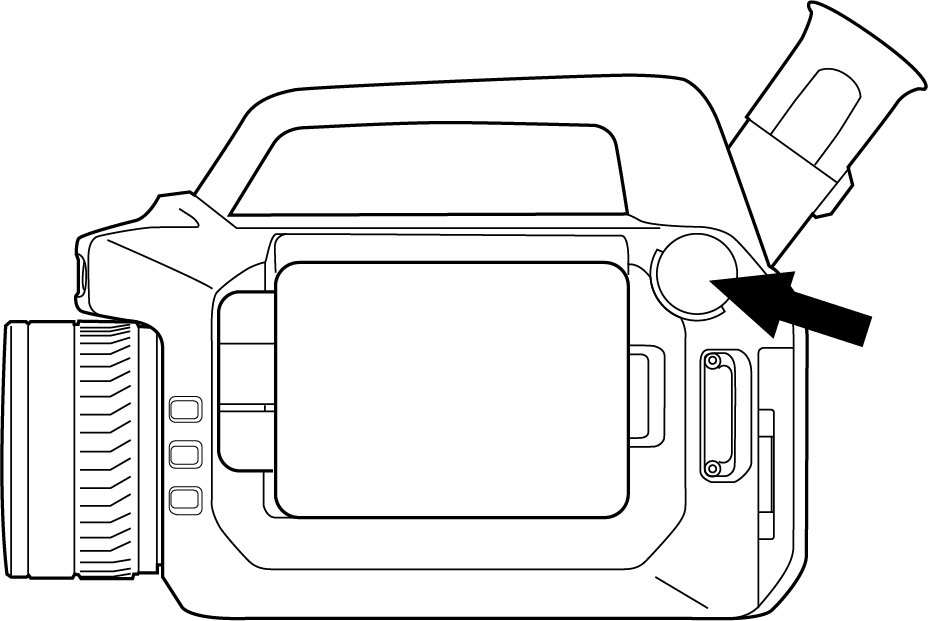
Figure 2. Mode wheel
Main toolbar
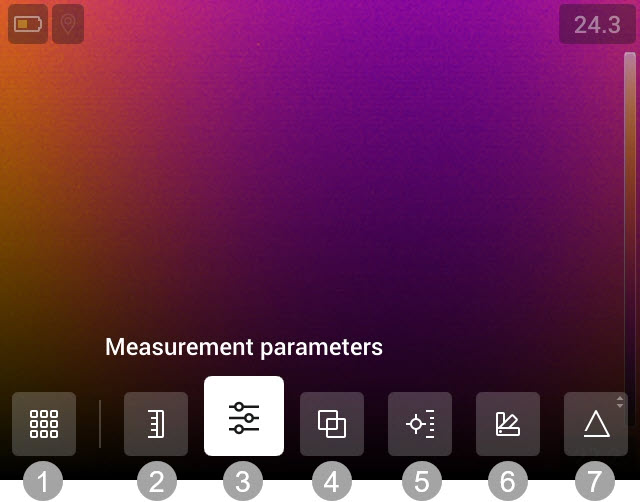
Mode selection
Temperature scale
Measurement parameters
Image mode
Measurement
Color
Delta T
Navigation
To navigate the user interface, you can use the touch screen and/or the joystick and Back button.
To display the main toolbar, do one of the following:
Tap the menu button at the bottom of the screen.
Push the joystick.
To navigate the toolbars, menus, and dialog boxes, and to change values in dialog boxes, move the joystick up/down or left/right.
To confirm changes and settings in menus and dialog boxes, push the joystick.
To leave dialog boxes and to go back in the menu system, push the Back button.
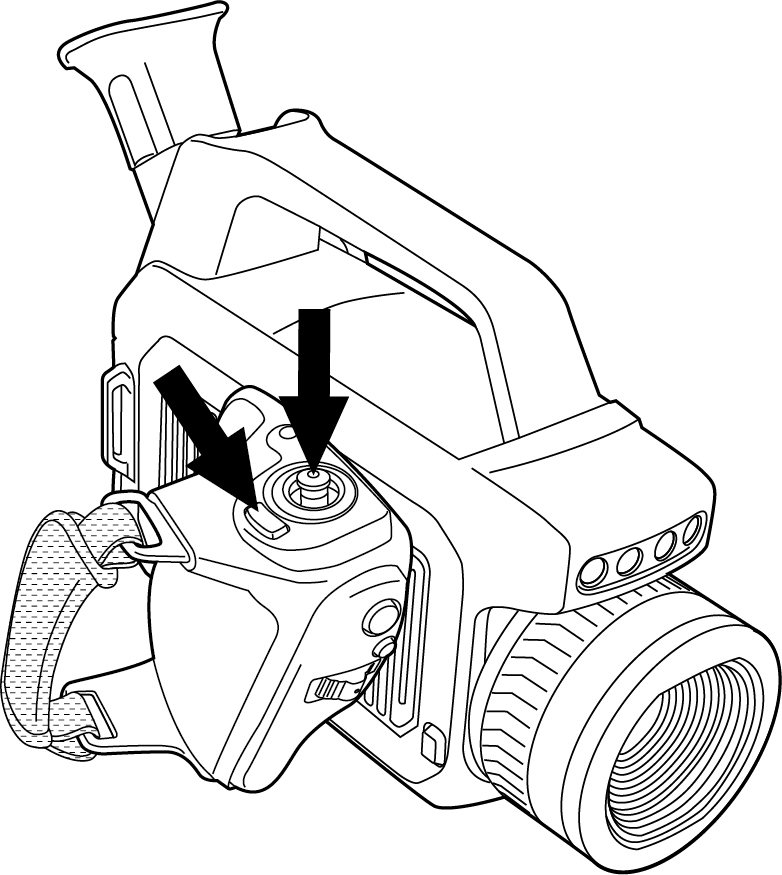
Figure 3. Back button and joystick.
Quick menu
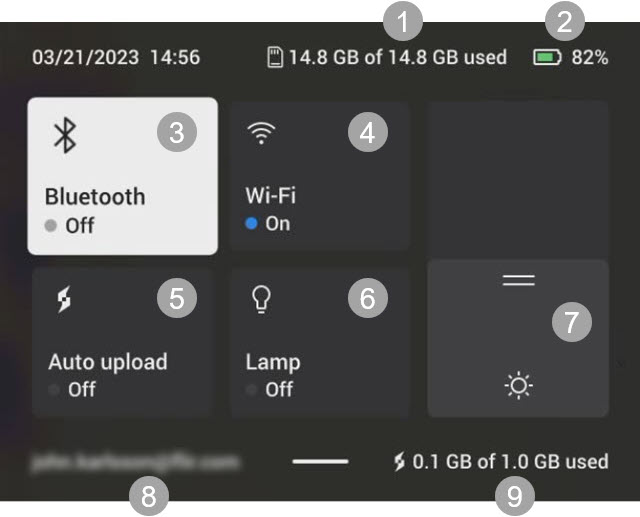
Figure 4. Quick menu
Storage status of the memory card.
Battery level.
Enable/disable Bluetooth or open the Bluetooth settings menu. See also section Bluetooth.
Enable/disable Wi-Fi or open the Wi-Fi settings menu. See also section Wi-Fi.
Enable/disable automatic upload of images and videos. See also section Automatic upload.
NoteIf the camera is not paired with a FLIR Ignite account, you will be prompted to sign in to FLIR Ignite before you can enable automatic upload.
Turn on/off the camera lamps.
NoteBefore you can turn on the camera lamps, you need to enable the lamps. On the Settings menu, select Device settings > Lamp & laser > Enable lamp & laser or Enable lamp & laser + Use lamp as flash.
Adjust the brightness of the screen.
The FLIR Ignite user account that the camera is paired with. For more information, see section Pair with FLIR Ignite.
Storage status of the FLIR Ignite account.
Navigation
To display the Quick menu, swipe down from the top of the screen.
To navigate the Quick menu by using the touch screen, do the following:
Tap to enable/disable a function.
Bluetooth and Wi-Fi: Tap and hold to open the settings menu.
Screen brightness: Tap the screen to adjust the screen brightness.
To navigate the Quick menu by using the joystick, do the following:
Move the joystick up/down or left/right to highlight a function.
Push the joystick to enable/disable the highlighted function.
Bluetooth and Wi-Fi: Push and hold the joystick to open the settings menu.
Screen brightness: Move the joystick up/down to adjust the screen brightness.
Image overlay
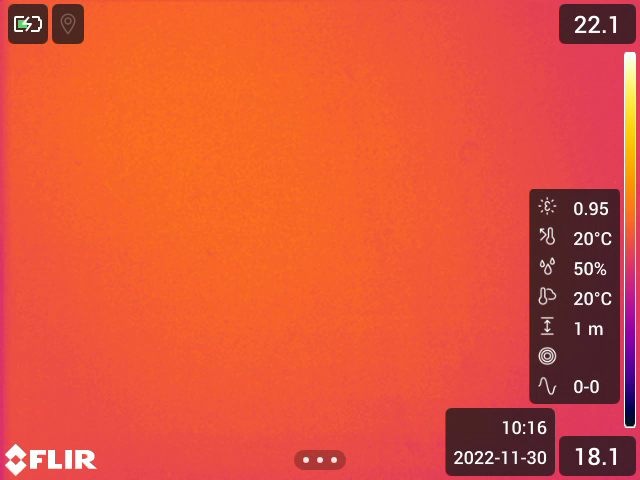
The camera saves the image information such as date, time, and items related to temperature measurements to the image file. This image information can be viewed in the image archive.
You can also choose to display selected image information items, and also lens information, as an overlay on the image. All image overlay information displayed on the live image will also be displayed on saved images.
To define what image overlay information to display, select Settings > Device settings > Display settings > Image overlay information.