Get started with Flir Assetlink
Quick guide
Log in with a Flir Assetlink account. Go to https://assetlink.flir.com, see Create an account.
Start the pairing procedure or do this at a later time in the camera settings menu, see Pairing cameras to Flir Assetlink.
Create a workspace, see Create workspace and site.
The Organization admin can create a workspace. To create a workspace, go to the current organization, click on + Create new workspace and name it.
Create a site, see Create workspace and site.
When a workspace is created, a site can be created in the same way. Select the workspace and click on + Create new site.
Add location, asset and inspection point to the Asset library, see Asset library.
Go to Asset library and create a New location and name it. Use the drop-down menu (+) to select New asset, New inspection point or New location, to build a structure.
To inspect an asset using the routing feature in the camera, the asset needs at least one inspection point.
Create an active route with assets and inspection points, see Create a new route.
Go to Routes, click on New Route and name it. Click EDIT ROUTE and select assets from the list to add to the route
Pair the camera with Flir Assetlink, if not already done, see Pairing cameras to Flir Assetlink.
Click on the user icon in the upper right corner and select CAMERA PAIR URLS or go directly to https://assetlink.flir.com/auth/.
Download the route, see Download route with iXX camera or Download route with Txx/Exx camera.
Make sure the camera is connected to Wi-Fi and paired with Flir Assetlink. Select a route and download it.
Do an inspection. Take images with the camera during the inspection, the images are saved automatically, see Inspections.
Inspect the assets by following the route in the camera.
Upload the inspection to Flir Assetlink when complete, see Upload inspection results to Flir Assetlink.
Upload the inspection with Wi-Fi, USB or SD card.
View the inspection, see Review and edit inspections.
Go to Inspections. Click on an inspection to se the result, an inspection list appears, select an asset to view the inspection point.
If the inspection looks correct click APPROVE to calculate the asset condition for the inspection points, see Approve inspection.
Create a report, see Create a report
Select which inspection to make a report of and click on CREATE REPORT. Name it and click CREATE.
Compatibility
Flir Assetlink supports integrated routing workflows with the following Flir cameras:
T5xx
T8x
Exx
iXX
Images from the following FLIR camera models can be uploaded to Flir Assetlink manually:
Ex
Ex Pro
Cx
T10xx
T6xx
T4xx
Flir One
Pairing cameras to Flir Assetlink
Start the pairing procedure from an Flir Assetlink enabled camera. The camera must be connected to a Wi-Fi network. Do the pairing as part of the initial setup of the camera or at any time through the camera Settings menu. For more information, refer to the camera user manual.
To access Flir Assetlink, go directly to https://assetlink.flir.com/auth/ or click on the user icon in the upper right corner and select CAMERA PAIR URLS. Make sure the correct URL is shown under Camera settings, for Device pairing URL (https://assetlink.flir.com/auth) and Assetlink Database URL (https://assetlink.flir.com/api).
Access Flir Assetlink
Flir Assetlink can be accessed as a web application through a browser, preferably Chrome, and requires no installation.
Create an account
To create an organization, you must have a Teledyne Flir account.
Click Sign up.
Users and roles
Flir Assetlink uses a role-based access control (RBAC) system. RBAC is an access management model that gives permissions to users based on predefined roles rather than individual settings. Each role includes a set of privileges that finds what actions a user can perform in the system. Roles can be given at different levels: some roles grant access to the entire organization, while others are limited to specific sites. This structure simplifies user administration, makes sure there is a consistent permission management, and improves overall security.
Organization: The company.
Workspace: Example of workspace might be regions, countries, cities, etc.
Site: A place that exist within the workspace, for example a factory.
Asset library: Contains asset that exist within the site.
An Flir Assetlink account is required for the invited person, see section Create an account.
Role description
A user can be assigned a role at the organization level (which gives access to all sites) or at a specific site (which gives access to that site only). The available roles are:
|
Observer |
|
|
Inspection contributor |
|
|
Participant |
|
|
Admin |
|
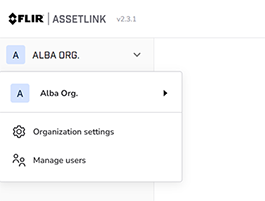
Manage users
The Organization admin can, in Manage users, add users to a site or organization and see all users connected to the organization.
The Site admin can, in Users on site level, add users to one or more sites and see all users and their roles connected with the site. If (inherited) shows after a role, it means that the role is inherited for the user from an organizational level to be included at the site level.
To make changes to a user, hover over the rows and click the pen icon that shows.
Add a user to Organization level
Select the organization where the new user will be added.
Click on the organization.
Select Manage user in the drop down menu.
Add the user by entering an email address. No e-mail will be sent to the added user.
To add a user to an organization, the user must have a registered Flir Assetlink account, see Create an account.
Add one or several sites or if the user is going to have access to the whole organization.
Select one or several roles for the user.
Click ADD.
Review and CONFIRM.
Add a user to Site level
The Site admin can add an existing user to a site or add a new user.
Go to Users.
Click on ADD USER to add a new user to the site or
select a user from the list and click on ASSIGN ROLES to add an existing user to the site.
If it is a new user, add e-mail address.
Select which site the user should have access to. A user can be added to one or several sites.
Select which role/roles the user will have.
Click ADD.
Build a structure
In Flir Assetlink the Organization admin creates an organization and a workspace. The Organization admin invites users to the organization and workspace, and from there, depending on the role they have been assigned, the invited user can create a site and a Asset library.
Organization: The company.
Workspace: Example of workspace might be regions, countries, cities, etc.
Site: A place that exist within the workspace, for example a factory.
Asset library: Contains asset that exist within the site.
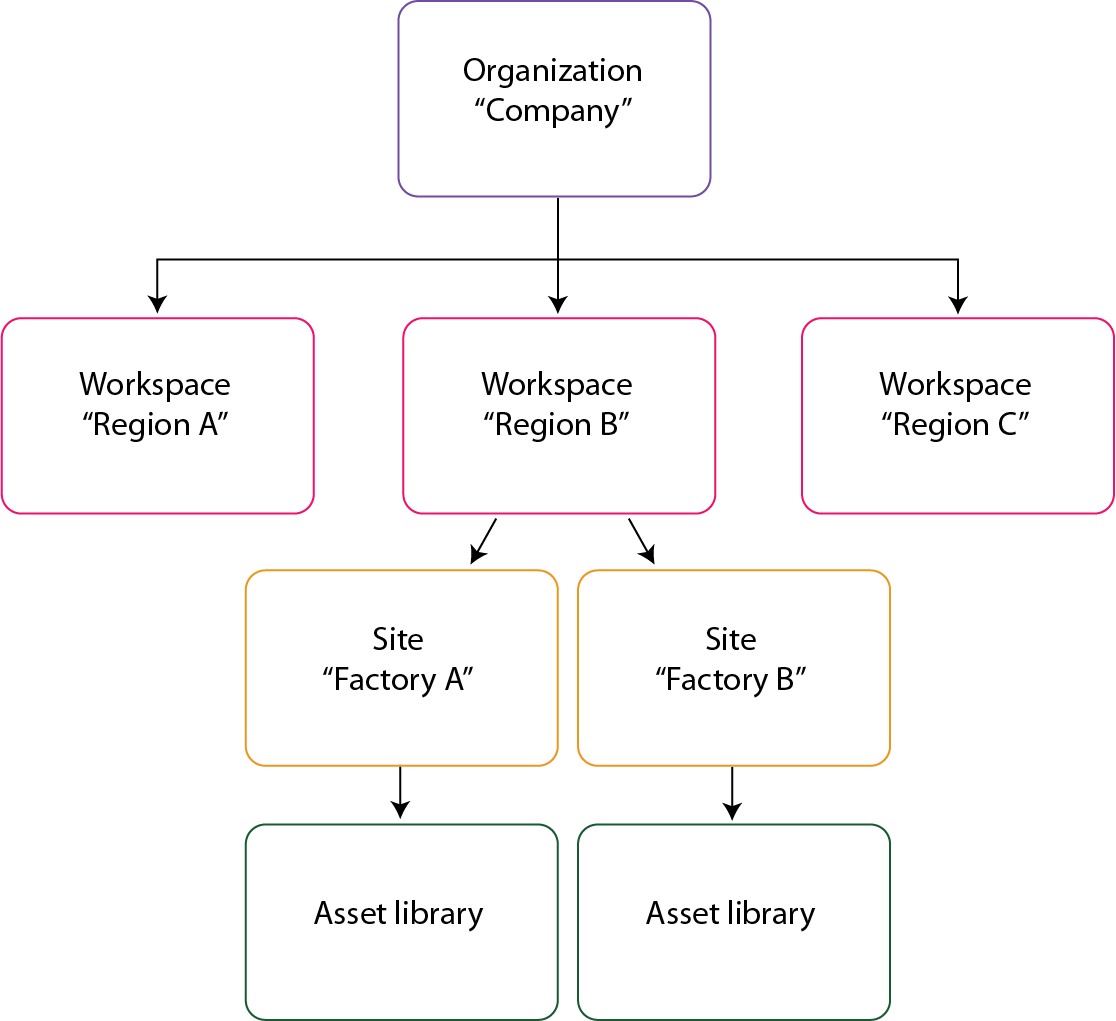
Figure 1.
Create workspace and site
A workspace gives quick access to one or several sites. A site is a subcategory of a workspace and works as a digital location that contains assets, inspections and thermal images.
Users are granted access to a site by the Organization admin or Site admin. Access to a site is specified on a per-site basis.
Only an Organization admin can create a workspace and site.
To create a workspace for an organization, do the following:
Go to the current organization.
Click on + Create new workspace.
Name the workspace.
When the workspace has been created, a site can be made in the same way.
Select the workspace and click on + Create new site.
Name the site.
Click on the site to view the site menu.